Rainwater Harvesting
Part 1
Water is a precious resource, the stuff of life itself. Around the world, water aquifers are drying up, groundwater is being contaminated and irrigation schemes are stressing the river systems that span continents.
Yet here in New Zealand, we usually take water for granted; we turn on the tap, out comes water we can drink.
Harvesting rainwater has long been the norm in rural areas that reticulated water doesn’t reach, yet it’s still not common in New Zealand’s urban areas. We lag far behind Australia, where drought and pressure on water supply are motivating changes in household water use and government subsidies for rainwater collection. More than half of Adelaide households have rainwater tanks for example.
There’s a lot to consider about how you harvest rainwater. But for urban households already connected to reticulated water, first you need to consider why you might do that.
Water security
Your family needs water to survive an emergency. That’s the single most compelling reason to have some means to harvest rainwater. Urban water researcher Martin Payne lives in Wellington city, where water comes from Kaitoke in the Hutt Valley. “The pipeline is about 45 km long and it crosses a major fault line three times. In an earthquake, it is very likely the network will be significantly affected. It may be years before some houses can be connected to the water network again.”
How much water do you need in an emergency? Some guidelines say three litres per person per day, but that’s the absolute bare minimum for short-term survival, says Martin. WHO guidelines call for 20–40 litres.
A four-person household may need at least 80 litres of water per day. “That’s 80 kilos you have to transport, every day, in whatever containers you have available,” warns Martin. “In my opinion, that’s what will drive half the population out of the city following an emergency.”
The Wellington Region Emergency Management Office (WREMO) has partnered with a local manufacturer to make 200-litre rainwater butts available at cost to Wellington ratepayers. The butts are cheap, and quick and easy to connect to a single downpipe – no plumber required.
In an emergency, boil the water gathered from a simple system like this before drinking it, or use an additive. You may prefer a hydrogen peroxide solution like Pour N Go to household bleach.
Is 200 litres enough storage? It’s a start, says Scott Dray, WREMO emergency management adviser. “We still encourage people to store emergency water supplies in containers. And here in Wellington, we don’t usually go more than a week without rain [that would replenish the rainwater butt].”
Water conservation
Harvesting rainwater from your own roof is a way to get around water restrictions applied by local bodies in many parts of the country. Many local bodies have introduced water meters, so reducing your use of town supply will save money on water charges.
However, there are bigger issues that go beyond a simple dollar calculation. “City surfaces are increasingly impermeable, so rainwater becomes stormwater and it’s shed quickly,” says Martin. High volumes are released quickly into urban streams, disturbing the ecosystem and reducing water quality.
There’s a lot of infrastructure and cost involved in treating reticulated water to drinking water quality – but very little of that water is used for drinking. Much of it is used to flush toilets.
Martin’s modelling suggests that a Wellington household with a modest 1000–3000 litre rainwater tank (plumbed to the laundry, toilet and outside taps), combined with reasonably efficient water use, could still halve its use of potable water.
Water quality
Rainwater may be preferable to town supply in places where reticulated water is poor quality. (Adelaide has so many rainwater tanks because of the salinity of the Murray River, from which town supply is drawn.) And some organic gardeners prefer to use rainwater rather than chlorinated town water on their gardens.
Rainwater tanks: things to consider
So you want a rainwater tank? Invest in some research and planning before opening your wallet.
This advice assumes your home is connected to reticulated water. (Stand-alone systems will be covered in the next issue ofOrganic NZ.) Experts and authorities want you to use that potable town supply in your kitchen and for showering/bathing. Plumbing your tank into your toilet, laundry and outside taps will typically meet 65 percent of your household water needs.
All models and brands are mentioned only as examples to help you begin your research.
The cheapest and simplest option, suitable for emergency water supply, is to connect a small plastic tank to a single downpipe, anything from 200–1000 litres, and empty it using a bucket, watering can or drip-fed irrigation system. Costs will be limited to the tank, simple fittings and minimal site preparation.
Slimline tanks like an 800-litre tank by Urba Water or 1020-litre Aqua Tank (SL01000) will fit under your eaves, take up less space, and multiple tanks can be fitted in series. They can be connected to a downpipe using a Superfill Deluxe device from Rainline Water Solutions, another an all-in-one fitting (screen/inlet/overflow). Tall tanks like these should be strapped to reduce the risk of damage in an earthquake.
You may want a bigger tank if you have room, collection area, and can take advantage of contour to gravity feed to gardens – or if you need to buffer stormwater discharge on site. You’ll pay more for fittings and drainpipe and probably need a plumber. You’ll need to consider how you’ll handle overflow when the tank is full. If stormwater is currently discharged into the city system, plumb the overflow into existing piping.
It’s a big jump in cost and complexity to the next step, plumbing water into your house: more fittings and pipe, plus a pump. Beware of plumbers trying to sell you pumps oversized for your system.
What sort of tank?
The many options available include concrete, timber, stainless steel and plastic tanks in many colours and shapes. If it looks good, expect to pay a premium.
Polyethylene is considered among the most inert of plastics and the tanks are long lasting; many are warranted for 15 or even 20 years. Still, some people think a plastic tank affects the taste of the water or have concerns about possible leaching of chemicals. Marine-grade stainless tanks are available (in smaller sizes) – nice if you can afford it.
If you need to bury a tank, you’ll need a concrete one. Some, not all, plastic tanks can be dug in a little bit, typically 0.6 m, to reduce their height.
In a small urban section, getting a concrete tank on site may be impossible or expensive. The other alternative is to build in situ. It’s a nice DIY project if you’re handy. Some people like concrete because it neutralises the natural acidity of rainwater.
Rectangular tanks can fit into spaces round tanks can’t, but must be strengthened with special reinforcing. This increases weight and cost.
You have more options if you’re incorporating a tank into a new build, such as bladders that fit underneath decks, or tanks buried near the house site.
Rachel Rose is establishing an urban permaculture property in Whanganui.
Rainwater collection 101
1. Calculate your roof area in square metres and estimate the area draining to each downpipe.
2. Assess your roof’s suitability for water harvesting. Ensure there is no lead-based paint or fixings present. Prune back overhanging trees to reduce leaf fall and fouling by birds or small animals.
3. Look up NIWA data for your region at http://bit.ly/XSLeOt and record your area’s rainfall (yearly average and by month).
4. Use this formula to calculate the volume of water you could potentially harvest: Annual rainfall x catchment x co-efficient %. Here’s an example, using the author’s house in Whanganui: 918 (mm rainfall) x 160 (roof size in sq m) x 0.9 = 132,192 litres per annum. The formulas get more complicated when you factor in first-flush diverters! Marley literature provides advice for calculating this: www.marley.co.nz. The co-efficient relates to the impossibility of harvesting all water that lands on your roof. In heavy downpours, some water will spill over gutters. Some will evaporate. If you have an absorbent roof material like concrete tiles, the co-efficient will be much less: seek further advice. Also review NIWA data for number of days of rain and consider how long your region may go without any rainfall, to calculate how long you may have to store water for.
5. Explore what space you have available for siting a tank, taking into account downpipes and overflow.
6. Check your council’s regulations about siting tanks. A tank not plumbed into the house is unlikely to require a consent, but may have to comply with regulations about placement.

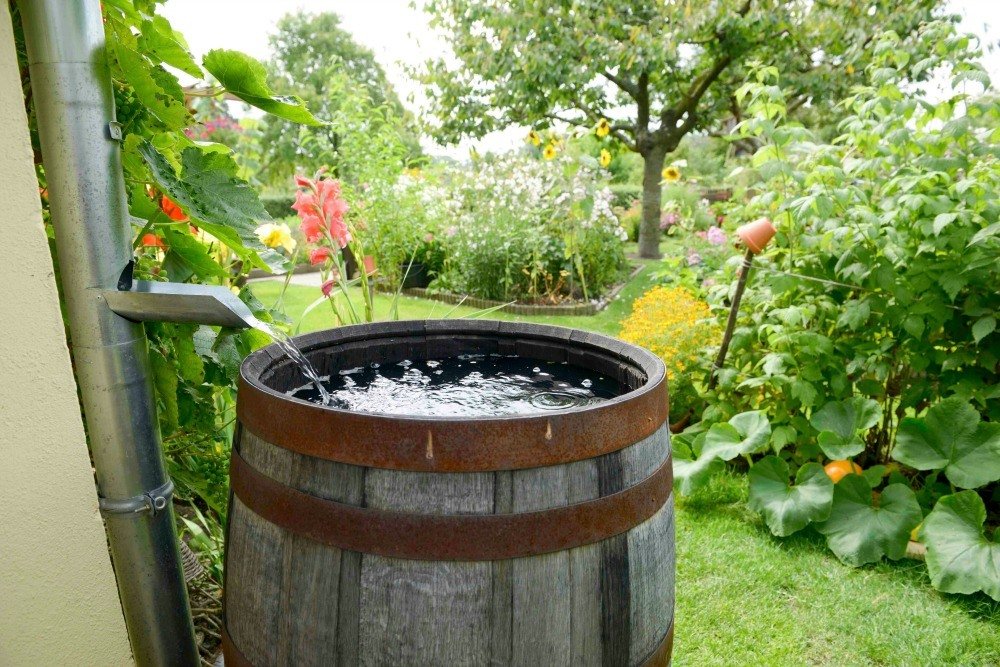
Wooden barrels have been used for centuries to collect and store rainwater, and are still seen occasionally.
Now other materials are more common for tanks: plastic, concrete and stainless steel
to get you thinking about what would work best in your situation.

This 15,000-litre plastic tank is huge for a suburban section but melts into the permaculture garden.
The tank collects rainwater from the roof of the house which is pumped back into the house for use. The house is also connected to town supply but can be switched entirely to the collected rainwater if necessary.
Photo: Rachel Rose