Posts

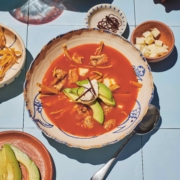
Sopa de Tortilla – Tortilla Soup

by Daniella Guevara Muñoz 

Sopa de tortilla is also known as sopa azteca or Aztec soup. It is a simple but delicious soup and, as the name hints, is full of tortillas. This soup has been on La Popular’s menu for years. Whenever we take it off, we get complaints. So it stays on.

Images and text from Provecho: Real Mexican Food at Home by Daniella Guevara Muñoz, photography by Simon Bajada. Murdoch Books RRP $49.99. (Tortilla soup p.54-55)

We hope you enjoy this free article from OrganicNZJoin us to access more, exclusive member-only content

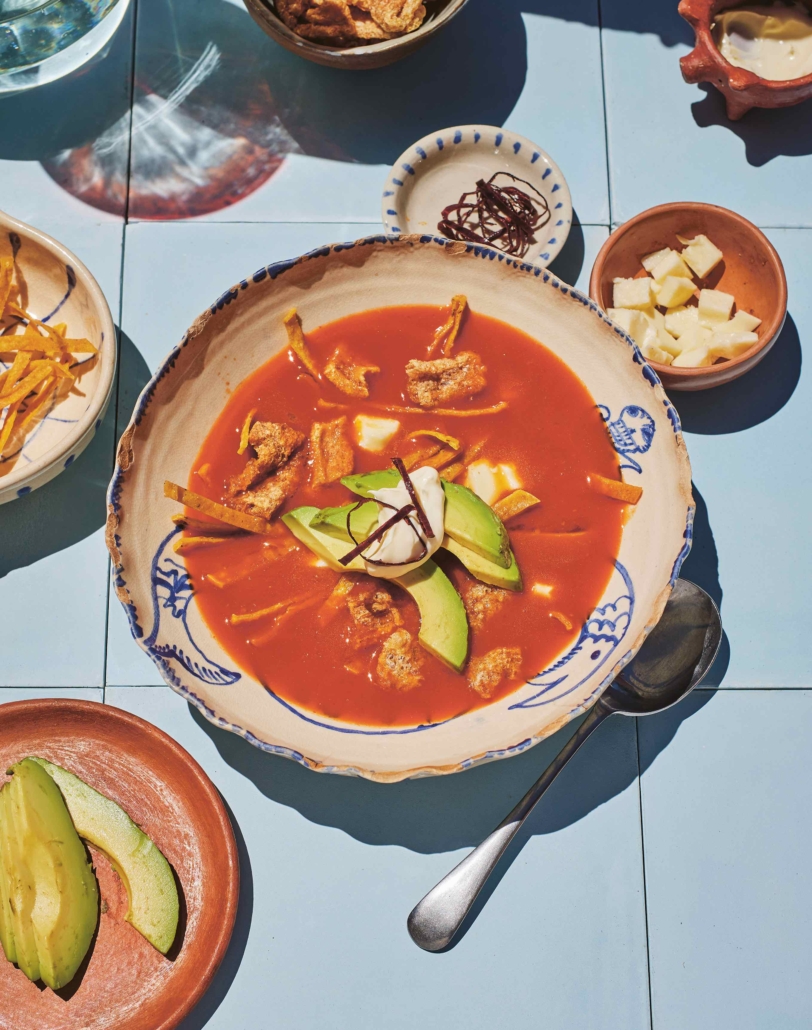
What makes this soup so delicious are the different textures – crispy tortilla strips, soft avocado, chewy cheese and a dollop of cream.
The soup is made in two stages. First is the soup base (which you can pre-make and keep in the freezer) and the second is the assembly. This recipe is traditionally made with chicken stock, but if you are vegetarian you can use vegetable stock instead.

Serves 2 litres (8 cups) / 6

2 litres (8 cups) chicken stock (see page 221 for homemade) or vegetable stock

Soup base 

  • 8 guajillo chillies, deseeded
  • 2 garlic cloves
  • 1½ brown onions, cut into chunks
  • 700 g (1 lb 9 oz) ripe tomatoes
  • ½ bunch coriander (cilantro), leaves picked
  • 1 teaspoon dried Mexican oregano
  • 1 teaspoon ground cumin
  • 6 corn tortillas (shop-bought or see page 253 for homemade), cut into quarters
  • 20 g (¾ oz) salt

To garnish

  • 1 guajillo chilli, to garnish
  • 6 stale corn tortillas (shop-bought or see below, or page 253, for homemade), to garnish
  • 200 ml (7 fl oz) vegetable oil
  • 1 avocado
  • 200 g (7 oz) cheese (queso panela if you can get it, but mozzarella works, too)
  • 100 g (3½ oz) chicharrón or pork crackling (omit for vegetarian)
  • 100 ml (3½ fl oz) thickened (heavy) cream

For the soup base, soak the guajillo chillies in boiling water until soft, about 5 minutes.

Once soft, drain them and put them in a blender or food processor with the rest of the soup base ingredients. Blend on high until you have a soft paste – it shouldn’t have any grittiness. Pass the base through a fine-mesh strainer.

For the soup, bring the stock to a slow boil in a stockpot, then add the soup base. Simmer until the soup thickens, about 30 minutes.

Meanwhile, prepare the garnishes. Using scissors, carefully cut the guajillo chilli into thin rings and cut the stale tortillas into 5 mm (1⁄4 inch) wide strips.

Pour the vegetable oil into a small saucepan and heat to about 180°C (350°F). I use a thermometer to test the oil, but if a piece of bread dropped in the oil browns in about 15 seconds, the oil is at the correct temperature.

Fry the chilli until crispy – don’t let the chilli burn, this happens in about 5–10 seconds – then place on paper towel to drain.

In the same oil, fry the tortilla strips until crispy, about 3 minutes – these won’t burn as easily. Place the strips on paper towel.

Halve the avocado, remove the seed and cut into slices. Put all the garnishes in separate bowls on the table.

Serve the soup in a large bowl. Each person can add whichever garnishes they want. I recommend: a handful of tortilla strips, cheese, avocado, chicharrón, a drizzle of cream, then the fried chilli. Keep adding more as you eat.

Corn tortillas

p.253

650 (1 lb 7 oz) Masa (page 250)

  • 280 g (10 oz) masa harina (nixtamalised maize flour)
  • ¼ teaspoon table salt (optional)
  • about 375 ml (1½ cups) warm water

In a mixing bowl, combine the masa harina and salt (if using). Gradually add the warm water while stirring with your hands. Continue to add water until the dough comes together and becomes soft and pliable.

The dough should hold together but not be overly sticky. If it feels too dry, add a little more water. If it’s too wet, add a bit more masa harina. Knead the dough for about 10 minutes to get the best result. It should be smooth and well combined. It must have a Play-Doh– like consistency, quite soft and a little bit sticky.

A good test is to make a tortilla in a press between two sheets of thin sandwich-bag plastic (see page 253). If the edge of the tortilla has deep cracks, the masa is too dry. A rough edge is normal.

You can keep masa for a couple of days in the fridge in an airtight container. If you want to use it, take it out of the fridge about an hour before you plan to use it. Knead thoroughly with your hand and add some water if necessary.

Divide the masa into small balls (about 30 g/1 oz), slightly smaller than a golf ball. You can make them larger or smaller depending on your preference.

Preheat a comal, hotplate or non-stick frying pan over medium– high heat. Place a ball of masa between two sheets of sandwich-bag plastic in the tortilla press (see the photographs on the following pages).

Press down firmly to flatten it into a round tortilla shape. Rotate the flattened tortilla with the plastic sheets 180 degrees, then press again gently. The tortilla should be approximately 1–2 mm (1⁄16 inch) thick.

Carefully peel off one of the plastic sheets, then place the raw tortilla (with the plastic) on the palm of your hand. The tortilla should be half on your hand, half hanging freely. Peel off the second sheet of plastic.

Lay the tortilla on the preheated hotplate or in the pan by placing the freely hanging tortilla on the hotplate first, then letting the rest of the tortilla roll off your hands.

You should come in with your hand, palm facing up, at an angle of about 45 degrees. Once the tortilla has hit the hotplate, rotate your hands about 90 degrees, rotating your palm towards the hotplate, pulling away from the tortilla.

This movement, if done smoothly, should release the tortilla from your palm without the tortilla falling on itself. This is a tricky movement, and I suggest practising this on the bench first (no heat).

Cook for about 30–60 seconds until the edge curls up slightly. Flip with a spatula and cook the other side for about 60 seconds, then flip again – if all goes well, it will puff up on the last flip.

(Tip: Don’t try to fix a wrongly placed fresh tortilla; it will get worse.)

Remove the cooked tortilla from the hotplate and stack it with the others in a clean tea (dish) towel in a chiquihuite. The stacking is important, as it will keep cooking the tortilla. Serve the freshly made corn tortillas warm to make your tacos.


Broccoli: A Winter Hero

As the cold settles into our gardens and kitchens, one green vegetable continues to thrive: broccoli. Nutritional therapist Paula Sharp introduces this winter hero, including gardening tips, recipes and nutritional benefits.

We hope you enjoy this free article from OrganicNZJoin us to access more, exclusive member-only content

This pretty vegetable that looks remarkably like a small shrub has a fascinating history, impressive health credentials and in my opinion a starring role in the winter vegetable patch. Broccoli is more than just a basic side dish; it’s a powerhouse for human health.

From Ancient Rome to Kiwi gardens

Broccoli (Brassica oleracea var. italica) was grown in the Mediterranean over 2000 years ago. It was developed by ancient Romans from wild cabbage, and its name comes from the Italian broccolo, meaning ‘flowering crest of a cabbage’ (broccoli is the plural). Broccoli belongs to the nutrient-rich Brassica family, along with cauliflower, kale, Brussels sprouts and cabbage.

Broccoli made its way through Europe and into our kitchens much later, and today it is a staple in many New Zealand gardens, especially in winter. This cool-season crop doesn’t just survive frosts; it thrives in them.

Broccoli plants growing in a raised bed. Photo: Rachael & Zane Ross / Flickr CC BY-NC-SA 2.0

Growing broccoli

Broccoli loves cool, crisp conditions, making it ideal for late autumn and winter planting in New Zealand.

Sow seeds or transplant seedlings from mid-autumn, and you’ll be harvesting heads from June through to September, with August being a prime time in many regions.

You can still sow seeds or transplant seedlings in August or early September. Plug plants will also continue to thrive particularly in cooler areas or a chilly spring.

For best growth:

  • Plant in full sun
  • Use well-drained, compost-rich soil
  • Keep soil moist but not soggy
  • Space plants well to allow airflow and strong head formation

Photo: Gretta Hoffman, Pexels

You’ll know it’s ready to harvest when the central head is tight, deep green, and about the size of a fist. Cut just above the first set of leaves. Many varieties produce smaller side shoots after the main head is removed, giving you bonus crops well into spring.

Broccoli’s nutritional benefits

Broccoli truly earns its superfood status. Packed with vitamin C, fibre and antioxidants, broccoli is a winter immune-booster. Its compounds – sulforaphane, glucosinolates and indole-3-carbinol – help fight inflammation, support hormone balance and protect against cellular damage.

Key nutrients:

  • Vitamin C – For immune defence, collagen production, and iron absorption
  • Vitamin K – Vital for bone health and blood clotting
  • Folate – Essential for DNA repair and cell growth
  • Potassium and magnesium – Help regulate blood pressure and muscle function
  • Iron – Supports energy and oxygen transport
  • Calcium – Supports bone health

Powerful phytochemicals:

  • Sulforaphane – A compound linked to reduced inflammation, detoxification, and potential cancer-fighting properties
  • Lutein and zeaxanthin – Support healthy vision and protect against eye strain

Photo: Freepik

The best ways to eat broccoli

Different cooking methods impact nutrient availability, so it pays to mix things up:

  • Light steaming helps preserve sulforaphane and vitamin C
  • Roasting enhances flavour but slightly reduces heat-sensitive nutrients like vitamin C
  • Raw broccoli (like in slaws or salads) keeps vitamin C levels high but may cause bloating or discomfort for people with sensitive digestive tracts.
  • Stalks and leaves are edible too: dice them into soups, stir-fries or make vegetable stock for extra fibre and flavour. I sneak these into bolognaise sauces, meat or vegetarian pies and rice dishes (don’t tell my children).
  • NB: Older broccoli stalks or stems can be very fibrous.  If so, peel these before dicing and cooking.

Absorption tips

Pair broccoli with a source of healthy fat (like olive oil, avocado, or tahini) to absorb fat-soluble vitamins like Vitamin K. Combine it with vitamin C-rich foods (like lemon juice or capsicum) to boost plant-based iron absorption.

Why eat in season?

Choosing in-season broccoli means you’re getting it at its freshest, most nutritious, and most affordable. It also supports local growers and reduces the environmental impact of long-haul transport. Whether you grow it yourself or pick it up from your local farmers’ market, broccoli in August is a winter win – it just tastes better.

Purple sprouting broccoli – photo: Conall/Flickr

Broccoli recipes

Here are two easy ways to enjoy broccoli while it’s at its peak.

Lemon and garlic broccoli

Serves 4 as a side dish.

  • Lightly steam florets from a medium head of broccoli for 4–5 minutes.
  • Toss with 2 teaspoons of extra virgin olive oil, 2 cloves of minced garlic, a pinch of flaky sea salt, and a squeeze of fresh lemon juice.

Simple, fresh, and perfect as a side.

Creamy broccoli and pumpkin soup

Serves 4. This makes a beautifully textured soup with the broccoli florets and blended pumpkin.

Ingredients

  • 1 onion
  • 4 cloves garlic
  • 1 large teaspoon olive oil
  • 1 medium pumpkin or large butternut squash
  • 1 large broccoli head
  • 1 litre vegetable stock

Photo: Paula Sharp

Method

  1. Dice the onion and dice or mince the garlic, then sauté in oil.
  2. Cut the pumpkin or squash into cubes.
  3. Chop the broccoli stem (save the florets for later), and simmer with the stock until soft. For a thicker soup, add less liquid. 
  4. Blend until smooth with a stick blender.
  5. Cut the rest of the broccoli into florets and steam them.
  6. Add florets to the soup and season well.
  7. Top with a sprinkle pumpkin seeds and a swirl of Greek yoghurt or coconut cream.

AUTHOR BIO: Paula Sharp is a nutritional therapist working one-to-one via Zoom to support women’s health, restore gut health and digestion, hormonal balance, skin and hair, sleep, shifting weight and health pre- and post-surgery. www.paulasharpnutrition.com

She is also a guest speaker, giving talks to companies on nutrition and mindset. In London she worked in the organic fruit and vegetable industry, and now she is based in Whakatāne, growing her own extensive spray-free garden.

Photo at top of article: Alabama Extension, Wikimedia Commons