How to make kimchi
Not only is kimchi delicious but it’s a probiotic that is great for gut health. Theresa Sjoquist talks to two kimchi makers to find out the secrets of this moreish crunchy pickle.
Kimchi is a 3000-year-old traditional Korean fermented vegetable dish. In the old days it provided a way of preserving the harvest and was stored in cool caves or underground.
Kimchi appears to be a good source of vitamins K, A, beta-carotene, C, folate, choline, calcium and potassium. Naturally fermented probiotics (Lactobacilli bacteria also found in yoghurt and other fermented dairy products) support gut health and the immune system. Garlic is also an antiviral and blood cleanser, and cabbage is a digestive aid. Chilli keeps you warm.
Meet Miss Kimchi
Chef Rachel Kim has been selling her kimchi for four years as Miss Kimchi at La Cigale market in Parnell and The Shed Collective in Henderson, and now from her own café, Holly’s Café, in Auckland’s New Lynn. Born in Chuncheon in South Korea, Rachel came to New Zealand on a student exchange programme in 2003 and at 16, her parents encouraged her to come back to learn English.
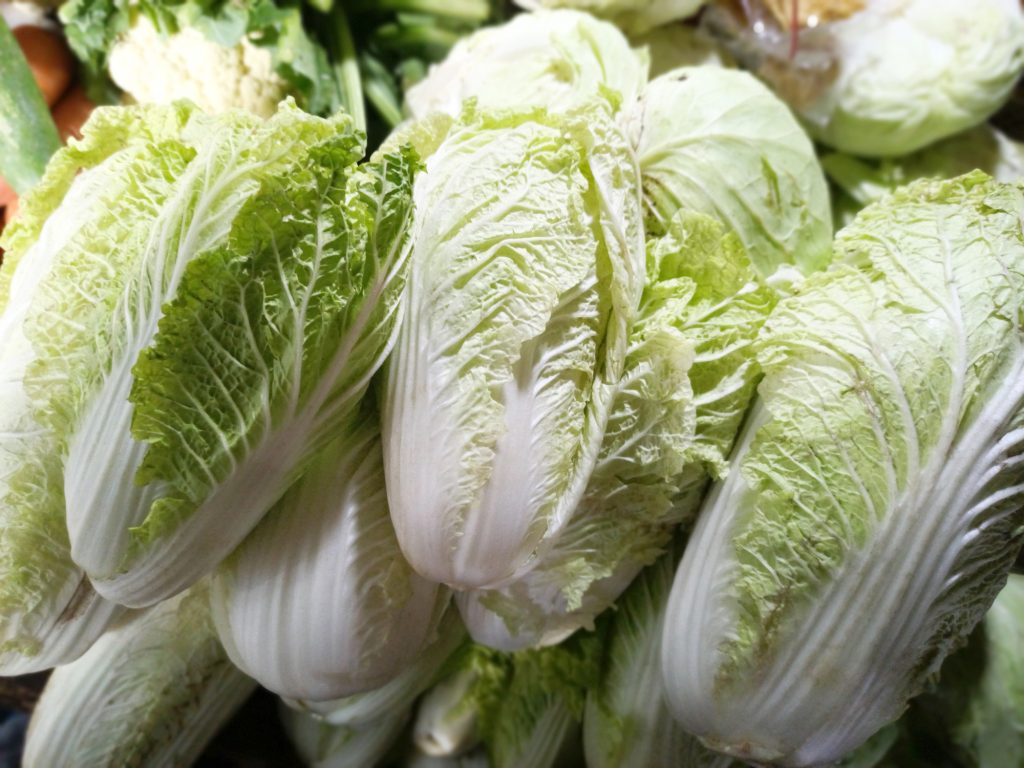
“Kimchi seems complicated,” she says, “but is very easy to make yourself. Once you have the mother sauce, you can make it with daikon or wombok (Chinese) cabbage, ordinary cabbage, red cabbage, cucumber, spring onions, even beetroot.
“In Korea there’s always traditional wombok cabbage kimchi on the table, but also several other types of kimchi along with side dishes. All are similarly made but each tastes different according to the vegetables used. Spring onion kimchi is very popular, and cucumber kimchi is beautiful, but you need to take the seeds out first otherwise it creates too much liquid. Any root vegetable works well as long as it is salted to reduce moisture.”

Making traditional kimchi
Koreans always naturally ferment their Kimchi and Rachel’s family put it on the table for breakfast, lunch and dinner. In Korea kimchi is generally made right after the autumn harvest in huge batches with family and relatives arriving to help, usually taking the whole day. At the end of the process the helpers take their share home with them.
Using six large wombok cabbages, Rachel chops them coarsely and soaks them for five hours in brine made from one cup of rock salt in ten cups of water. Any salt is fine but iodised salt may inhibit fermentation. The longer cabbage is left in brine with less salt, the better, says Rachel, because salt leaches the sweetness out of the vegetables. In Korea brining commonly takes 10 to 14 hours. “My Dad salts in the evening and in the morning starts getting the other vegetables ready,” she says.
Rachel coarsely shreds two large daikon (large Japanese radish) into a bowl, and into another chops three medium onions which she puts with 500gm peeled garlic, and two chopped nashi pears. The pears add natural sweetness so sugar isn’t necessary. Adding nashi is traditional.
In a separate bowl she measures200g of salt with 500g of Korean Kimchi chilli powder (gochugaru). Chilli is always to the same ratio as garlic. If you prefer milder kimchi, reduce the chilli but also reduce the garlic by the same weight. Rachel adds a bunch (100g) of chopped Chinese chives (garlic chives) to the shredded daikon, mainly for the colour.
Rachel’s husband, Alex Niepold helps out blending the garlic, chopped onions and nashi pears with a stick whizz into a fine sauce Rachel calls the Mother Sauce. Once the cabbage or vegetables have been properly brined they need to be rinsed three or four times otherwise the kimchi will be too salty. Rachel mixes the denser shredded daikon with the Mother Sauce and the chilli and salt and allows them to stand for half an hour or so.

Variations
Because she needs quick access to chopped kimchi in the café, Rachel generally makes mak kimchi (a faster fermenting chopped version) with cabbage, but she keeps a couple of halved wongbok cabbages also soaked in brine to make the more traditional pogi kimchi (whole cabbage) where each leaf is opened and some of the mother sauce spread between. The cabbage is then folded and packed into a container for fermenting. Rachel drops cling film directly onto the kimchi which starves it of air so the fermenting process doesn’t form mould on the surface.
Fermenting
Larger (denser) vegetables take longer to ferment. Kimchi is generally cold fermented in a chiller and is ready within five to seven days, unlike other cabbage ferments such as sauerkraut which take at least three weeks. Kimchi can be left at air temperature for a quicker ferment and will be quite far advanced within two days. Historically it was buried in earthenware containers for fermentation in the ground where it was cooler. Providing the container remained sealed, perfectly edible kimchi could be eaten as many as fifty years later.
Vegan and vegetarian options
Common Korean ingredients are fish sauce and fish paste but Rachel dispenses with them so vegetarians and vegans can still enjoy traditional style kimchi. If you use fish sauce and paste, exchange the 200g of salt for 100g fish sauce and 300g of Korean shrimp paste. It’s common to make kimchi without fish ingredients particularly for Korean temples where monks are vegetarian.
Get the right chilli
Gochugaru is available from Korean and most other Asian supermarkets. It is a specific chilli, quite coarsely ground, sweeter than and not as hot as other chillis but if you ask for Kimchi Chilli, you’ll get the correct product. Some types of kimchi exclude chilli altogether and are more like sauerkraut.
Root to tip kimchi
Once the kimchi has been eaten, there is always juice left over which can be a bit sour. It makes a tasty drink and also very good soup. As kimchi ages and continues fermenting it becomes more sour and the vegetables softer but cooking removes the sourness. Older kimchi is used in stir fries, stews, as a stew, and eaten steamed, or in pancakes.
When Rachel and Alex’s daughter, Holly was born eighteen months ago, Rachel didn’t want to go back to being a full time chef so they opened Holly’s Café in July 2021 with the idea of takeaways but it has become a busy café as well. Alex, a welder, created all the steel work, balustrades, furniture, and counters in the café and now works full time with Rachel.
Organic kimchi
Brenda Trotman is CEO of Be Nourished, New Zealand’s only organic kimchi maker, and business is booming as people catch up with the wonderful nourishing flavor hit that kimchi is.
“We wash our cabbages three or four time to wash all the bugs off,” says Brenda. “We only use organic cabbages, we don’t want pesticides anywhere near our fermented kimchi, and by way of explanation, some pesticides need to be stopped being used weeks before harvesting. That’s how harmful pesticides are. They’re designed to kill things. Insecticides are an important cause of poor gut health.”
If kimchi is new to you, jump on the bandwagon because New Zealanders can’t get enough of this versatile savoury probiotic.
Kimchi stew

1 tablespoon sesame oil
1 tablespoon miso paste
500g pork shoulder or belly diced into small pieces (you can replace with tofu)
500g kimchi, chopped
600g water
400ml kimchi juice
2 cloves garlic, chopped
1 chilli (optional)
3 tablespoons chopped spring onion
Put sesame oil in a pot and add miso paste, pork and kimchi.
Gently stir-fry until meat is nicely coated in miso and cooked, then add water. Bring it to the boil, on a high heat for 20 minutes.
Turn heat down to medium and add garlic, chilli and spring onion.
Continue to cook for another 20 minutes.
Kimchi pancake

2 cups kimchi, finely chopped
1 cup flour (or gluten-free flour)
⅓ cup kimchi juice
⅔ cup water
Mix all ingredients together in a bowl.
Place oil in a pan and when it’s hot, add pancake batter. Cook on both sides until golden brown.
Serve with soy sauce on the side.
Other ideas for eating kimchi
You can eat kimchi with pretty much everything but here are some ideas on what you can add it to:
Eat it with scrambled eggs.
Chop it up and add it to fried rice or noodles.
Add it to a grain bowl.
Put it in a toasted cheese sandwich or a burger.
Eat it by itself!
Theresa Sjöquist is a freelance writer based at Port Albert. theresasjoquist.com