No one asked us whether the new substance belonged here.
A parable for our times by David McNeill
We hope you enjoy this free article from Organic NZ. Join us to access more, exclusive member-only content
We are the ones who live beside the paddock.
We are the children breathing at the fence line, the old woman hanging washing when the wind changes, the dog nosing the ditch, the cat washing its paws after walking through wet grass.
We are the swallows taking insects from the air, the worms folding leaves into the soil, the fungi threading unseen through roots, the bees reading flowers as maps, the fish waiting downstream where every paddock eventually arrives.
No one asked us whether the new substance belonged here.
It came with a label, a number, an approval, a promise. It came as efficiency. It came as yield. It came as a solution to a problem measured in tonnes and dollars.
It came with confidence from elsewhere, from another regulator, another climate, another soil, another river system, another idea of acceptable loss.
The farmer saw a treatment. The supplier saw a market. The regulator saw a pathway. The Minister saw growth. The paddock saw a fog settle on its skin.
We do not speak in quarterly returns.
We speak in hatchings, germinations, moults, root hairs, spawning, coughing, composting, mauri and the slow inheritance of residues.
What is temporary to a permit may be permanent to a stream. What is negligible to a model may be everything to a mayfly. What is ‘acceptable exposure’ to an adult may not be acceptable to a child, an embryo, a wetland, or a handful of living soil.
The farmer may gain this season. The grass may stand thicker. The invoice may be justified. But the paddock is not an isolated factory floor. It is connected: to field drains, lungs, gardens, milk, birds, rain, worms, neighbours, memory, and whakapapa.
We ask for a law that hears the quiet witnesses before the loudest applicant.
We ask that novelty not be mistaken for progress.
We ask that profit not be allowed to outrun proof.
We ask that soil be treated not as a surface to be managed, but as a living community with its own right to caution, to abundance.
For once a substance has crossed the fence, entered the ditch, touched the root, settled in the silt, or moved through the body of a child, the question is no longer whether approval was efficient. The question is who was made to carry the cost.
This is kaitiakitanga.
The Soil Act — the shortest and most important act for the environment. Clause 1. No person shall do anything to harm the soil. The end.
David McNeill is a member of Soil & Health’s National Council, its treasurer, and is a Soil & Health appointee on the board of BioGro NZ.
The image at the top is a concept image, which David created using AI.
We acknowledge that the rules for pesticide application would not allow this exact scenario to take place, due to requirements for buffer zones, protective clothing etc.
However the rules governing agrichemicals are not strong enough to protect public and environmental health, and these rules are sometimes broken.
https://organicnz.org.nz/wp-content/uploads/sites/2/2026/06/NewSprays_in_NZ.jpg7681408membershiphttps://organicnz.org.nz/wp-content/uploads/sites/2/2024/09/OrganicNZ-2024-Masthead.pngmembership2026-06-29 22:30:442026-06-29 22:30:49Parable of the paddock edge
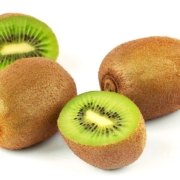
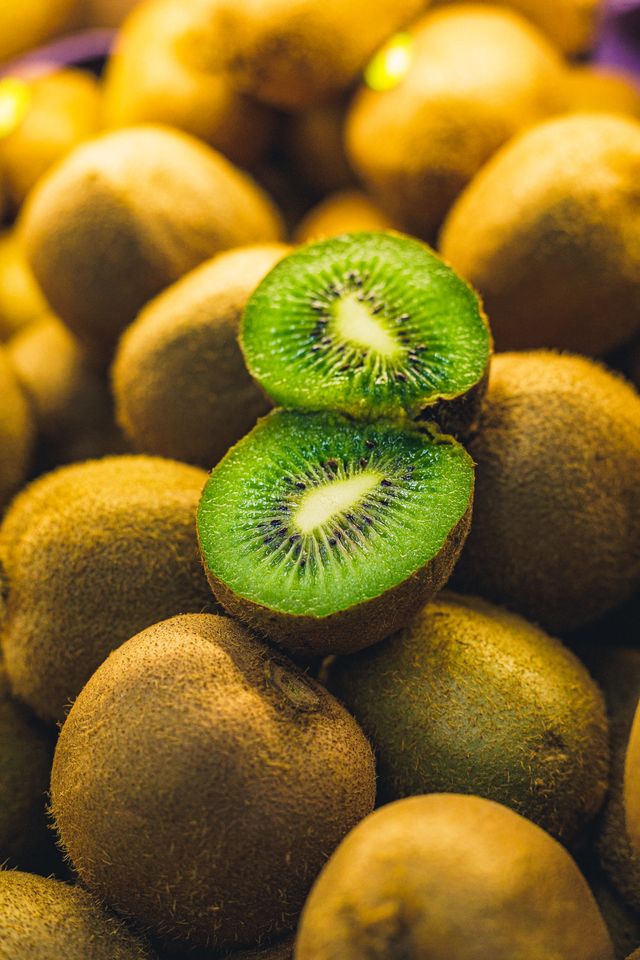
There’s something quietly satisfying about growing the fruit that put New Zealand on the global produce map.
Kiwifruit has become so woven into our national identity that it’s easy to forget it isn’t actually native here at all, and its journey from a fuzzy Chinese curiosity to a backyard favourite is a story worth knowing.
Paula Sharp finds out more.
We hope you enjoy this free article from Organic NZ. Join us to access more, exclusive member-only content
Chinese origins
Kiwifruit originated in the Yangtze River valley of China, where it grew wild for centuries and was known as a monkey peach. Seeds made their way to New Zealand in 1904, brought home by a Mary Isabel Fraser, principal of Whanganui Girls’ College who had been visiting her missionary sister in China.
Early growers in this country called it the Chinese gooseberry, and it was mostly a curiosity in home gardens until commercial growers in the Bay of Plenty began cultivating it seriously from the 1930s onward. The name kiwifruit wasn’t adopted until the 1950s and 60s, partly as a marketing move to make the fruit more appealing, and more exportable, to American buyers.
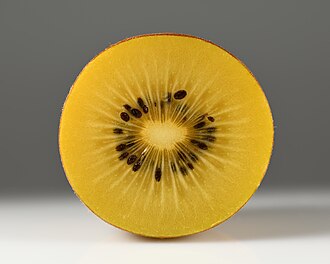
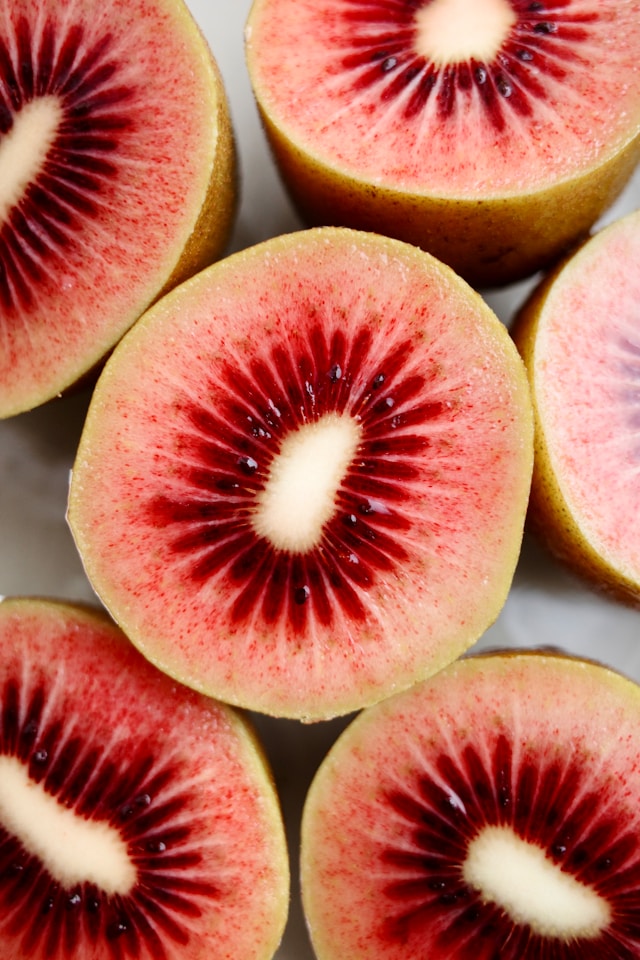
From there, New Zealand growers and breeders turned it into one of the country’s most successful horticultural exports, eventually breeding the golden SunGold variety that’s now found on supermarket shelves worldwide, and most recently the RubyRed.
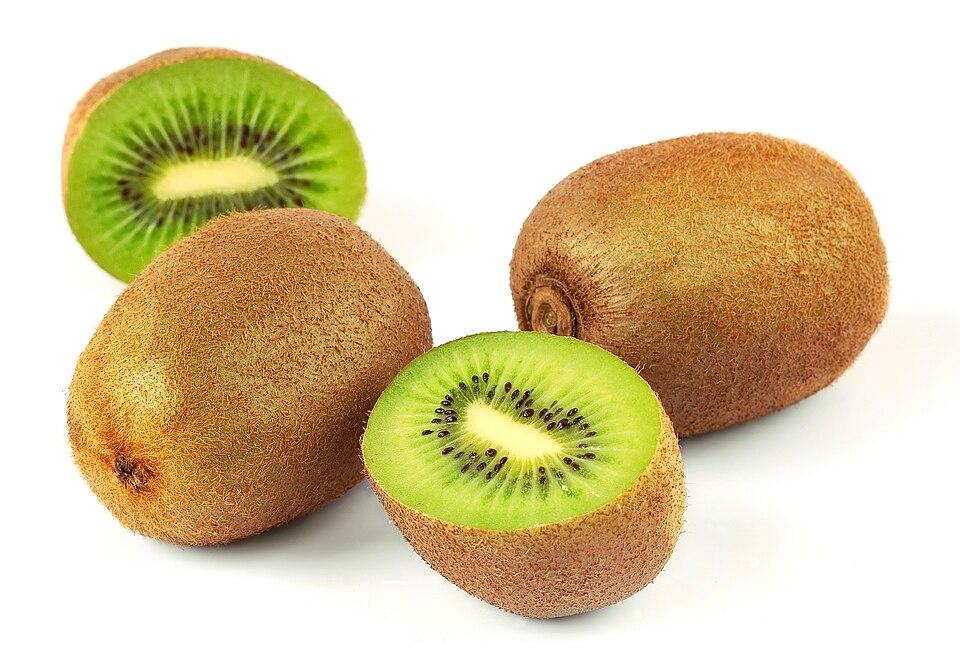
From a nutrition standpoint, kiwifruit punches well above its size. A single fruit delivers more vitamin C than an orange, supporting immune function and collagen production for skin and joint health.
It’s also a useful source of dietary fibre, including both soluble and insoluble types that support digestion and a healthy gut microbiome.
Kiwifruit contains actinidin, a natural enzyme that helps break down protein, which is part of why it’s traditionally used as a meat tenderiser and why some people find it eases digestion after a protein-heavy meal.
You’ll also get a useful dose of vitamin E, folate, and potassium, along with antioxidants that support cardiovascular health.
Gold varieties tend to have even higher vitamin C levels than green ones, while green kiwifruit slightly edges ahead on fibre.
Photo: Anderson Martins, Pexels
If you enjoy simple, grounded nutrition like this; practical, seasonal, and realistic, you can join Paula’s Sharp Bite newsletter for weekly insights, recipes, and support HERE.
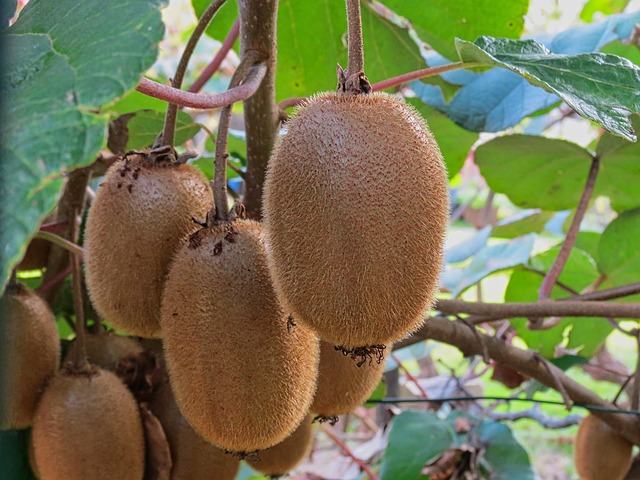
Growing kiwifruit
If you already have kiwifruit in your home garden, you’re fortunate. If not, you may not be able to source plants unless you’re growing commercially under licence. When the highly infectious bacterial PSA vine disease arrived in New Zealand in 2010, the entire kiwifruit industry was threatened, and many orchards suffered severely. Restrictions were put on the movement of plant material in order to curb the spread of the disease.
Kiwifruit vines are vigorous, long-lived, and well suited to organic home gardens, provided you have space and a sturdy structure. They need a strong pergola or trellis system, as a mature vine can spread several metres and becomes heavy with growth.
Plant in free-draining, humus-rich soil with a slightly acidic to neutral pH, and choose a sheltered, sunny spot protected from strong winds, which can damage the large leaves and developing fruit.
Photo: Pixamio, Pixabay
Most kiwifruit varieties are dioecious, meaning you need both a male and a female vine for fruit to set, unless you have a self-fertile variety bred for smaller gardens. Bees do most of the pollination work, so avoid spraying anything that might deter them during flowering in late spring.
Mulch generously with organic compost or aged manure to retain moisture and feed the soil naturally, and water consistently through summer, as kiwifruit vines are shallow-rooted and dislike drying out.
Annual winter pruning keeps the vine productive and manageable, removing old fruiting canes to make way for new growth. Harvest in autumn when the fruit feels firm but the seeds inside have turned black, then allow them to ripen further at room temperature.
Simple kiwifruit recipes
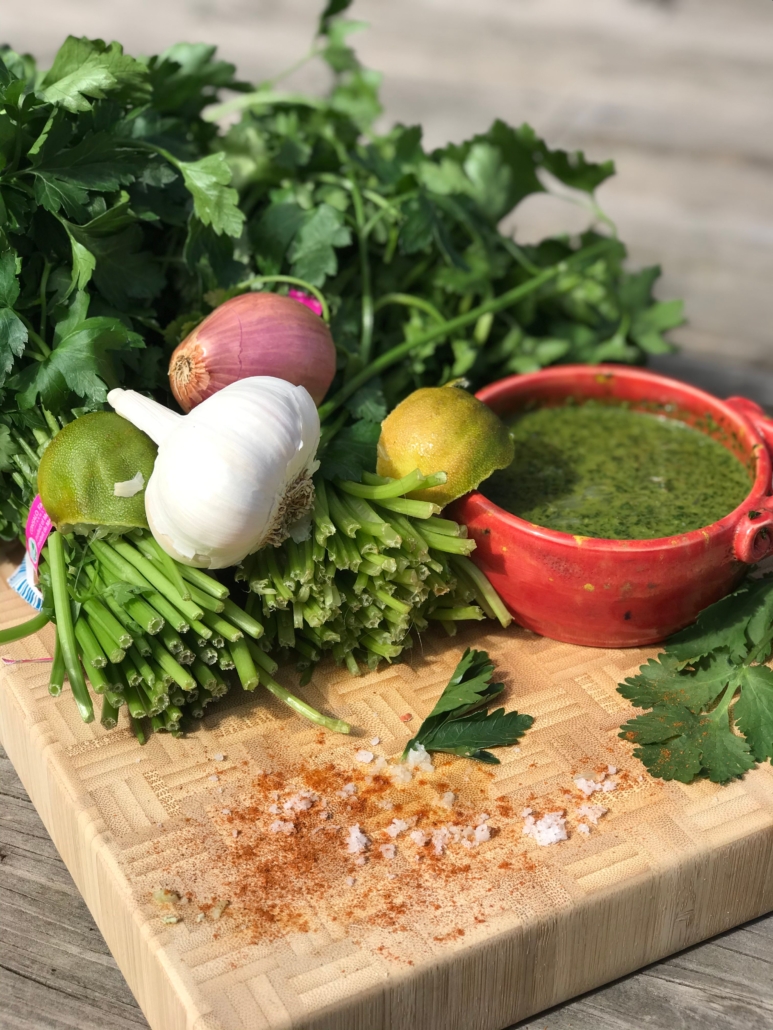
Zesty kiwifruit & coriander salsa
Bright, enzyme-rich, and lovely with grilled fish or tacos.
Ingredients
4 ripe green or gold kiwifruit, peeled and diced
½ small red onion, finely diced
1 small red chilli, finely chopped (seeds removed if preferred)
2 tablespoons fresh coriander, chopped
1 tablespoon lime juice
1 tablespoon olive oil
Pinch of sea salt
Method
Combine the kiwifruit, red onion, chilli, and coriander in a bowl.
Whisk together the lime juice, olive oil, and salt, then pour over the salsa.
Toss gently and let sit for 10 minutes before serving to let the flavours combine.
Photo: Sarah Deason, Pexels
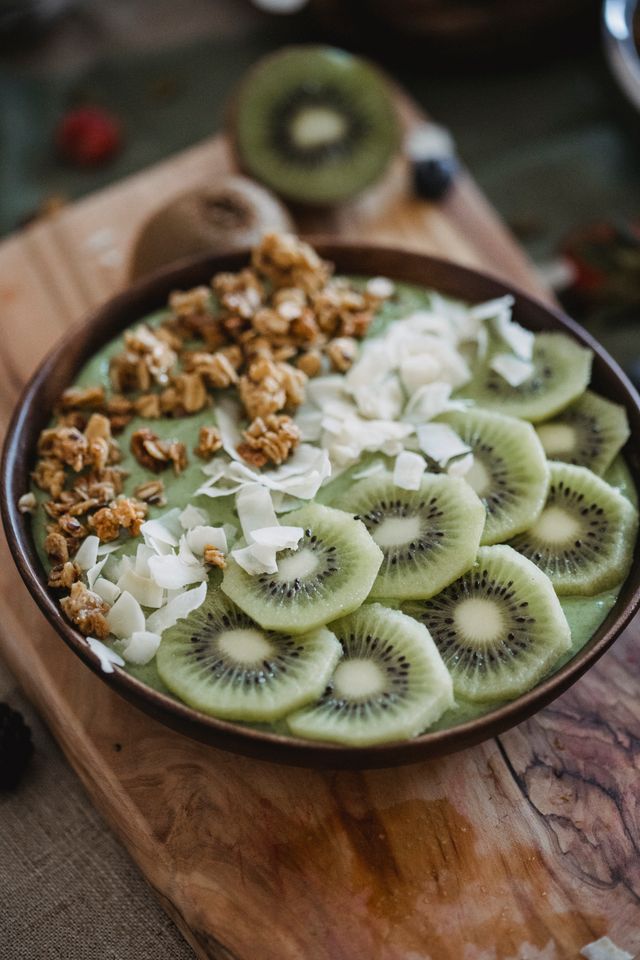
Kiwifruit green smoothie bowl
A snack or breakfast that’s packed with fibre and vitamin C.
Blend (with a Nutribullet, stick blender etc.) the kiwifruit, banana, spinach, yoghurt, and water until smooth and thick.
Pour into a bowl and top with your choice of sliced kiwifruit, a sprinkle of chia seeds, granola, shredded coconut, then serve immediately.
Photo: Nicola Barts, Pexels
Want more seasonal nutrition inspiration?
I’m Paula Sharp, nutritional therapist and founder of Paula Sharp Nutrition, supporting women to nourish their health with sustainable food and mindset habits.
If you’d like seasonal recipes, practical nutrition tips and evidence-based wellness insights delivered straight to your inbox, I’d love you to join my newsletter. Sign up at: www.paulasharpnutrition.com
Photo at top of article: Luc Viatour, Wikimedia Commons
https://organicnz.org.nz/wp-content/uploads/sites/2/2026/06/Kiwi_Actinidia_chinensis_1_Luc_Viatour-Wikimedia-Commons.jpg656960membershiphttps://organicnz.org.nz/wp-content/uploads/sites/2/2024/09/OrganicNZ-2024-Masthead.pngmembership2026-06-29 22:23:112026-06-29 22:23:16Kiwifruit: Treasures in red, gold and green
One woman. Thirty hives. Thousands upon thousands of bees. And a lifelong love affair with some of nature’s most essential pollinators. Paula Sharp interviews beekeeper Jewelle Lloyd.
We hope you enjoy this free article from Organic NZ. Join us to access more, exclusive member-only content
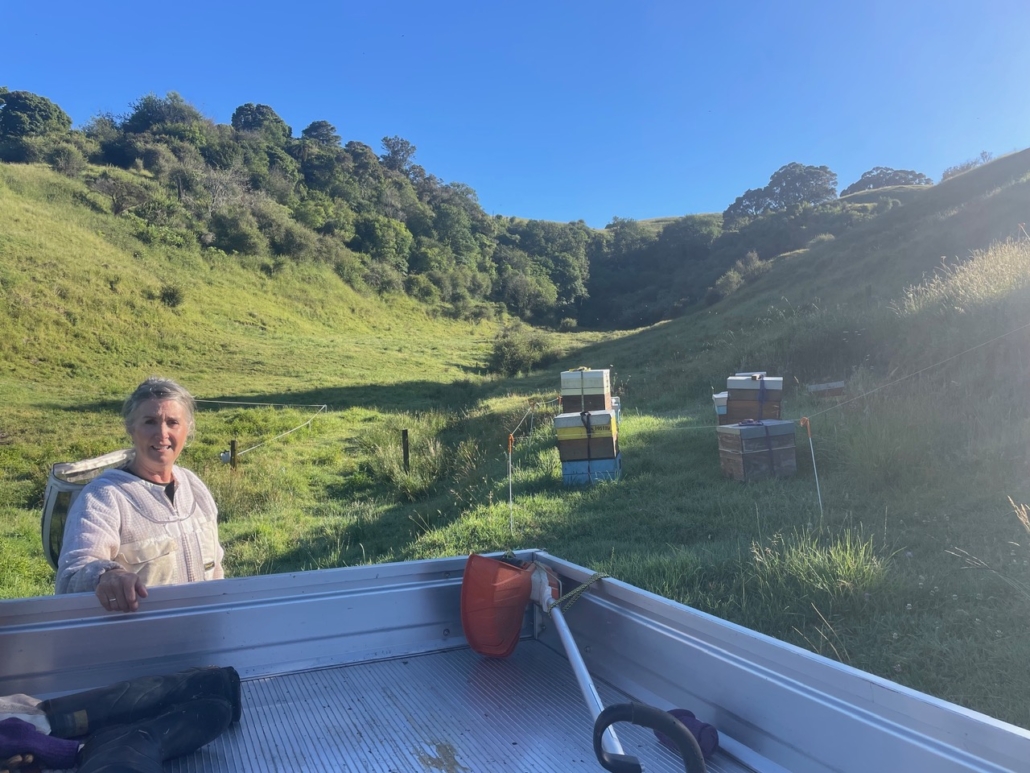
Ōhope Beach in the Eastern Bay of Plenty is known for its surf breaks, salt air and sweeping coastline. But tucked quietly behind the relaxed coastal lifestyle is a woman whose life revolves around one of nature’s most remarkable creatures, the honey bee.
For local honey producer Jewelle Lloyd, bees are not simply livestock, nor merely a business venture. They are part of her family history, her everyday rhythm and deeply woven into her identity.
Jewelle laughs when she admits she may be slightly obsessed with bees. Bee earrings. Bee socks. Bee-themed gifts. Bee conversations.
“I just love them,” she says. This is no passing hobby; beekeeping runs through generations of her family.
Her earliest memories are tied to her grandmother’s homestead, where hives stood only a short walk from the back door. While many children kept a cautious distance, Jewelle was fascinated.
Her grandmother harvested honey straight from the hives and treated the bees with enormous respect. She spoke to them often, chatting gently as she moved around the property. To some this may sound whimsical, but experienced beekeepers understand that calm energy around bees matters. Her grandmother rarely wore a protective suit and stings were uncommon.
Jewelle remembers standing nearby, watching closely, asking endless questions and quietly absorbing knowledge through observation. “My brothers weren’t interested in the bees at all, but I was always curious.”
That curiosity never left. Now, decades later, the next generation is beginning to circle back to the hives as well. Her sons, now grown with families of their own, are beginning to show interest in the craft that has travelled down through the family line. A cousin is also well established in the industry, working in kiwifruit pollination.
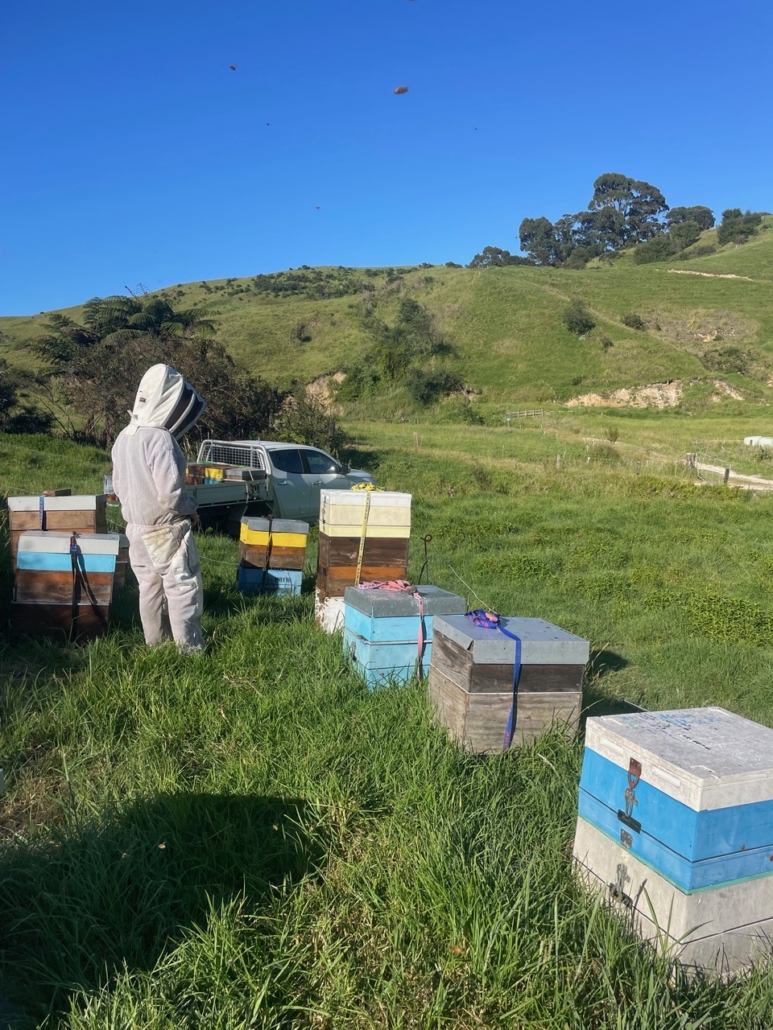
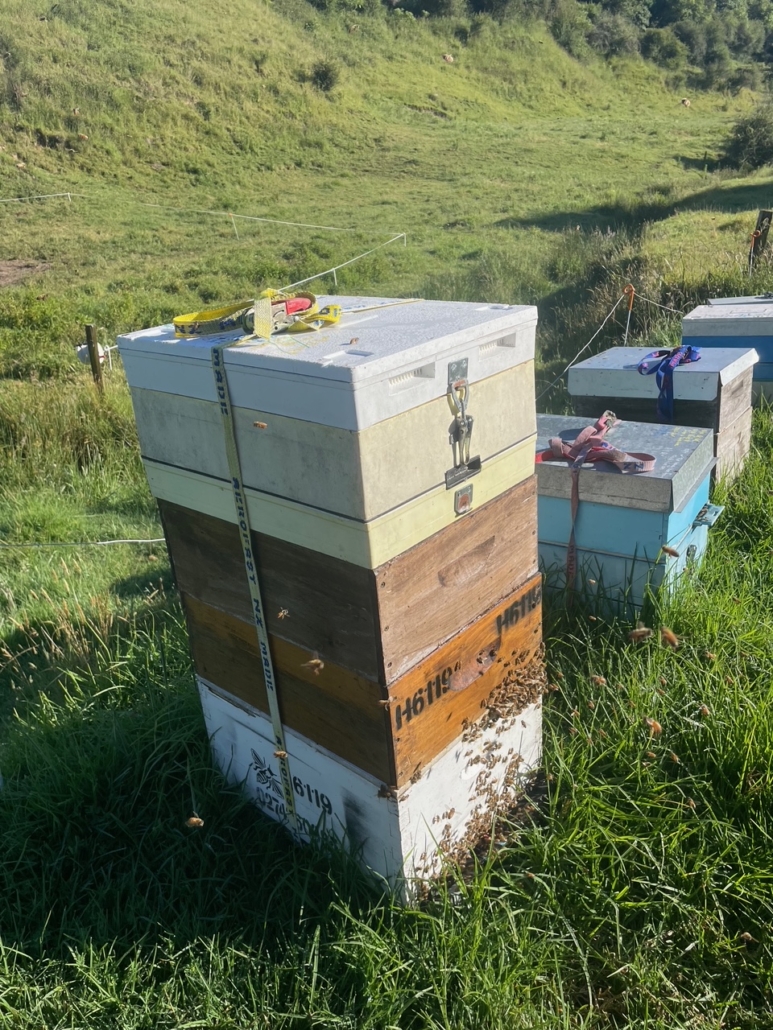
Today, Jewelle manages around 15 hives on a coastal Bay of Plenty farm, and another 15 hives on her partner’s property near Gisborne. The two regions provide distinctly different landscapes, climates and flowering plants, resulting in unique honey varieties and flavour profiles.
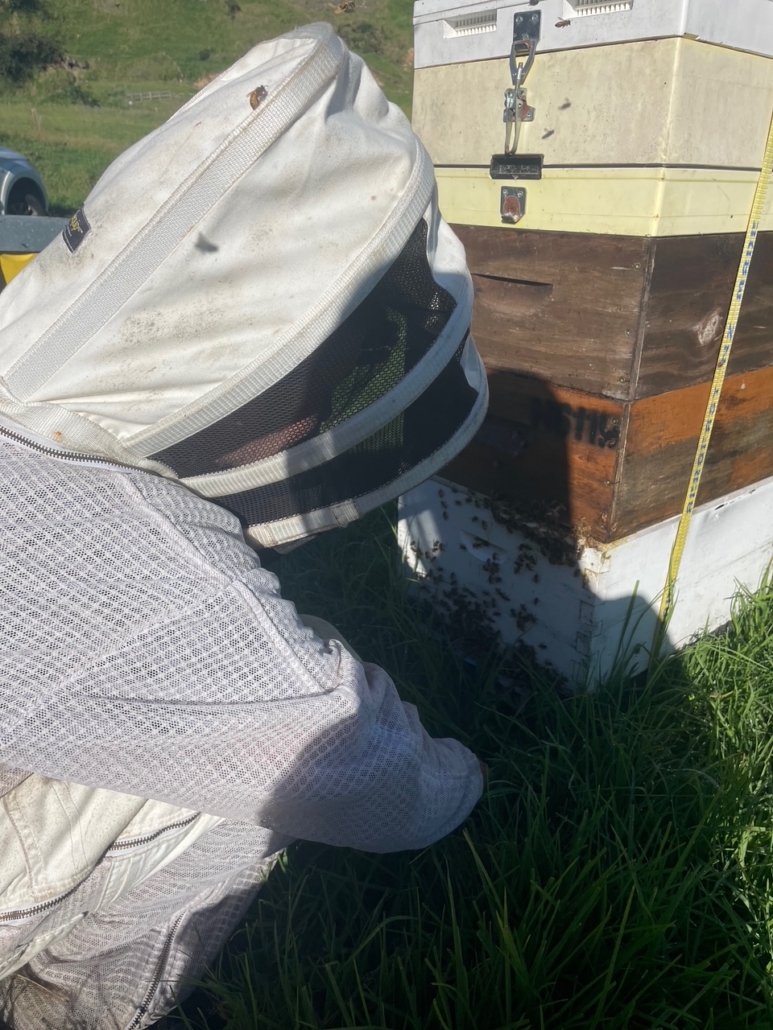
Unlike many large-scale commercial operations, Jewelle’s beekeeping is intentionally personal and hands-on. One of the most important aspects of her practice is independently raising her own queen bees, no small undertaking in the beekeeping world.
Queen breeding
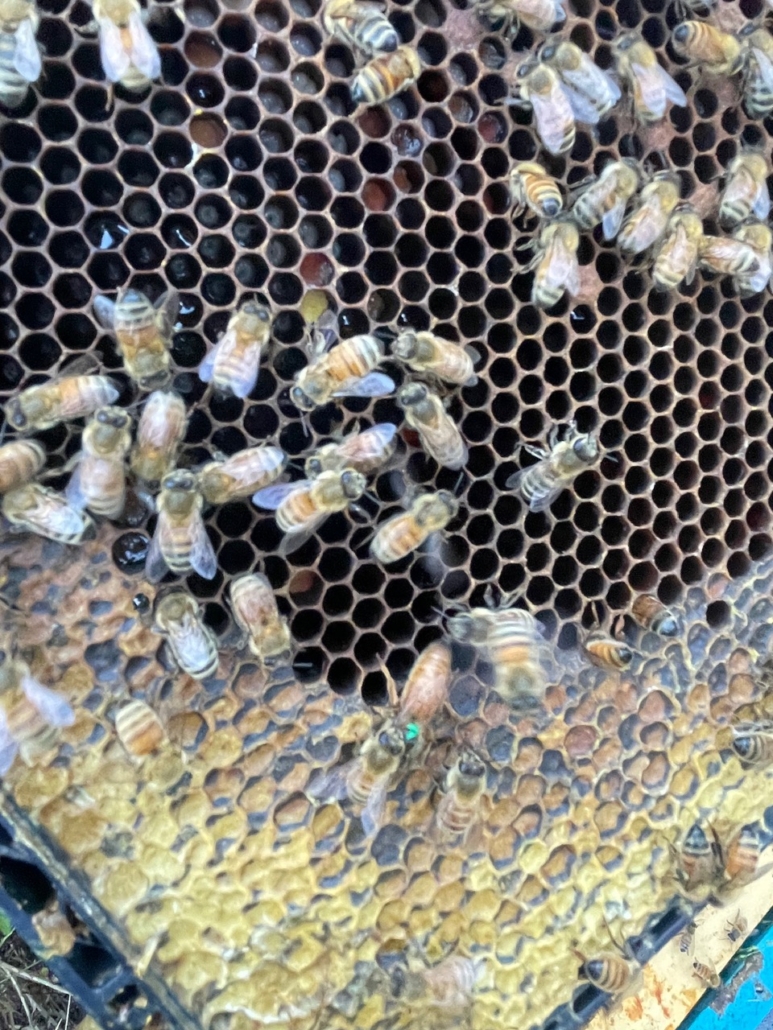
The queen bee is the heart of the hive. Her genetics influence things like productivity and overall colony strength. By breeding and selecting her own queens, Jewelle maintains close oversight of the lineage within her hives. “It means I know exactly where my queens have come from. I can monitor strength, temperament and disease resistance much more closely.”
Each year, she introduces new queens into the hives to maintain vitality and healthy colony performance. Strong queens are essential for resilient hives, particularly as modern beekeeping faces increasing environmental pressures. Jewelle’s careful management reflects a growing movement among smaller New Zealand beekeepers who prioritise sustainability, hive health and biodiversity over mass production.
The Bay of Plenty coastline offers bees rich and varied food sources. Depending on the season, bees forage on clover, pōhutukawa, mānuka, wildflowers and native coastal species. This diversity contributes to the flavour, colour and nutritional complexity of locally produced honey. The Gisborne hives experience slightly different conditions, creating subtle variations in the final harvest.
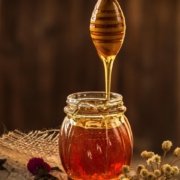
Raw and minimally processed
Honey is far more than simply a natural sweetener. Raw honey contains trace enzymes, antioxidants, plant compounds and naturally occurring antibacterial properties. New Zealand honey, particularly mānuka honey, has gained international recognition for its medicinal properties. Traditionally, raw honey has been used to soothe sore throats, calm coughs, support wound healing and provide a quick source of natural energy. Emerging research also suggests certain honeys may assist in reducing bacterial growth due to naturally occurring hydrogen peroxide activity and other bioactive compounds.
Jewelle sells her honey raw, meaning it is minimally processed and not heavily heat-treated. This matters because excessive heating can damage delicate enzymes and beneficial compounds naturally present in honey. Raw honey retains more of its natural character, complexity and nutritional integrity.
Over time, raw honey may crystallise, something many consumers mistakenly view as a flaw. In fact, crystallisation is often a sign the honey has been minimally processed and remains closer to its natural state.
While Jewelle carefully manages the hives herself, the honey frames are sent away for extraction once ready for harvest. During extraction, honey-filled frames are spun to remove the honey while preserving the delicate wax comb structure. The honey is then lightly filtered and jarred. And nothing goes to waste.
Jewelle also sells beeswax, which is used in candles, skincare products, balms and reusable wraps. The circular nature of beekeeping strongly appeals to many small-scale producers. Bees pollinate crops and gardens, produce honey and wax, and play a vital role in biodiversity and food production systems. Without pollinators, our range of food would be greatly reduced.
Close observation
Modern beekeeping, however, is not without challenges. Across the world, bee populations face growing pressure from habitat loss, pesticide exposure, climate instability and disease. In New Zealand, varroa mite management remains one of the largest ongoing concerns for beekeepers. Maintaining healthy hives requires constant observation, careful intervention and proactive management. Healthy bees are not accidental. Good beekeeping requires patience, consistency and deep respect for the natural behaviour of the hive.
Her connection to the bees also reflects something increasingly valued within the organic and regenerative food movement: relationship. Small-scale producers often know their land intimately. They observe flowering cycles, seasonal changes and environmental stressors in ways industrial systems do not. That relationship with land and environment ultimately shows up in the final product.
Outside the hives, Jewelle’s day job is teaching hairdressing at Whakatāne’s Toi Ohomai Institute of Technology. On the surface, teaching hairdressing and keeping bees seem worlds apart, but there are surprising similarities. Both require patience, creativity, steady hands and strong people skills. And while teaching may pay the bills, the bees nourish something deeper.
At local markets, Jewelle lights up when talking about hive behaviour, queen development and seasonal honey variations. Customers quickly realise they are buying from someone genuinely connected to her craft. She sells her honey at several outlets in the Whakatāne, Ōhope and Gisborne areas, as well as directly via email at iamjewelle@hotmail.co.nz or phone on 0274 260 985.
For many people, purchasing local honey is about far more than taste. It supports regional food resilience, small-scale producers and the protection of pollinator populations. In Jewelle’s case, every jar carries a story, from a grandmother chatting quietly to bees outside a homestead door, to a passionate beekeeper in Ōhope continuing that tradition today.
In a fast-moving world, there is something deeply reassuring about that continuity.
If you would like my free PDF Medicinal Honey Recipes, including simple ways to use raw honey for wellness, soothing winter tonics and nourishing kitchen remedies, email me at paulasharp31@icloud.com
Want some seasonal nutrition inspiration?
I’m Paula Sharp, nutritional therapist and founder of Paula Sharp Nutrition, supporting women to nourish their health with sustainable food and mindset habits.
If you’d like seasonal recipes, practical nutrition tips and evidence-based wellness insights delivered straight to your inbox, I’d love you to join my newsletter. Sign up at: www.paulasharpnutrition.com
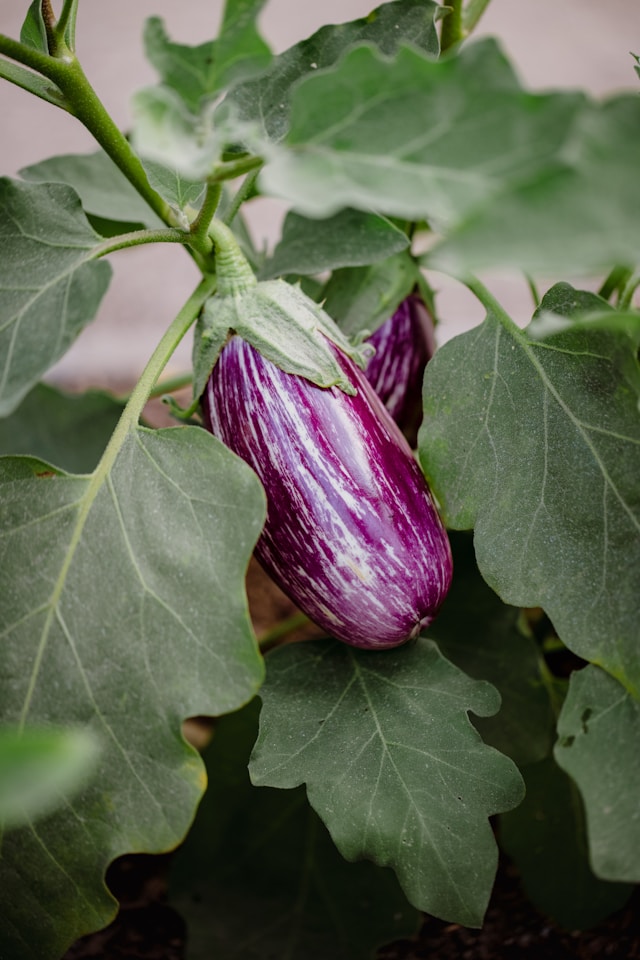
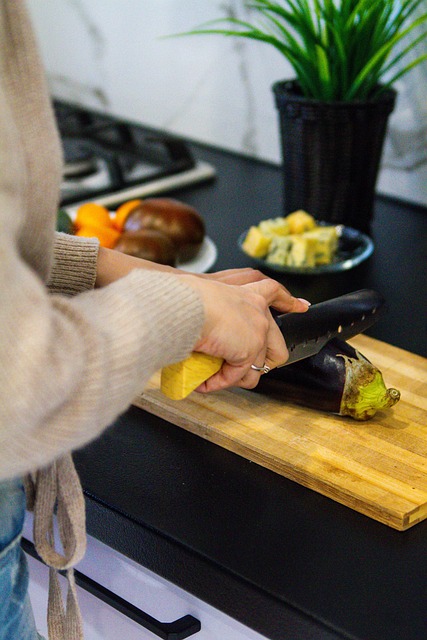
The aubergine is one of those vegetables that people often overlook, until they learn how to cook it well. Then everything changes, writes Paula Sharp.
We hope you enjoy this free article from Organic NZ. Join us to access more, exclusive member-only content
When handled right, the aubergine turns soft, silky, and deeply satisfying, carrying flavour in a way few other vegetables can. It’s not loud or showy; it’s grounding, nourishing, and incredibly versatile – exactly the kind of food that supports steady, sustainable health.
While the aubergine (also known as eggplant) wasn’t a traditional staple in many New Zealand kitchens a generation ago, it’s now finding its place. You’ll spot it at local markets, tucked into home gardens, and increasingly on menus that celebrate seasonal, plant-forward eating.
Why the name ‘eggplant’?
The aubergine traces its origins back over 2000 years to India and Southeast Asia, where it grew wild before being cultivated. It gradually travelled west along trade routes into the Middle East, Africa, and Europe.
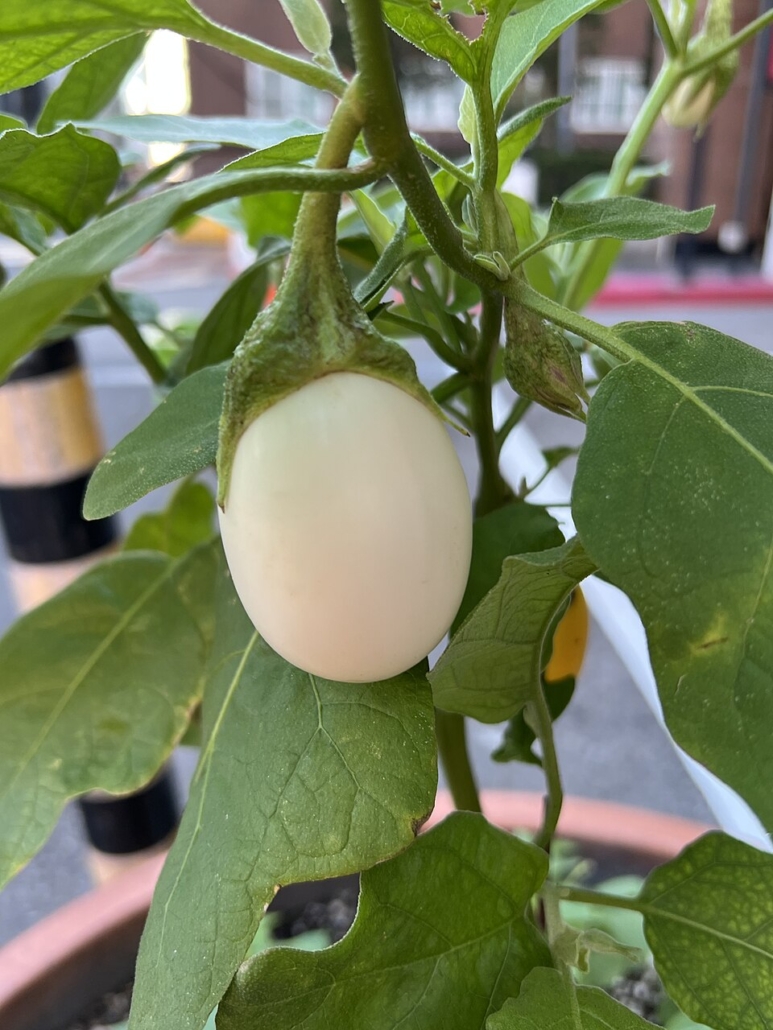
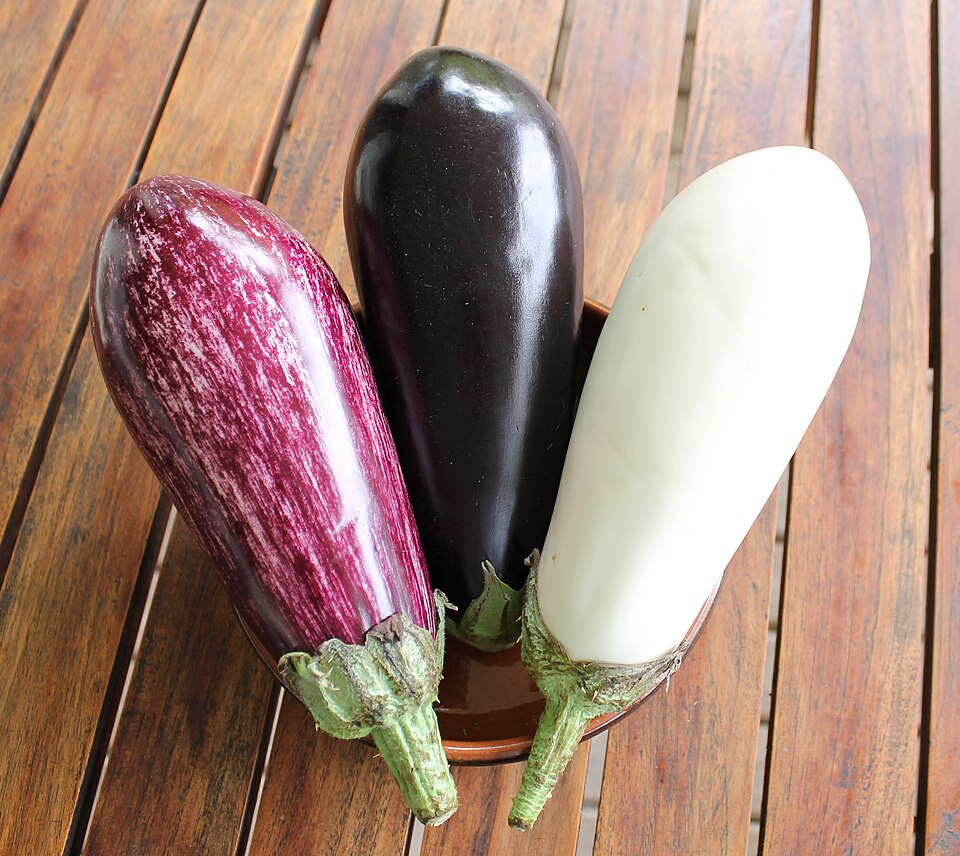
Early varieties were small, pale, and egg-shaped, hence the name eggplant.
By the Middle Ages, it had gained a slightly dubious reputation in Europe for bitterness and poor preparation. Fortunately, modern cultivation has softened those edges, giving us the milder, more reliable varieties we enjoy today.
Photo: Japanese white eggplant, Wikimedia Commons
Growing aubergines
Aubergines are warmth-loving plants, which makes them well suited to New Zealand’s warmer regions like Northland, Auckland, and the Bay of Plenty. With shelter and care, they can still be grown further south.
They thrive with:
Full sun (6–8 hours daily)
Rich, well-drained soil with plenty of organic matter
Consistent warmth and protection from wind.
Plant in spring after the last frost, and in cooler areas, use cloches or grow under cover to get them established. In places like Tauranga, you can expect a generous harvest through late summer into early autumn.
Keep watering consistently (but not excessively), mulch well, and feed with an organic fertiliser to support strong, steady growth.
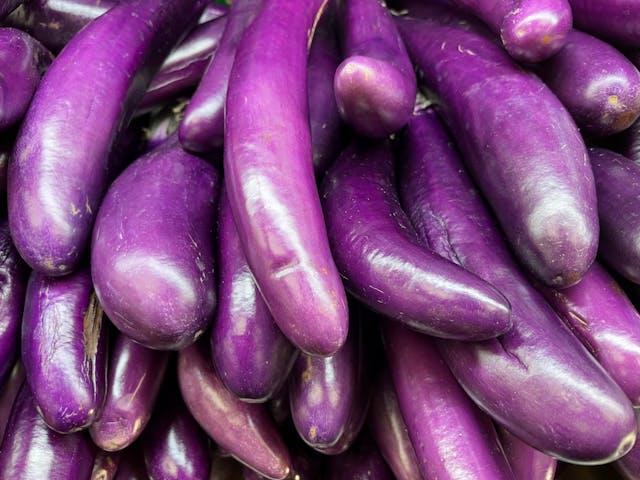
Photo: Jason Leung, Unsplash
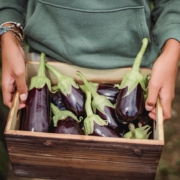
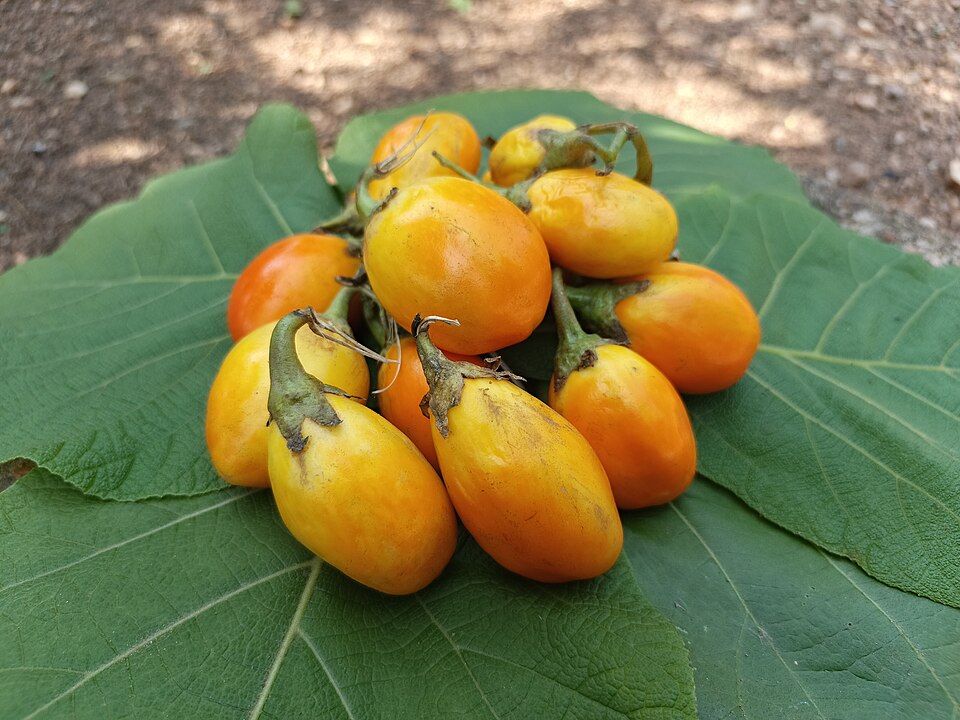
ABOVE: Aubergines come in a wide range of shapes and colours
Photos: Grey Geezer/Wikimedia Commons; Kod B/Wikimedia Commons (aubergines from Ivory Coast); Chixpix/Pexels
Nutritional benefits
Aubergine is one of those quietly supportive foods. It won’t spike your blood sugar or overwhelm your system; it works gently in the background. Its deep purple skin contains nasunin, a potent antioxidant that helps protect cells from oxidative stress, particularly in the brain. That alone makes it worth keeping the skin on when cooking.
It also offers:
Polyphenols that support metabolic function
Fibre to support digestion and blood sugar balance
Potassium for heart and nervous system health
Its ability to absorb healthy fats like olive oil makes it especially satisfying, helping meals feel complete and sustaining.
If you enjoy simple, grounded nutrition like this; practical, seasonal, and realistic, you can join Paula’s Sharp Bite newsletter for weekly insights, recipes, and support HERE.
In the kitchen
Aubergine rewards good cooking. Undercooked, it can be spongy. Cooked well, it becomes soft, rich and almost creamy. Salting beforehand can improve texture and reduce bitterness, though many modern varieties don’t require it. Roasting, grilling, or slow cooking are the best approaches; these bring out its depth and allow it to fully absorb flavours.
In New Zealand, aubergines sit comfortably alongside other late summer and early autumn produce like tomatoes, courgettes, capsicums, and fresh herbs. The aubergine is a natural fit for a more diverse, plant-rich way of eating that many people are moving toward.
It’s also a great vegetable for those wanting to reduce reliance on heavily processed foods. When paired with good fats, herbs, and whole ingredients, it becomes something deeply nourishing rather than just an add-on.
Add coconut oil to roasting dish and allow it to melt in the oven.
Slice aubergine in half lengthways and score the cut flesh. Toss pieces in the melted oil and season well.
Roast for 30–40 minutes until soft and golden, and remove from oven.
Mix yoghurt, garlic and lemon juice. Spoon over aubergine and top with herbs.
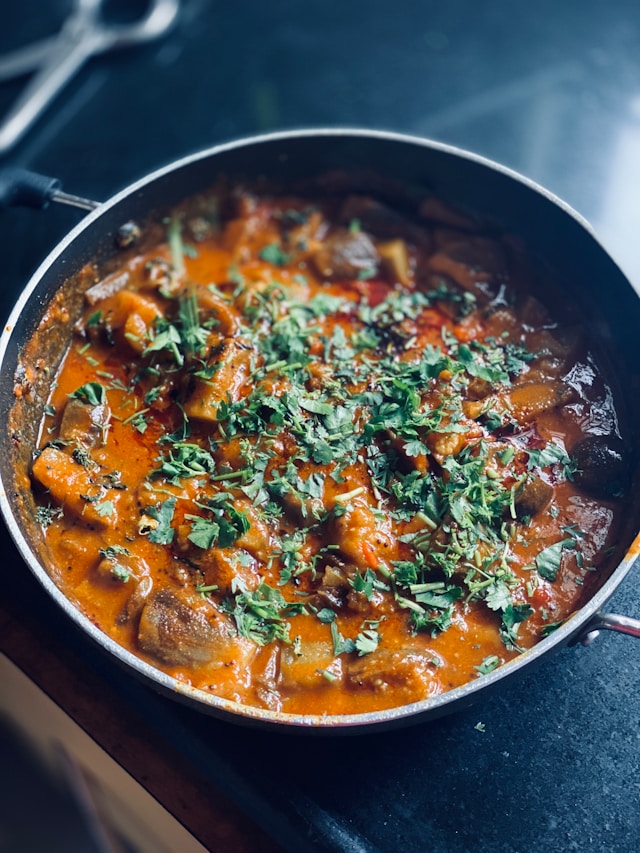
Aubergine & lentil stew
Serves 2
Ingredients
1 aubergine, diced
1 onion, chopped
1 clove garlic, crushed
1 carrot, diced
1 tin chopped tomatoes
½ cup red lentils
1 tsp cumin
1 tsp smoked paprika
2 cups vegetable stock
olive oil
salt and pepper
Photo: Sanket Shah, Unsplash
Method
Heat oil and sauté onion and garlic until soft.
Add aubergine and cook until lightly browned.
Stir in remaining ingredients, and simmer 25–30 minutes until lentils are tender.
Season and serve.
Want more seasonal nutrition inspiration?
I’m Paula Sharp, nutritional therapist and founder of Paula Sharp Nutrition, supporting women to nourish their health with sustainable food and mindset habits.
If you’d like seasonal recipes, practical nutrition tips and evidence-based wellness insights delivered straight to your inbox, I’d love you to join my newsletter. Sign up at: www.paulasharpnutrition.com
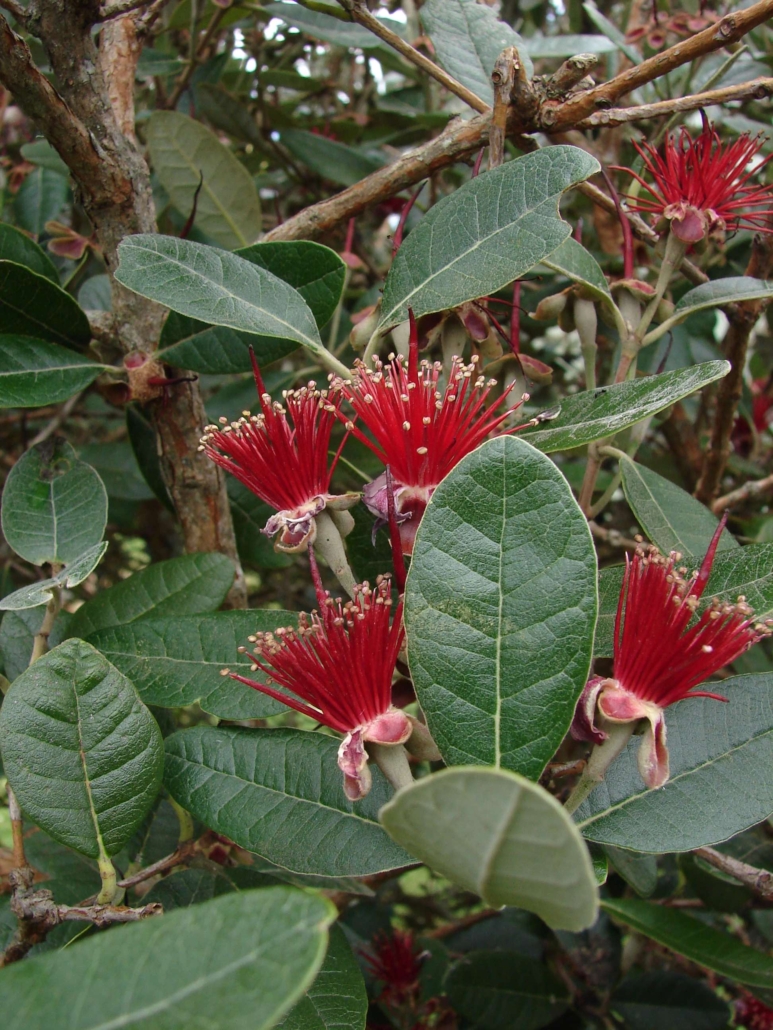
As the air cools and the leaves begin to turn, a familiar scent signals the arrival of one of New Zealand’s most iconic seasonal fruits, the feijoa.
With its unmistakable perfume and tangy-sweet flavour, the feijoa is more than just a garden staple, writes Paula Sharp; it’s nutrition packed in a fibrous skin, and it has a firm place in childhood memories and Kiwi culture.
We hope you enjoy this free article from Organic NZ. Join us to access more, exclusive member-only content
A brief history
Feijoas (Feijoasellowiana, formerly Accasellowiana) are native to the highlands of southern Brazil, Paraguay, Uruguay, and northern Argentina.
They were introduced to Aotearoa New Zealand in the early twentieth century and quickly found a natural home in our temperate climate.
Over time, feijoas have become so embedded in New Zealand life that many people assume they are native. They are in the myrtle family – along with pōhutukawa and rata, whose flowers are similar.
From schoolyard swaps to overfilled buckets left at the gate, feijoa season is a community event.
Feijoas may be small, but they pack a big nutritional punch. They are particularly rich in vitamin C, supporting immune function as we head into the cooler months, exactly when many people begin to feel run down.
They are also high in dietary fibre, especially soluble fibre, which helps nourish beneficial gut bacteria and support digestion. For people navigating bloating, sluggish digestion, or changing hormones, this kind of gentle, food-first support can be incredibly powerful.
Feijoas contain antioxidants such as polyphenols, helping to reduce inflammation and protect cells from oxidative stress. They also provide potassium, supporting heart health and fluid balance
Interestingly, feijoas contain natural compounds that may support mood and calm the nervous system, perhaps part of the reason they feel so comforting to eat.
Autumn is a natural time to reset. If your energy feels low, digestion is off, or hormones are shifting, small changes using seasonal food, like feijoas can make a real difference. For personalised, practical support, visit www.paulasharpnutrition.com or email paulasharp31@icloud.com.
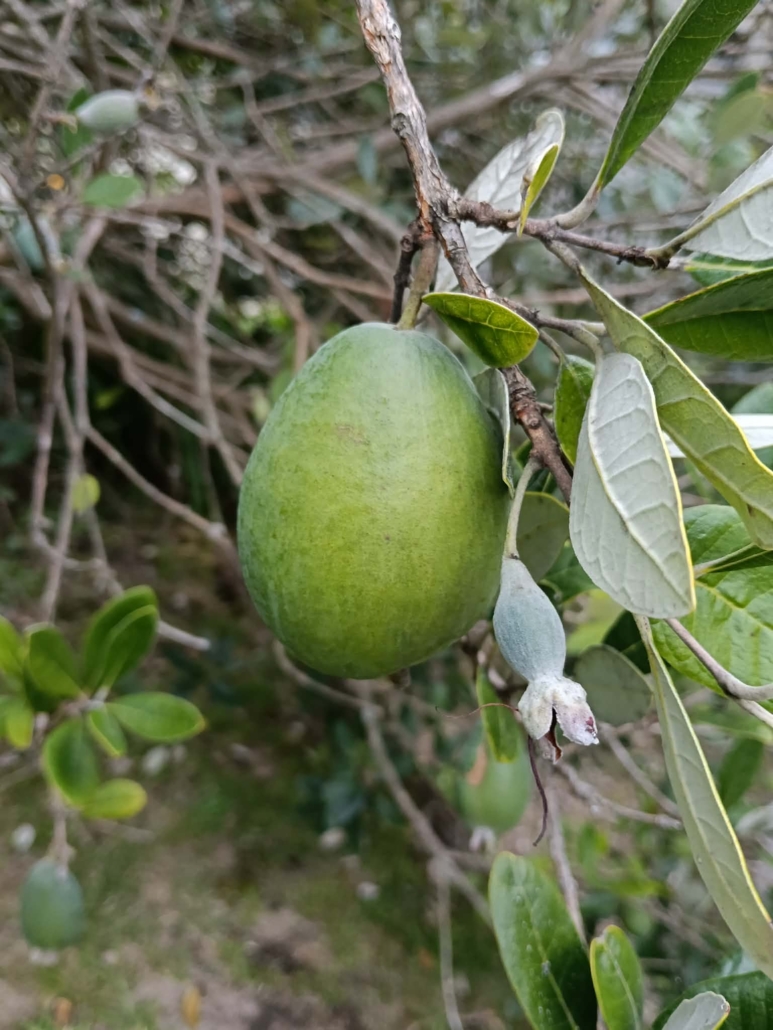
Growing feijoas at home
Feijoa trees are well suited to organic growing and are relatively low maintenance, making them ideal for home gardens. They thrive in full sun and well-drained soil and are hardy once established.
For the best fruit production, plant two varieties to encourage cross-pollination. Varieties such as Apollo, Unique, and Kaiteri perform well across many regions of New Zealand.
Feijoas benefit from regular watering during dry periods and a layer of organic mulch to retain moisture and support soil health. Feeding with compost or organic fertiliser in spring will encourage strong growth and fruiting.
One of the joys of feijoas is that the fruit drops when ripe, no picking required. Simply gather them from the ground each day during the season. Just be quick, as birds and insects love them too.
Feijoa season often brings abundance; healthy trees can be BIG and therefore the harvest is vast. Rather than letting the fruit go to waste, this is a perfect opportunity to preserve, share, and get creative in the kitchen. Feijoas freeze well (simply scoop out the flesh), making them an easy addition to smoothies, baking, or desserts through the winter.
Simple feijoa recipes
Feijoa & ginger compote
.Fabulous for breakfast, dessert or a snack. Serves 2.
Ingredients
10–12 ripe feijoas
2 tbsp honey or maple syrup
1 tsp freshly grated ginger
juice of ½ lemon
splash of water
Method
Scoop out the feijoa and place in a saucepan with the honey, ginger, lemon juice, and water.
Gently simmer for 10–15 minutes until soft and fragrant.
Allow to cool slightly before serving.
Serve with: Greek yoghurt, porridge, or over pancakes. Stores well in the fridge.
Feijoa crumble
Filling
12–15 feijoas, scooped
1 apple, grated
1 tbsp honey or a handful of raisins
1 tsp cinnamon
Topping
1 cup rolled oats
½ cup almond meal
2 tbsp coconut oil (melted)
2 tbsp maple syrup
Method
Preheat oven to 180°C.
Combine filling ingredients and place in a baking dish.
Mix topping ingredients until crumbly and sprinkle over the fruit.
Bake for 25–30 minutes until golden.
Serve with yoghurt or cream.
Want more seasonal nutrition inspiration?
I’m Paula Sharp, nutritional therapist and founder of Paula Sharp Nutrition, supporting women to nourish their health with sustainable food and mindset habits.
If you’d like seasonal recipes, practical nutrition tips and evidence-based wellness insights delivered straight to your inbox, I’d love you to join my newsletter. Sign up at: www.paulasharpnutrition.com
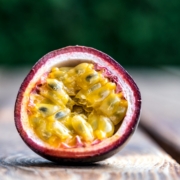
Wrinkled on the outside, vibrant and jewel-like inside, passionfruit is one of New Zealand’s most distinctive summer fruits.
Beyond its distinctive aroma and tangy sweetness, passionfruit offers impressive nutritional benefits, supporting digestion, immunity, heart health and even mood. Small but mighty, this fruit earns its place as more than just a decorative topping, as Paula Sharp elaborates.
We hope you enjoy this free article from Organic NZ. Join us to access more, exclusive member-only content
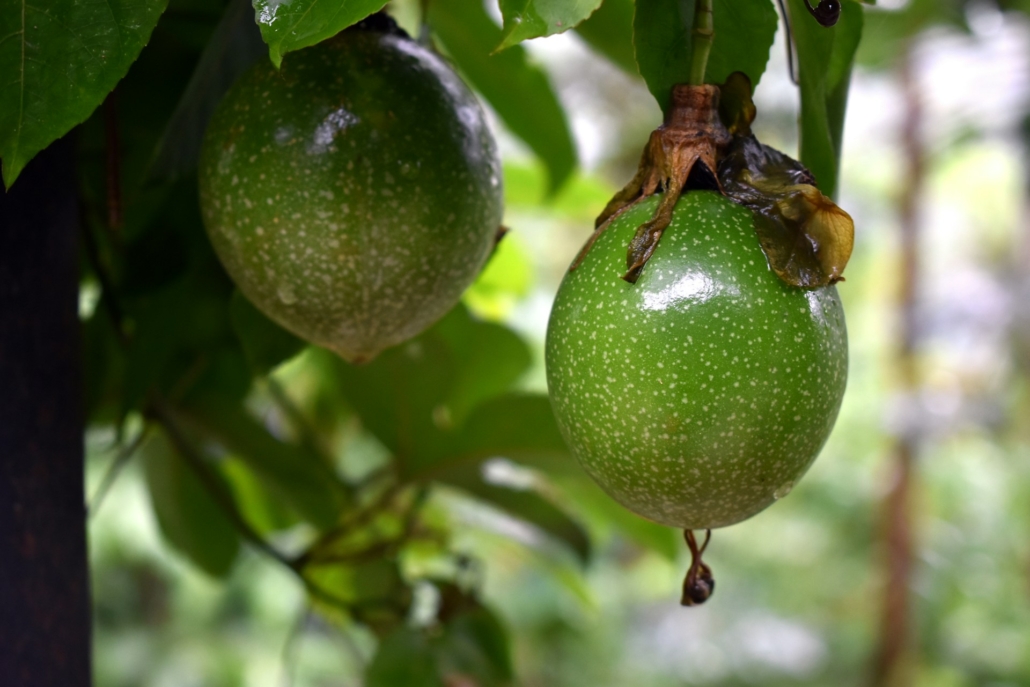
Growing passionfruit
Grown widely across warmer regions, particularly in home gardens and organic orchards, passionfruit thrives with minimal intervention when conditions are right, making it a natural fit for organic growing systems. You can grow it from seed, generally from October to May.
Passionfruit (Passiflora edulis) likes moist, fertile soil and a warm, sunny and sheltered spot.
A framework, such as wires or trellis, is essential for the vine to to climb up. It can be grown alongside a fence, with wires, or even in a tub, with bamboo stakes or tub trellis.
Photo: Eka P. Amdela / Unsplash
A nutrient-dense favourite
Passionfruit is rich in vitamins, minerals and plant compounds that support whole-body health. Just one fruit contains a meaningful amount of vitamin C, essential for immune function, skin health and collagen production. Vitamin A and carotenoids contribute to eye health and cellular repair, while potassium supports healthy blood pressure and heart rhythm.
Focus on fibre
What truly sets passionfruit apart is its fibre content. The edible seeds and pulp provide both soluble and insoluble fibre, supporting digestive health, bowel regularity and beneficial gut bacteria. For those focusing on blood sugar balance, fibre helps slow the absorption of natural sugars, making passionfruit a smart addition to meals rather than a spike-and-crash snack.
Gut health and digestion
Traditionally passionfruit is used in herbal medicine systems for its calming properties, but modern nutrition also highlights its role in digestive wellbeing. The fibre feeds beneficial gut microbes and supports healthy gut motility, the coordinated muscular contractions that move food efficiently through the digestive tract.
The polyphenols in passionfruit act as antioxidants, helping to reduce inflammation in the digestive tract. In organic systems, where soil health is prioritised, fruits like passionfruit often show higher polyphenol content. Healthy soils produce resilient plants, and that resilience is reflected in their nutritional profile.
Photo: Bluesnap / Pixabay
Heart and metabolic support
Passionfruit contains potassium, magnesium and plant sterols that collectively support cardiovascular health. Fibre plays a role in lowering LDL cholesterol, while antioxidants help protect blood vessels from oxidative stress.
For those managing insulin resistance or aiming for metabolic balance, passionfruit works best paired with protein or healthy fats, for example alongside yoghurt, nuts or seeds to further stabilise blood sugar levels.
A gentle mood booster
Interestingly, compounds found in the passionflower family have been studied for their calming effects on the nervous system. While the fruit itself is milder than medicinal extracts, its magnesium content and antioxidant profile can support stress resilience as part of a balanced diet. The sensory experience alone, that tropical aroma and burst of flavour, often brings a moment of joy, which is no small thing in today’s busy world.
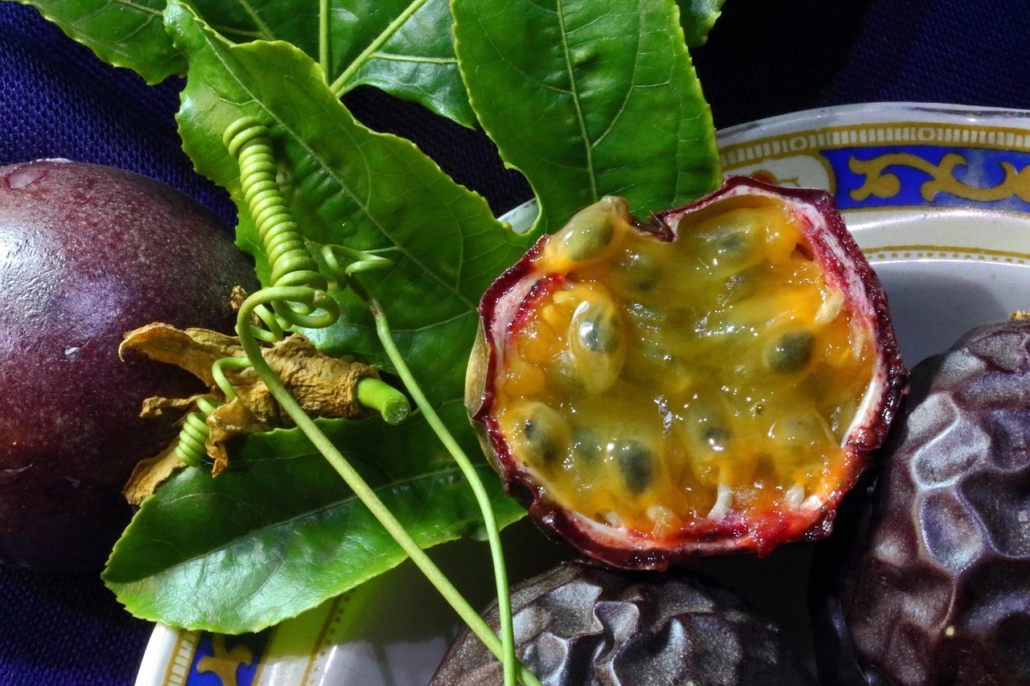
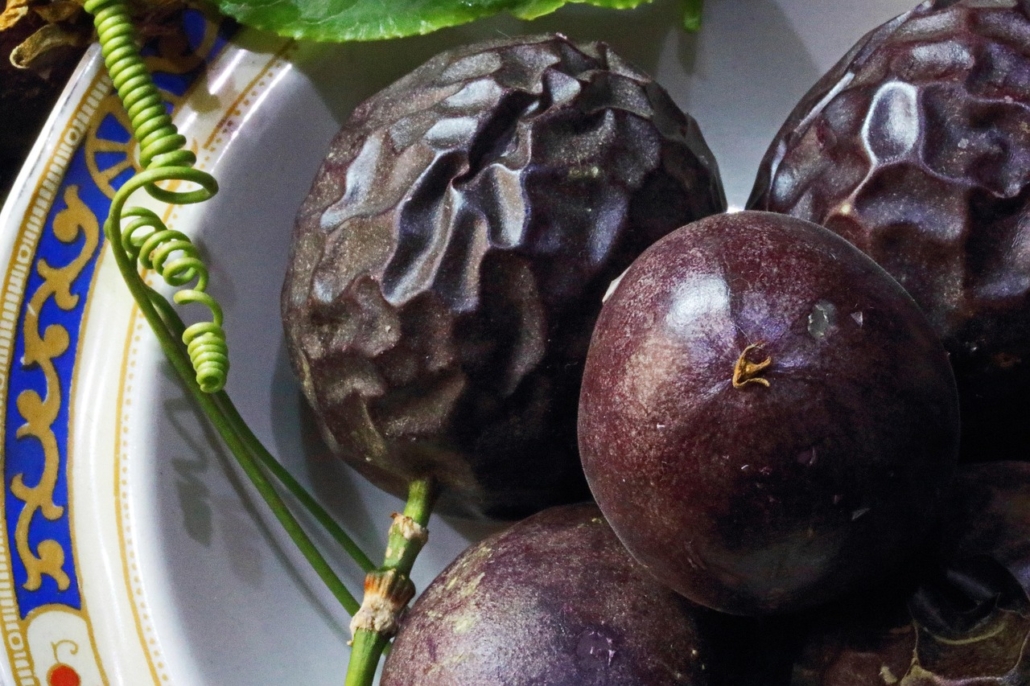
Choosing and using passionfruit
Ripe passionfruit should feel heavy for their size with wrinkled skin – smooth skins usually indicate under ripeness. Organically grown fruit may show more surface imperfections, but inside, the pulp remains vibrant and nutrient-rich.
Passionfruit requires little preparation: simply halve, scoop and eat. The seeds are entirely edible and contribute much of the fibre and beneficial fats.
Photo: Bluesnap / Pixabay
Simple Passionfruit Recipes
Passionfruit Coconut Chia Pudding
Serves 2
Ingredients
2 tbsp chia seeds
1 cup organic coconut milk or unsweetened almond milk
pulp of 2 ripe passionfruit
½ tsp vanilla extract
optional: drizzle of raw honey or maple syrup
Method
Mix all ingredients in a bowl or jar.
Stir well, cover and refrigerate for at least 2 hours or overnight.
Serve topped with fresh berries or toasted coconut.
Photo: Monika Borys, Unsplash
Passionfruit Yoghurt Dressing
Perfect for both fruit salads or leafy greens
Ingredients
pulp of 1–2 passionfruit
½ cup unsweetened Greek or coconut yoghurt
1 tsp olive oil
pinch of sea salt
Method
Whisk all ingredients until smooth.
Use immediately or store in the fridge for up to two days.
Passionflower Tea
The fruit offers vibrant nutrition, but also the leaves and flowers of the passion vine, particularly species such as Passiflora incarnata. This is traditionally drunk as a herbal tea (or herbal tincture) because of its renowned calming properties.
Passionflower tea is useful when you are feeling: mild anxiety and nervous tension, restless sleep, and/or stress-related digestive discomfort.
The plant contains flavonoids and alkaloids thought to gently influence GABA receptors in the brain. These promote relaxation without heavy sedation. It’s often used as part of a bedtime routine or during heightened stress.
NB. While considered safe, it’s not recommended during pregnancy, and anyone on sedative medication should seek professional guidance before use.
How to make passionflower tea
Place 1 teaspoon dried organic passionflower (leaf and flower) in a teapot or infuser. Pour over a cup of ‘near to’ boiling water.
Cover and steep for 5–10 minutes. (The longer it’s left, the stronger the flavour and herbal properties. As a sleep aid, steep for 10 minutes or more).
Strain and enjoy warm.
Ideally, for sleep support, drink 30–60 minutes before bed. For daytime calm, enjoy mid-afternoon.
Photo: CollectingPixels / Pixabay
Want more seasonal nutrition inspiration?
I’m Paula Sharp, nutritional therapist and founder of Paula Sharp Nutrition, supporting women to nourish their health with sustainable food and mindset habits.
If you’d like seasonal recipes, practical nutrition tips and evidence-based wellness insights delivered straight to your inbox, I’d love you to join my newsletter. Sign up at: www.paulasharpnutrition.com
Photo at top of article: Michael Kucharski / Unsplash
https://organicnz.org.nz/wp-content/uploads/sites/2/2026/02/michael-kucharski-dVBxFStU7kQ-unsplash.jpg12801920membershiphttps://organicnz.org.nz/wp-content/uploads/sites/2/2024/09/OrganicNZ-2024-Masthead.pngmembership2026-02-27 01:30:582026-02-27 01:31:00Passionfruit: Small fruit, big benefits
Soil & Health Auckland has the pleasure of hearing from Savannah Carter-Green, who runs the Kai Rākau Project at Auckland Council’s Sanders Reserve on the North Shore.
All welcome.
The Kai Rākau (Food Tree) Project is a community collection of heritage fruit, nut and subtropical trees, plus native medicinal trees and plants for the purposes of education, protection and heritage.
Savannah will tell us:
About how and why the project began
Where it is now
and its future goals and aspirations
Thursday 12 February 2026
7pm start time – sign-in, koha, and time to browse the sales tables.
7: 30pm – general business and announcements followed by our guest speaker, and question time.
9 pm Supper time – plate for our shared supper is always welcome
VENUE: Western Springs Gardens Community Halls, 956 Great North Road, Western Springs, Auckland
Offers of help with setting up from 6:40pm or tidying up afterward are gratefully accepted!
If you wish to download the ‘flyer’ above, you can do so here.
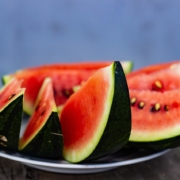
Few foods say ‘New Zealand summer’ quite like watermelon. Crisp, refreshing and naturally sweet, the watermelon is more than a picnic staple: it’s a nutritional ally for hydration, heart health and skin vitality.
With its high water content and vibrant pink-red flesh, watermelon earns its place as one of summer’s most supportive seasonal foods, as Paula Sharp writes.
We hope you enjoy this free article from Organic NZ. Join us to access more, exclusive member-only content
The watermelon (Citrullus lanatus) is believed to have originated in Africa over 5000 years ago, where it was valued not only for its sweetness but its ability to store water in hot, dry climates. Archaeological evidence shows watermelon seeds placed in Egyptian tombs, highlighting its role as a life-sustaining food. From Africa, watermelons spread through the Mediterranean and Asia, eventually becoming a summer fruit worldwide.
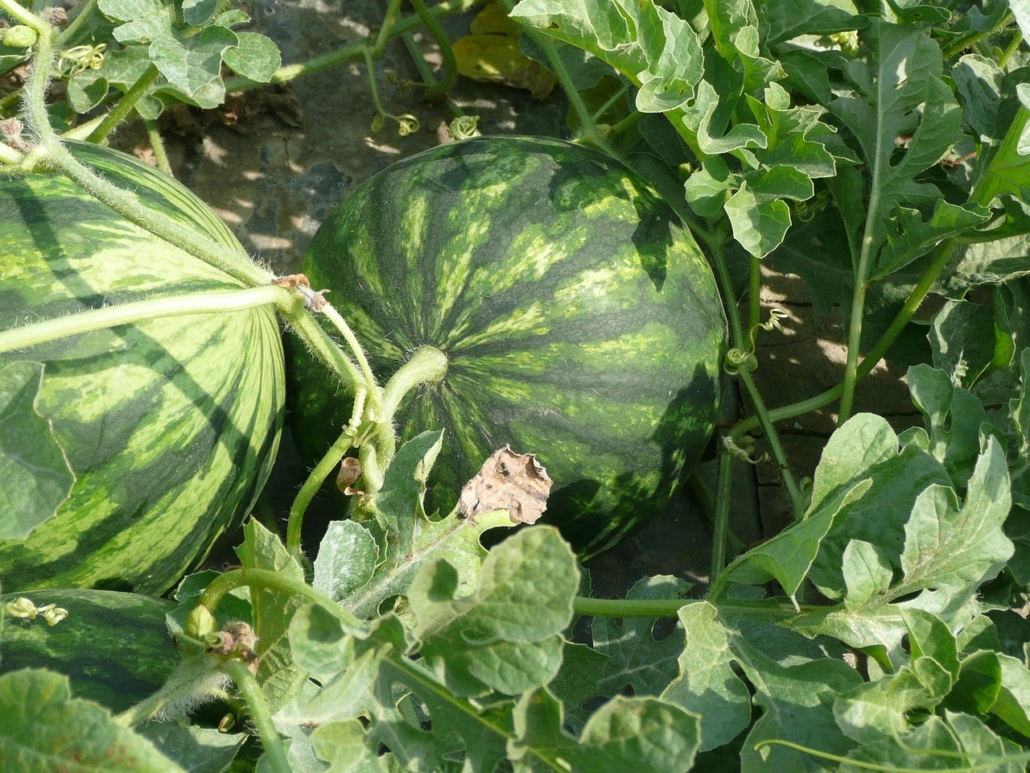
Growing watermelons
Today, watermelons are grown seasonally in New Zealand, particularly in warmer regions with long sunny days and free-draining soils. They thrive in warm, sunny conditions and need room to sprawl. They prefer fertile, compost-rich soil with good drainage and consistent watering, particularly while fruit is forming.
Seeds are best planted after the last frost, once soil temperatures are reliably warm. Organic growers often use mulch to retain moisture and suppress weeds. It usually takes 70-100 days from planting to harvesting, although some varieties take up to 120 days. A ripe watermelon sounds hollow when tapped and has a creamy yellow patch where it rested on the ground.
Seeds are best planted after the last frost, once soil temperatures are reliably warm. Organic growers often use mulch to retain moisture and suppress weeds.
It usually takes 70-100 days from planting to harvesting, although some varieties take up to 120 days. A ripe watermelon sounds hollow when tapped and has a creamy yellow patch where it rested on the ground.
Photo: Lorenzo Andreotti, Pixabay
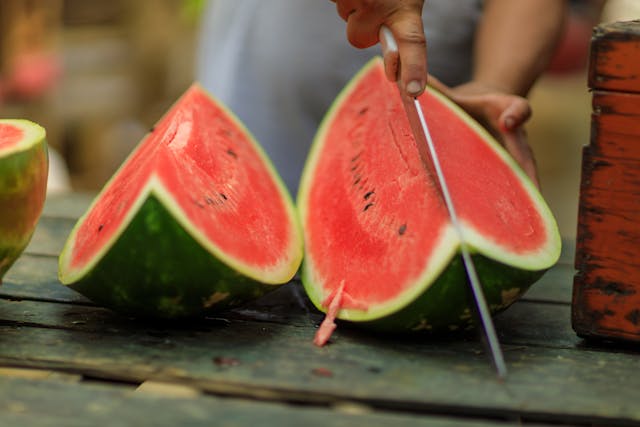
Super hydration
Watermelons are made up of around 90% water; they are among the most hydrating foods available. This is especially valuable during summer when dehydration can creep in unnoticed, particularly for children and older adults.
As well as water, watermelons provide electrolytes such as potassium and magnesium, which support fluid balance, muscle function and nerve signalling. For those who struggle to drink enough water, watermelons offer a refreshing and nourishing alternative.
Photo: Matheus Bertelli, Pexels
Nutrition
Despite its sweetness, the watermelon is relatively low in calories and delivers meaningful nutritional value. It provides vitamin C to support immune health and collagen formation, and vitamin A (as beta-carotene) to support skin, eye and cellular health.
The red flesh of the watermelon is rich in lycopene: a powerful antioxidant linked to reduced oxidative stress and improved heart health. Notably, watermelons contain highly bioavailable lycopene, making them a valuable addition to a cardioprotective diet.
Watermelons also contain the amino acid citrulline, which is found in the flesh and pale rind. Citrulline supports nitric oxide production in the body, helping to improve blood flow and support circulation and exercise recovery.
Cautions
Watermelons suit most, but not all people.
Diabetes or insulin resistance: natural sugars in watermelon can raise blood glucose more quickly when eaten on its own. Pairing it with protein or healthy fats and keeping portions moderate can improve tolerance.
Post bariatric surgery: Larger amounts of watermelon may trigger blood sugar swings or symptoms of dumping syndrome due to the high water and sugar content. Smaller portions, eaten slowly and alongside protein, are usually better tolerated.
Digestive sensitivities (including irritable bowel syndrome – IBS): Watermelon’s fructose content can cause bloating. Individual tolerance varies, so listening to your body is key.
Nature’s timing
For me, eating watermelon is a reminder of nature’s timing: a cooling, hydrating food arriving exactly when we need it most. Simple, joyful and deeply nourishing, watermelons show that good nutrition can be practical and pleasurable.
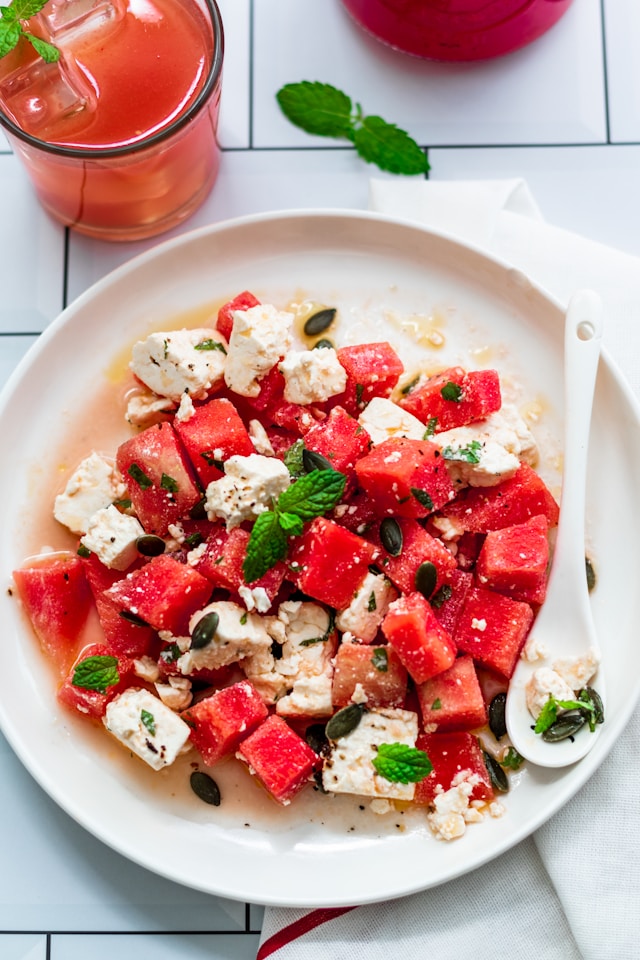
Watermelon, mint & feta salad
Ingredients
4 cups watermelon, cubed
½ cup organic feta, crumbled
handful fresh mint leaves, torn
1 tbsp extra virgin olive oil
freshly ground black pepper
optional: squeeze of lime juice
Method
Serve chilled.
Gently toss watermelon, feta and mint in a bowl.
Drizzle with olive oil, season with pepper and add lime juice if using.
Photo: Monika Borys, Unsplash
Watermelon hydration slushie
A great electrolyte. Serves 2.
Ingredients
3 cups watermelon, deseeded
juice of ½ lemon
pinch of sea salt
a few ice cubes
optional: fresh mint or basil
Method
Blend all ingredients until smooth. Serve immediately.
Photo: Marcelo Verfe, Pexels
AUTHOR BIO
PaulaSharp is a nutritional therapist based in Whakatāne, New Zealand, supporting people, especially women to improve digestion, hormones, energy and overall wellbeing through practical, holistic nutrition.
Join the Sharp Bite Newsletter: for seasonal nutrition tips, recipes and simple wellbeing insights, subscribe to Paula’s Sharp Bite newsletter at www.paulasharpnutrition.com.
Nutritional therapist Paula Sharp enthuses about the nutrition and flavour of the humble potato when in its seasonal ‘new’ incarnation, and shares a delicious potato salad recipe.
We hope you enjoy this free article from OrganicNZ. Join us to access more, exclusive member-only content
There’s something joyful about the arrival of new potatoes. Their appearance marks the shift into early summer — that moment when gardens start to speed up, days stretch out, and meals feel lighter, fresher, and closer to the earth. In New Zealand, new potatoes sit in a special place in our food culture: early‐season, delicate, full of flavour, and a perfect fit for our festive tables.
From an organic perspective, they’re a beautiful example of how nutrient density, flavour, and sustainable farming intersect. Grown without synthetic fertilisers or pesticides, organic new potatoes offer us a clean, wholesome staple that supports soil health, biodiversity, and local growers, while delivering exceptional nutrition on the plate.
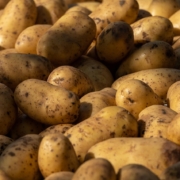
What makes a potato new?
‘New’ potatoes are planted and harvested earlier than main-crop potatoes, usually from late October through to early January, depending on region and soil warmth.
Rather than being cured like storage potatoes, they come straight to market with paper-thin skins and a moisture-rich interior. This is why they cook quickly, hold their shape well in salads, and have that signature creamy, subtly sweet flavour.
Their fragile skins are more than just a culinary bonus; they retain more vitamins and minerals compared with older, stored potatoes. Their freshness window is short, so in season matters.
New potatoes are more than an ingredient, in my opinion, they’re a story of soil, sustainability, and nourishment.
As we move into the festive season and the height of our growing year, they invite us to slow down, eat seasonally, and reconnect with the land beneath our food.
Photo: Potato foliage, by Anik Hasan, Pexels
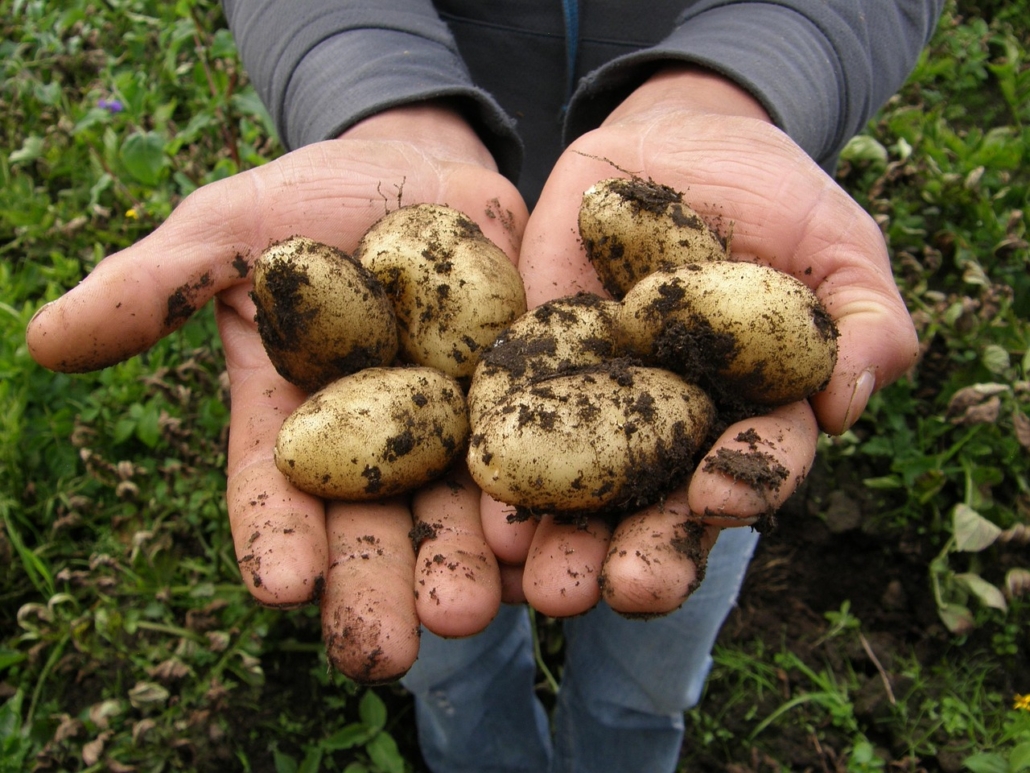
Growing new potatoes in early summer
Across the Bay of Plenty, Pukekohe, Northland, Hawke’s Bay, North Otago and other temperate climates, new potatoes thrive in warm soils with good drainage and plenty of organic matter.
Planting happens from late winter through mid-spring. Early varieties mature quickly, often ready within 60 to 90 days. Some of the common varieties are Jersey Benne, Cliffs Kidney, Rocket and Swift.
Mulching, companion planting, and natural pest management are key in organic systems. Many organic growers use biological controls, beneficial insects, and proper spacing to reduce disease and improve airflow. The result is a nutrient-dense crop produced in a way that enhances, rather than extracts from, the land.
Why organic matters for potatoes
Potatoes are among the crops most commonly treated with fungicides, herbicides, and sprout inhibitors in conventional systems.
Choosing organic means you’re supporting growers who prioritise soil structure, microbial health, and ecosystem balance, and it reduces your exposure to these chemicals. Organic potatoes come from systems where soil nutrition is built naturally through compost, cover crops, and crop rotation. This richer soil profile contributes to higher micronutrient content and superior flavour.
Photo: sbj04769 | Pixabay
Higher in nutrition
While potatoes are often lumped into the ‘carb’ category, new potatoes offer considerably more. Because they’re so fresh, they retain a higher proportion of:
Vitamin C – supports immunity, skin repair, and iron absorption. (Vitamin C degrades with heat but, depending on cooking time and method, new potatoes are likely to retain more than stored potatoes.)
Potassium – crucial for heart function, nerve signalling, and maintaining healthy blood pressure.
B vitamins – especially B6, essential for hormonal balance, mood regulation, and metabolism.
Dietary fibre (especially when the skin is left on) – helps with digestion, blood sugar steadiness, and gut microbiome resilience.
New potatoes naturally contain resistant starch, a type of fibre that feeds beneficial gut bacteria and supports metabolic health. Interestingly, resistant starch levels increase when potatoes are cooked and cooled — making new potatoes ideal for summer salads and picnic dishes.
In the kitchen: versatile, quick, and festive
With New Zealand’s cherry season lasting only a few weeks, from mid-December into early January, savouring them New potatoes shine when their skins are left on. A simple steam or boil is often enough. Toss with herbs, lemon, good olive oil, or cultured cream for an instant seasonal dish.
They’re also ideal for festive cooking, Christmas tables, barbecues, shared platters, and light summer lunches. Their ability to hold shape without becoming floury makes them perfect for salads.
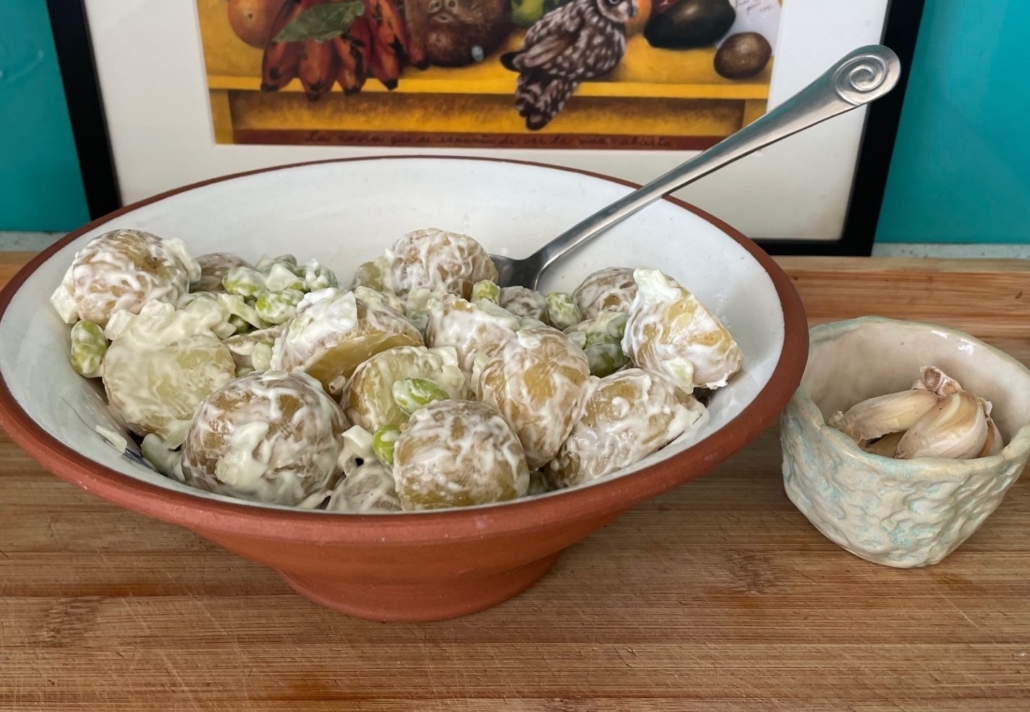
Creamy new potato salad
with edamame, herbs & lemon
Photo: Paula Sharp
Ingredients
1 kg new potatoes
1 cup shelled edamame beans (frozen)
3 spring onions, finely sliced
¼ cup fresh dill, chopped
¼ cup parsley, chopped
Dressing
½ cup whole-egg mayonnaise (or vegan mayo)
2 Tbsp Greek or coconut yoghurt
zest of 1 lemon
Juice of ½ lemon
1 tsp Dijon mustard
Sea salt and cracked pepper to taste
Method
Boil potatoes whole until just tender. Drain and cool slightly.
In a bowl, add frozen edamame beans, cover with boiling water, cover with a lid for approximately 3 minutes.
Slice cooled potatoes into halves or quarters (keep the skin on).
In a large bowl, add potatoes, edamame, spring onions, dill, and parsley.
Whisk dressing ingredients together. Pour over salad and gently fold to combine.
Refrigerate 30 minutes before serving.
AUTHOR BIO
Paula Sharp is a nutritional therapist supporting women’s health, digestion, hormones, skin, sleep, and energy through one-to-one consultations via Zoom. She’s also a local guest speaker in the Bay of Plenty and regular writer for Organic NZ.
Join Paula’s free newsletter – Sharp Bite – for weekly nutrition tips, seasonal recipes, and mindset inspiration.
Photo at top of article: Alexei_other | Pixabay
https://organicnz.org.nz/wp-content/uploads/sites/2/2025/12/potatoes-6980000_1280.Alexei_other.jpg8531280membershiphttps://organicnz.org.nz/wp-content/uploads/sites/2/2024/09/OrganicNZ-2024-Masthead.pngmembership2025-12-18 21:51:202025-12-22 17:07:16Small, sweet, and mighty
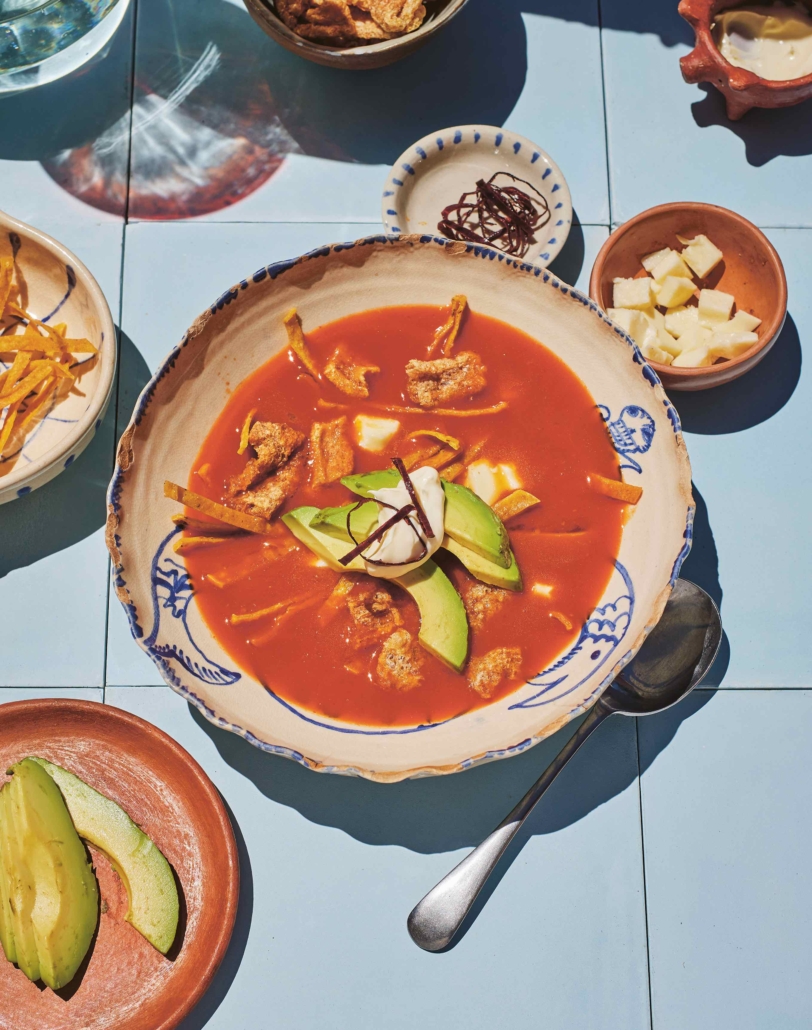
Sopa de tortilla is also known as sopa azteca or Aztec soup. It is a simple but delicious soup and, as the name hints, is full of tortillas. This soup has been on La Popular’s menu for years. Whenever we take it off, we get complaints. So it stays on.
Images and text from Provecho: Real Mexican Food at Homeby Daniella Guevara Muñoz, photography by Simon Bajada. Murdoch Books RRP $49.99. (Tortilla soup p.54-55)
We hope you enjoy this free article from OrganicNZ. Join us to access more, exclusive member-only content
What makes this soup so delicious are the different textures – crispy tortilla strips, soft avocado, chewy cheese and a dollop of cream.
The soup is made in two stages. First is the soup base (which you can pre-make and keep in the freezer) and the second is the assembly. This recipe is traditionally made with chicken stock, but if you are vegetarian you can use vegetable stock instead.
Serves 2 litres (8 cups) / 6
2 litres (8 cups) chicken stock (see page 221 for homemade) or vegetable stock
Soup base
8 guajillo chillies, deseeded
2 garlic cloves
1½ brown onions, cut into chunks
700 g (1 lb 9 oz) ripe tomatoes
½ bunch coriander (cilantro), leaves picked
1 teaspoon dried Mexican oregano
1 teaspoon ground cumin
6 corn tortillas (shop-bought or see page 253 for homemade), cut into quarters
20 g (¾ oz) salt
To garnish
1 guajillo chilli, to garnish
6 stale corn tortillas (shop-bought or see below, or page 253, for homemade), to garnish
200 ml (7 fl oz) vegetable oil
1 avocado
200 g (7 oz) cheese (queso panela if you can get it, but mozzarella works, too)
100 g (3½ oz) chicharrón or pork crackling (omit for vegetarian)
100 ml (3½ fl oz) thickened (heavy) cream
For the soup base, soak the guajillo chillies in boiling water until soft, about 5 minutes.
Once soft, drain them and put them in a blender or food processor with the rest of the soup base ingredients. Blend on high until you have a soft paste – it shouldn’t have any grittiness. Pass the base through a fine-mesh strainer.
For the soup, bring the stock to a slow boil in a stockpot, then add the soup base. Simmer until the soup thickens, about 30 minutes.
Meanwhile, prepare the garnishes. Using scissors, carefully cut the guajillo chilli into thin rings and cut the stale tortillas into 5 mm (1⁄4 inch) wide strips.
Pour the vegetable oil into a small saucepan and heat to about 180°C (350°F). I use a thermometer to test the oil, but if a piece of bread dropped in the oil browns in about 15 seconds, the oil is at the correct temperature.
Fry the chilli until crispy – don’t let the chilli burn, this happens in about 5–10 seconds – then place on paper towel to drain.
In the same oil, fry the tortilla strips until crispy, about 3 minutes – these won’t burn as easily. Place the strips on paper towel.
Halve the avocado, remove the seed and cut into slices. Put all the garnishes in separate bowls on the table.
Serve the soup in a large bowl. Each person can add whichever garnishes they want. I recommend: a handful of tortilla strips, cheese, avocado, chicharrón, a drizzle of cream, then the fried chilli. Keep adding more as you eat.
Corn tortillas
p.253
650 (1 lb 7 oz) Masa (page 250)
280 g (10 oz) masa harina (nixtamalised maize flour)
¼ teaspoon table salt (optional)
about 375 ml (1½ cups) warm water
In a mixing bowl, combine the masa harina and salt (if using). Gradually add the warm water while stirring with your hands. Continue to add water until the dough comes together and becomes soft and pliable.
The dough should hold together but not be overly sticky. If it feels too dry, add a little more water. If it’s too wet, add a bit more masa harina. Knead the dough for about 10 minutes to get the best result. It should be smooth and well combined. It must have a Play-Doh– like consistency, quite soft and a little bit sticky.
A good test is to make a tortilla in a press between two sheets of thin sandwich-bag plastic (see page 253). If the edge of the tortilla has deep cracks, the masa is too dry. A rough edge is normal.
You can keep masa for a couple of days in the fridge in an airtight container. If you want to use it, take it out of the fridge about an hour before you plan to use it. Knead thoroughly with your hand and add some water if necessary.
Divide the masa into small balls (about 30 g/1 oz), slightly smaller than a golf ball. You can make them larger or smaller depending on your preference.
Preheat a comal, hotplate or non-stick frying pan over medium– high heat. Place a ball of masa between two sheets of sandwich-bag plastic in the tortilla press (see the photographs on the following pages).
Press down firmly to flatten it into a round tortilla shape. Rotate the flattened tortilla with the plastic sheets 180 degrees, then press again gently. The tortilla should be approximately 1–2 mm (1⁄16 inch) thick.
Carefully peel off one of the plastic sheets, then place the raw tortilla (with the plastic) on the palm of your hand. The tortilla should be half on your hand, half hanging freely. Peel off the second sheet of plastic.
Lay the tortilla on the preheated hotplate or in the pan by placing the freely hanging tortilla on the hotplate first, then letting the rest of the tortilla roll off your hands.
You should come in with your hand, palm facing up, at an angle of about 45 degrees. Once the tortilla has hit the hotplate, rotate your hands about 90 degrees, rotating your palm towards the hotplate, pulling away from the tortilla.
This movement, if done smoothly, should release the tortilla from your palm without the tortilla falling on itself. This is a tricky movement, and I suggest practising this on the bench first (no heat).
Cook for about 30–60 seconds until the edge curls up slightly. Flip with a spatula and cook the other side for about 60 seconds, then flip again – if all goes well, it will puff up on the last flip.
(Tip: Don’t try to fix a wrongly placed fresh tortilla; it will get worse.)
Remove the cooked tortilla from the hotplate and stack it with the others in a clean tea (dish) towel in a chiquihuite. The stacking is important, as it will keep cooking the tortilla. Serve the freshly made corn tortillas warm to make your tacos.
https://organicnz.org.nz/wp-content/uploads/sites/2/2025/11/Tortilla-soup-p.54-55-low-res-scaled.jpg25602018membershiphttps://organicnz.org.nz/wp-content/uploads/sites/2/2024/09/OrganicNZ-2024-Masthead.pngmembership2025-11-28 12:57:162025-11-28 12:57:18Sopa de Tortilla – Tortilla Soup