Posts

Dark chocolate crunch bars (aka ‘healthy’ protein bars)

By Dr Linia Patel 

Many shop-bought protein bars hit your protein numbers, but they come with so many other sweeteners and additives that aren’t great for you to be eating habitually. With this recipe I tried to create a protein bar that was healthy.

Images and text from Food for Menopause by Dr Linia Patel, photography by Clare Winfield. Murdoch Books RRP $45.00

We hope you enjoy this free article from OrganicNZJoin us to access more, exclusive member-only content

Clients (especially those who are on the go a lot) are always asking me to recommend a protein bar. To be honest, there isn’t one that I would recommend for regular consumption! They’re okay as an occasional get-out-of-jail card, but not for regular consumption.

Many shop-bought protein bars hit your protein numbers, but they come with so many other sweeteners and additives that aren’t great for you to be eating habitually.

With this recipe, I tried to create a protein bar (without using protein powder) that was healthy. One that I would be happy to recommend my clients eat regularly. Each bar gives you about 5 grams of protein – perfect for a snack. They are high in healthy fats, so, as yummy as they taste, keep it to one per snack!

Makes 10-12 bars

Ready in 20 minutes, plus chilling

Vegan

Gluten free

Ingredients 

  • 2 tbsp tahini
  • 4 tbsp almond or peanut butter
  • 60g (scant ½ cup) dark (70%) chocolate chips
  • 200g (7oz) cooked quinoa
  • 70g (½ cup) whole unpeeled almonds, chopped
  • 30g (1oz) whole linseeds or flaxseeds

Method

  1. Line a small loaf, baking or cake tin with parchment paper.
  2. Either in the microwave or in a bowl set over a pan of gently simmering water, melt the tahini, nut butter and chocolate together until smooth.
  3. Add the rest of the ingredients and mix well.
  4. Tip into the prepared tin and chill for at least 1 hour, then cut into 10–12 small bars.

Tips

These will keep in the fridge for up to 10 days. If you like, you can drizzle with extra melted chocolate before slicing (as per the photo).


Spring into Kōanga!

By Tanya Batt

Tanya Batt shares the story of Spring into Kōanga, a seasonal celebration on Waiheke Island. It’s one of the Kai for Community projects run by the Once Upon an Island Charitable Trust These projects focus on reconnecting with true seasonal celebrations and the stories and traditions around growing, harvesting and sharing food in the Waiheke community.  

We hope you enjoy this free article from OrganicNZJoin us to access more, exclusive member-only content

Egg time! 

It’s egg time. Many people often fail to make the connection between eggs, Easter and spring – kōanga. Probably because we celebrate Easter (a northern spring festival) in Australia and New Zealand in autumn.

However if you are lucky enough to have the company of a few chickens, that connection will come as no surprise to you. At this time of year you can be sure of an egg for breakfast. But for many of us, eggs (if you eat them) come from shops and shops always have eggs regardless of the season.

When we lose the connection between our seasons and celebrations, a vacuum is created and celebrations become superficial. Instead of connecting us to our environment, they become focused on what we can buy and how things look, and reverence is often diminished or lost. Upcoming spring Halloween celebrations demonstrate this perfectly.

ABOVE: Laying the tāpapa beds, Piritahi Marae, Waiheke Island, September 2024

September: Laying the tāpapa beds 

Here on Waiheke, we’re seasonally celebrating with Spring into Kōanga – a story in two parts.

The first part took place during September with the return of the pīpīwharauroa (shining cuckoo), in the māra of the Island’s Piritahi Marae, with the laying of the tāpapa beds from which will grow the tipu of the kūmara. These tipu (shoots or slips) will then be sown later in October or early November.

The September event was led by whaea Maikara Ropata, and kaumatua Eugene Behan-Kitto, a master kūmara grower who learnt his growing skills from the late Kato Kauwhata (Ngāpuhi), kaumata and inaugural chairperson of Piritahi Marae. The hope is to grow enough tipu this kōanga, for both the marae māra and other community garden groups, and activate island wide uptake of growing kūmara.

Growing stories and kākano (seed) for the hue (gourd) were also shared in an informal kōrero about this treasured plant – another early arrival bought by the tipuna of tangata Māori. When young, the fruit of this plant can be eaten but as a dried mature fruit it was used a storage vessel, musical instrument and taonga. The day finished with a kōrero given by Mike Smith, a climate activist who has recently won the right to take several large companies in New Zealand to court for failure to curtail their carbon emissions.

Kūmara was the first cultivated crop grown in Aotearoa. Its legacy as a primary food source of the people of this country stretches back several hundred years. The māra kūmara falls under the domain of Rongo-mā-Tāne, the atua of cultivated food and of peace.

October: Pumpkins, corn, tomatoes and more 

Our second event was held on the grounds of another of our community gardens – the Surfdale food forest – on 20 October. The programme included a talk about growing tomatoes with one of our green-fingered gurus, Eddie Welsh, seasonal kai ideas from the Waiheke Home Grown Trust, a spring posy competition, egg decorating and plant giveaways for the summer garden.

The focus was on two plants in particular: pumpkins and corn. Both plants originate from the Americas, their cultivation extending back thousands of years.

There are lots of traditions and stories associated with corn. In Europe, a ‘corn mother’ or ‘the old woman’ or ‘corn dolly’ was made out of corn (though corn was a generic word used for grain). The corn dollies were kept in the barn to protect the crops during winter, and then ploughed into the ground come spring to ensure a good harvest.

This tradition resonates strongly with another story of corn, which is told by a number of North American First Nations people from the eastern and south-western areas, where from the first mother’s body grew the first maize plants.

Attendees were given free pumpkin seedlings and corn seed, accompanied by a story and a song and were encouraged to bring their harvests to the Autumn Kai for Community Waiheke Food Festival in April 2025. The pumpkin seedlings were germinated by the students of the Waiheke Primary School’s Garden to Table programme. This programme was also the source of the pink popping corn seed that will be distributed for growing over summer, again culminating in a island-wide ‘pop-a-thon’ in autumn.

A primary focus of the Kai for Community programme is to excite and support families to grow food at home, fostering the green hearts and fingers of young children. Both Spring into Kōanga events have been generously supported by the Waiheke Local Board and are part of the Waiheke Island Climate Action plan.

The relationship we have with the land we live on, the food we grow and eat and each other are the cornerstones of wellbeing. Celebrating our seasons brings these three important things together and helps create healthy and happy hapori (communities).


Tanya Batt is a word warbler and seed sower living on Waiheke Island. Her two passions – storytelling and gardening – have found a happy union in the work she does as a storytelling gardener at a local school and through her role as creative director of the Once Upon an Island Charitable Trust’s Kai for Community (KFC) projects.

www.imagined-worlds.net

ABOVE: Tanya Batt with Chinese cabbage

Steamed eggplant with spicy sauce drizzle

By Connie Cao 


This is an extremely simple dish that’s packed full of flavour. It’s great to cook during peak eggplant (aubergine) season in the garden.

Images and text from Your Asian Veggie Patch by Connie Cao, photography by Connie Cao. Murdoch Books RRP $45.00.

We hope you enjoy this free article from OrganicNZJoin us to access more, exclusive member-only content

Serves 3–4

Ingredients 

  • 400 g (14 oz) eggplant (aubergine) (a slim variety works best)
  • 1 spring onion (scallion), to garnish
FOR THE SAUCE
  • 2 garlic cloves
  • 2 teaspoons vegetable oil
  • 2 teaspoons sesame oil
  • 2 teaspoons white or black vinegar
  • 1½ tablespoons light soy sauce
  • 1 teaspoon chilli oil (see below or page 135 of the book)
  • 1 teaspoon finely chopped ginger
  • 1 teaspoon sugar

Method

  1. Cut off the ends of the eggplant, and then slice the eggplant into long halves or quarters.
  2. Finely chop the spring onion and garlic cloves.
  3. Place the eggplant into a steamer, and cook for 15 minutes or until tender.
  4. While the eggplant is steaming, mix the sauce ingredients together in a small bowl.
  5. Once the eggplant is ready, drain any excess water.
  6. Transfer the eggplant to a plate, drizzle the sauce on top and garnish with spring onion. Serve hot.

Homemade chilli oil

Makes 130 ml (4½ fl oz)

  • 200 g (7 oz) fresh chillies
  • 3 garlic cloves
  • ½ cup (125 ml) vegetable oil (or other neutral oil with a high smoke point)
  • Spices for flavouring (optional)
  • 1 cinnamon stick
  • 1 star anise
  • 1 bay leaf
  • 2 teaspoons Sichuan peppercorns
  • 2 teaspoons sesame seeds

Method

  1. Slice the chillies into small pieces, and dehydrate using the instructions in the Storing section [page 134 of the book].
  2. Once dried, break the chilli pieces into flakes using a mortar and pestle or spice grinder, and place them into a ceramic mug or bowl.
  3. Slice the garlic cloves.
  4. Heat the vegetable oil in a saucepan over low heat until it slowly starts to bubble.
  5. Add the garlic and your choice of spices (if using), and allow them to infuse for 5–7 minutes while the oil continues to slowly bubble away. Remove from the heat once the garlic has started to brown.
  6. Allow the oil to cool for a few seconds, then slowly pour it through a strainer and onto the chilli flakes, removing the garlic and spices in the process. Take care, as the chilli flakes will start to sizzle and pop.
  7. Gently stir to mix everything together, and set aside to cool.
  8. Once the chilli oil is cool, pour it into the jar. Place the lid on the jar, and allow the chillies to infuse the oil in the fridge for 2–3 days. Use within 3–4 weeks.
Book cover image: Connie Cao, Melbourne permaculture gardener, homesteader, photographer and digital content creator, in her backyard harvesting long beans (also called asparagus beans, Chinese long beans, snake beans, yard beans, yard long beans)

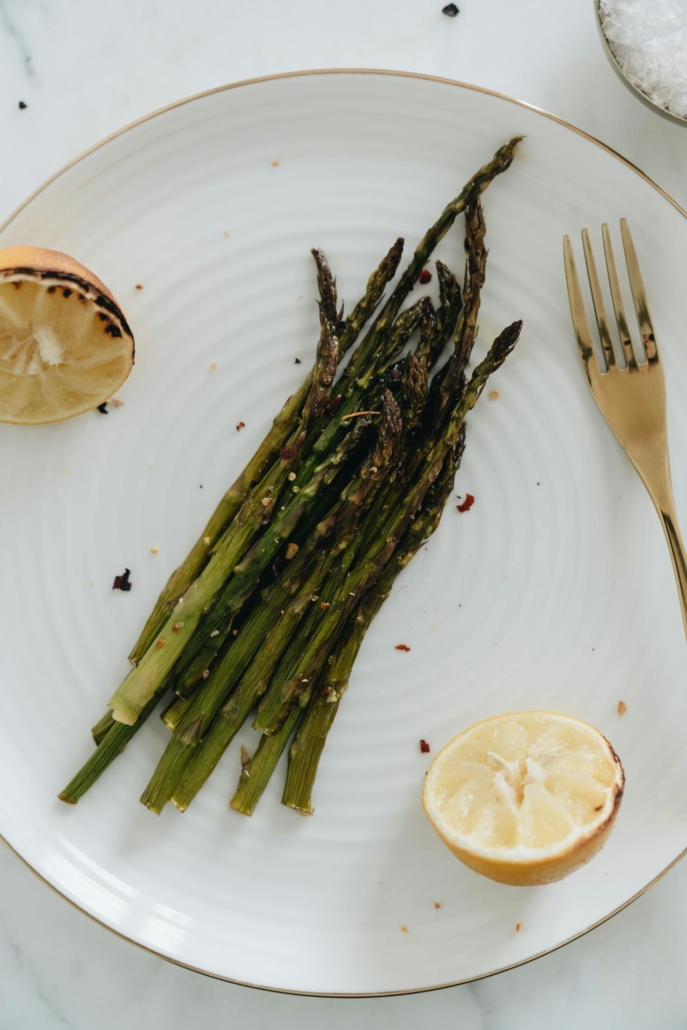
Asparagus & Lemon Walnut Crumble 

Recipe by Margo Flanagan and Rosa Power
Photography by Margo Flanagan and Susannah Blatchford  

We hope you enjoy this free article from OrganicNZJoin us to access more, exclusive member-only content

Feeds: 6  | Time: 10 minutes 

Ingredients 

  • 2 tablespoons cooking oil  
  • 2 bunches asparagus spears, ends snapped off  
  • ½ teaspoon sea salt  
  • Lemon Walnut Crumble  
  • 1 tablespoon cooking oil  
  • ¾ cup walnuts, roasted and chopped  
  • 2 garlic cloves, crushed and finely chopped  
  • ½ teaspoon sea salt  
  • ½ lemon, zest and juice  

Method 

  1. Preheat the oven to 200°C (400°F).  
  1. Heat the cooking oil in a frypan. When it’s hot, add the asparagus and salt. Cook for 2 minutes, give it a toss, then cook for another 1–2 minutes. Once the asparagus is cooked but still has a bite to it, transfer it to a plate.  
  1. Using the same frypan, add the cooking oil, walnuts, garlic and salt. Cook, stirring frequently (being careful not to let them burn) until golden brown (about 3 minutes). Add the lemon zest and juice and cook for another 1–2 minutes, stirring frequently. Remove the pan from the heat.  
  1. To serve, top the asparagus with a generous portion of the walnut crumble.  
  1. This is best eaten straight away.

SWAP  

Walnuts for any nut or seed you have in the pantry. We love using pumpkin seeds or almonds. The walnut crumble can be served atop any other vegetable when asparagus is not in season. Refer to Swap with the Seasons (page 12). 

TIP  

The asparagus season is short, so make use of the woody asparagus ends that otherwise would be thrown in the compost. Freeze them to use in future soups or vegetable stocks. 

DELICIOUS WITH  

Herby Quinoa + Halloumi (page 36) and prawns, white fish or chicken. 


Extracted from More Salad by the Two Raw Sisters. Photography © Food: Margo Flanagan and Lifestyle: Susannah Blatchford. RRP$49.99. Out 10 September 2024. Published by Allen & Unwin NZ.  

Fat Hen & Cashew Cheese Tart

Recipe by Heidi Merika  

We hope you enjoy this free article from OrganicNZJoin us to access more, exclusive member-only content

A commonly foraged vegetable throughout the world, fat hen is a good source of protein, fibre, calcium, magnesium, potassium, vitamin C, vitamin A and trace elements, making this vegan tart — which uses both the seeds and leaves of the plant — highly nutritious. It is a lovely light lunch or dinner option, and smaller individual tarts are great in lunchboxes or to take on picnics. Add any savoury toppings you fancy. Some options are suggested below, but feel free to choose your own. 

SERVES 8  | 1 HOUR | GF 

Ingredients 

  • 1 large handful of fresh fat hen leaves 
DOUGH
  • ¼ cup (20 g) fat hen seeds  
  • 1 cup (100 g) almond meal  
  • 2 tablespoons coconut oil  
  • 1 tablespoon psyllium husk  
  • 1 tablespoon water 
CASHEW CHEESE  
  • 2 cups (310 g) raw cashews, soaked in cold water for 30 minutes  
  • 1 garlic clove, crushed  
  • 1 tablespoon nutritional yeast  
  • 1 tablespoon apple cider vinegar  
  • ½ teaspoon salt  
  • ½ teaspoon black pepper 
POSSIBLE TOPPINGS 
  • fresh fat hen leaves (blanched)  
  • roasted zucchini (courgette)  
  • roasted capsicum (pepper)  
  • sautéed mushrooms  
  • sliced tomato  
  • pitted olives  
  • capers, vegan feta, fresh herbs 

Method

  1. Preheat the oven to 160°C (315°F).
  2. Blanch the fat hen leaves by placing them in a heatproof bowl and pouring boiling water over them, then straining them immediately, pressing the water out of them. Set aside.  
  3. Place all the dough ingredients in a food processor and blend until they form a dough that pulls away from the sides. (You can also mix them together by hand if you don’t have a food processor.) The dough should stick together.  
  4. Press the dough into a loose-based flan (tart tin), or a shallow tray lined with baking paper. Blind-bake the dough for 15 minutes, then remove from the oven and leave to cool.  
  5. Turn the oven up to 180°C (350°F). Using a food processor, blend all the cashew cheese ingredients to a paste, adding a tablespoon of water if the mixture is too dry.  
  6. Pour or spoon the cashew cheese over the cooled tart base. Arrange the blanched fat hen leaves over the tart, then add your choice of toppings.  
  7. Bake for a further 20 minutes, until the crust is golden. Remove from the oven and leave to cool in the tin for 30 minutes, before cutting into eight slices for serving. The tart will keep in an airtight container in the fridge for 3–5 days. 

Images and text from p.178 of From the Wild by Heidi Merika, photography by Cath Muscat.
Murdoch Books RRP $55.00.  

Sliding into Spring 

By Setha Davenport

What does a ‘sliding scale’ price mean? I have been aware of this concept for years and had wanted to implement it in our business for several years as well, but had lacked the tech knowhow to create multiple prices for the same product until this winter.  

We hope you enjoy this free article from OrganicNZJoin us to access more, exclusive member-only content

What is a sliding scale? 

If you have not come across this beautiful format for allowing people to pay what they can afford for a product or service, it is worth looking into. Some might say that surely this isn’t a sound business decision? Won’t everyone simply choose the lowest price and leave you short-changed? Well, after a month of implementing this concept for our business, I can simply say, “No they won’t!”  

What we have found so far, is quite the opposite, and it is heartwarming to say the least. Before we go into the results we are witnessing, let me explain a bit more about the concept, and why we have chosen this for our business. Last year we DROPPED our seed packet prices across the board. What?! Why would we do that? We took all our seed packets and made them all $1 less overnight. That doesn’t sound like much, but when the total cost of a seed packet had been $4.00 that is a ¼ of the full price. The envelope printing and packing costs us $1.00 each so this was not a logical decision. It was one made from the heart.  

Photo: Felix Steckenborn, @phoenix_risenow

Deep connection with life 

We made this conscious choice after Cyclone Gabrielle, when we were clearly shown the power of community and our deep connection with all life and we wanted to give back. Give back for all the help we received then, give back to people who were struggling with the ever-increasing cost of living. We wanted to be part of the solution. Find a different way, a new model.  

I am indigenous. I am a seed keeper, I live with Nature, I am a part of her and I love her. I grow seeds and I sell them. I live with the land; I am part of the land and I own land.  

Merging Mother Earth’s teachings into business 

How can I take this bond with Nature and try to make a livelihood from her bounty? How can I be in these two worlds and find a way to blend them harmoniously? These are questions I often find myself pondering in the quiet and stillness of the night or while carefully tending a plant I want to see flourish. When I sit at my desk and tap on the computer keys to create ‘products’ for sale, I can feel very far away from the soil and seeds and the open air.  

I wanted to find a way to bring the reciprocity of nature into our business. I have long been inspired by my indigenous Cherokee ancestors and the way they lived for so long in harmony with Nature. How could I be profiting off Nature and still sustain this harmony? I see money as a resource, like compost or seeds. It is something we have created and when kept in circulation can help all. If we are open to a constant ebb and flow of money much like the tides or breathing and can trust that as it goes out into the world, it will flow back to us, I can see a more heart-centred, holistic approach to sharing the seeds. And that feels harmonious with Nature, with all Life.  

Photos: Setha Davenport

Making our seeds accessible 

We ultimately wanted anyone who desired access to high quality seeds for their garden to have them. This is very important to us. Always get in touch if lack of funds is standing in the way of accessing our seeds.  

So why have some of our prices increased this year? Well, we listened to some feedback. From customers, “your prices are too low! We know how hard you work and how much time, energy and money it takes to produce all the beautiful seeds. Don’t sell yourself short, invest in the seeds and your future.”  

So, we sat with that, and we talked more about having different prices for the same product. How we wanted people to be able to choose what they can afford. And despite having offered seeds at a reduced rate to low-income families over the years in our newsletter and mentioned on our website, we have not had a single enquiry.  

How does our sliding scale work? 

So please spread the word to anyone you know, who is struggling to afford seeds for their garden. The sliding scale is our updated take on helping to make seeds available to all, and at the same time allowing those who are more financially fortunate to support us and our small family seed business. Here is how it works. For seeds that we have a lot of or are easy for us to produce, we are offering multiple prices depending on what our customers feel they can afford: 

  • Low-income Price – Feeling strapped for cash, we’ve got you. Please pay this lower rate to make these seeds available to you and your family. ($3.00) 
  • Sustainability Price – This is the true cost to produce this packet of seeds. If this is what you can afford, please choose this price. In reciprocity there is balance. ($4.00) 
  • Support Price – Pay it forward. Are you secure in your income? Pay the price of 2 seed packets to offset those who are less stable financially. Thank you kindly. ($6.00) 
  • Generosity Price – Feeling flush, love what we do and want to give back to help us grow and flourish? Thank you very much, we are truly grateful. ($8.00) 

And the results?  

It is early days, but I can say with confidence, the majority of people pay the Sustainability Price. And I have seen enough people to put tears in my eyes, pay the Support and Generosity prices.  

It is a funny feeling to have that direct feedback that someone is choosing to pay more for a product and choosing to support you and your work. It puts a pep in our step and makes the long, sometimes gruelling days of self-employment seem more worthwhile.  

Interestingly, the same feeling can be had when someone chooses the Low-income Price. The feeling that we are helping someone gain access to high quality seeds for their garden to grow healthy food for their family is a very good feeling!  

This is the beauty of the system. When people rise to the challenge of choosing a price that works for them, and being honest with themselves about what they can afford to help the business they are purchasing from flourish, that is what happens.  

Opening to reciprocity 

I encourage any business contemplating a sliding scale pricing system to give it a try. It can be scary to make the shift, and fear or scarcity thinking can get in the way. Opening to the possibility of reciprocity in your work, your income, your livelihood… there is magic in this. It is the way forward to shift to away from scarcity to reciprocity and trust. Trusting that cooperation, not competition will make a better world and that people have big hearts and generally want others to succeed has been our experience thus far.  

I am feeling uplifted and supported heading into this new growing season, knowing we are growing more than just seeds, we are growing compassion, community and new possibilities. 


Setha Davenport has been growing food and seeds commercially for over 20 years. Featured in NZ Gardener, Good, Kiwi Gardener, Organic NZ, and Grow – Wāhine Finding Connection Through Food, she co-founded Setha’s Seeds in 2013 with a mission to see New Zealand heritage seeds flourish in Aotearoa and help gardeners and producers rediscover their magic, taste and health benefits. 

www.sethasseeds.co.nz  

Leek and Potato Stew

with cavolo nero, beans and bacon 

A simple, flavour-packed stew utilising spring veg and pantry staples – serves four.
Recipe and photos by Tess Lenart 

We hope you enjoy this free article from OrganicNZJoin us to access more, exclusive member-only content

This dish is equally delicious vegetarian, so feel free to omit the bacon and go for vegetable instead of chicken stock if you prefer. I find homemade stock has the best flavour, however shop-bought will work well also. 

I like to serve this stew for lunch with freshly baked bread or toast with lots of butter, or as an easy weeknight dinner. It freezes well and makes a great gift for anyone that could do with a warm hug in a bowl.  

The extra virgin olive oil drizzle and sprinkling of parmesan takes the dish to a whole new level so try to include these steps if you can!  

Ingredients 

  • 2 Tbsp extra virgin olive oil plus extra to drizzle 
  • 1 leek, quartered and thinly sliced 
  • 2 large cavolo nero leaves – stalks removed and chopped 
  • 2 garlic cloves, finely chopped 
  • 1 tsp fresh thyme leaves chopped 
  • 2 large potatoes 
  • 3 rashers of bacon (optional) 
  • 400g tin cannellini beans, drained and rinsed 
  • 1 pinch chilli flakes (optional) 
  • 750ml chicken (or vegetable) stock 
  • Parmesan cheese for serving (optional) 
  • 1 Tbsp chopped parsley for serving (optional) 
  • Salt and pepper 

Method

  1. Heat the olive oil in a large saucepan over medium-low heat. 
  2. Add the bacon (optional) and fry for 2 minutes. 
  3. Add the leeks and a pinch of salt and gently stir until the leeks soften and start to turn translucent.  
  4. Add the garlic, cavolo nero stalks, chilli flakes, thyme and a good grind of pepper. Cook for 3-4 minutes.  
  5. Add the potatoes and gently coat them with the aromats. 
  6. Pour in the stock and simmer for 30 minutes. 
  7. Season to taste, add the cannellini beans and simmer gently for 10 minutes. 
  8. Chop and add the remaining cavolo nero leaves and cook for a couple of minutes then take the saucepan off the heat. 
  9. Ladle the stew into bowls, drizzle with olive oil and top with chopped parsley and grated parmesan. 

Tess Lenart is the founder and chief chutney-maker at Rootstock Foods and The Rootstock Larder roadside stall in Algies Bay.  

Follow @rootstockjournal on Instagram for more delicious, homestyle recipes and kitchen garden inspiration.  

Shai Magic

Raglan organic grower, compost maker, gardening educator and permaculture landscape designer Shai Brod shares his compost-making and spring gardening tips with Mynda Mansfield.  

Shai Brod

The following content is only available to logged-in members – log in here. Not a member? Join us to gain access to a wide range of content.


Mynda Mansfield is a writer and long-time organic gardener who lives in Raglan. She runs a homeschool group for 12 children using Waldorf education principles, and has published a book called A Eurythmy Teacher’s Handbook.

www.myndamansfield.com  

Kūmara and white bean soup

This seasonal soup serves 6, is quick and easy to make, and very nourishing fare on a cold winter’s day. All the ingredients are easily sourced from an organic shop near you. Words and picture by Christine Dann.

We hope you enjoy this free article from OrganicNZJoin us to access more, exclusive member-only content

Ingredients

  • 1 onion, finely sliced
  • 1–2 cloves garlic, finely chopped
  • small piece fresh ginger, very finely chopped
  • 1 Tbsp oil
  • 4–5 medium sized kumara, peeled and cut into small cubes
  • 1 tsp mild curry powder
  • 1 tsp powdered vegetable stock, dissolved in 1 litre hot water
  • 1 400 g can white beans, drained (cannellini or butter beans)
  • salt and pepper, to taste
  • to garnish – plain yoghurt or coconut cream, paprika, fresh coriander or parsley

Method

  1. Sauté the onion, garlic and ginger gently in the oil, until the onion is soft but not coloured.
  2. Add the curry powder and cook gently, stirring, for one minute.
  3. Roll the cubed kūmara in the onion mix. Add the stock, and season to taste.
  4. Simmer until the kūmara is soft – around 15 minutes. Add the beans, and heat gently.
  5. Mash the soup with a potato masher to crush the kūmara and beans (or purée with a stick blender); thin with water if necessary; adjust the seasonings to taste.
  6. Garnish the bowls of soup with a swirl of yoghurt or coconut cream, a sprinkle of paprika, and/or chopped coriander or parsley leaves.

Christine Dann has been gardening organically for 50+ years, and is the author of four books on gardening and/or food, and numerous articles on aspects of gardening. 

The Wild and Wonderful World of Perennial Brassicas

By Peta Hudson and Philippa Jamieson

The following content is only available to logged-in members. Join us to gain access to a wide range of content.


Peta Hudson is a permaculture teacher and gardener, and former proofreader of Organic NZ
Philippa Jamieson is a writer, editor and author of The Wild Green Yonder: Ten Seasons Volunteering on New Zealand’s Organic Farms. 

Article first published in Organic NZ November/December 2019