
Posts

Small, sweet, and mightyย 

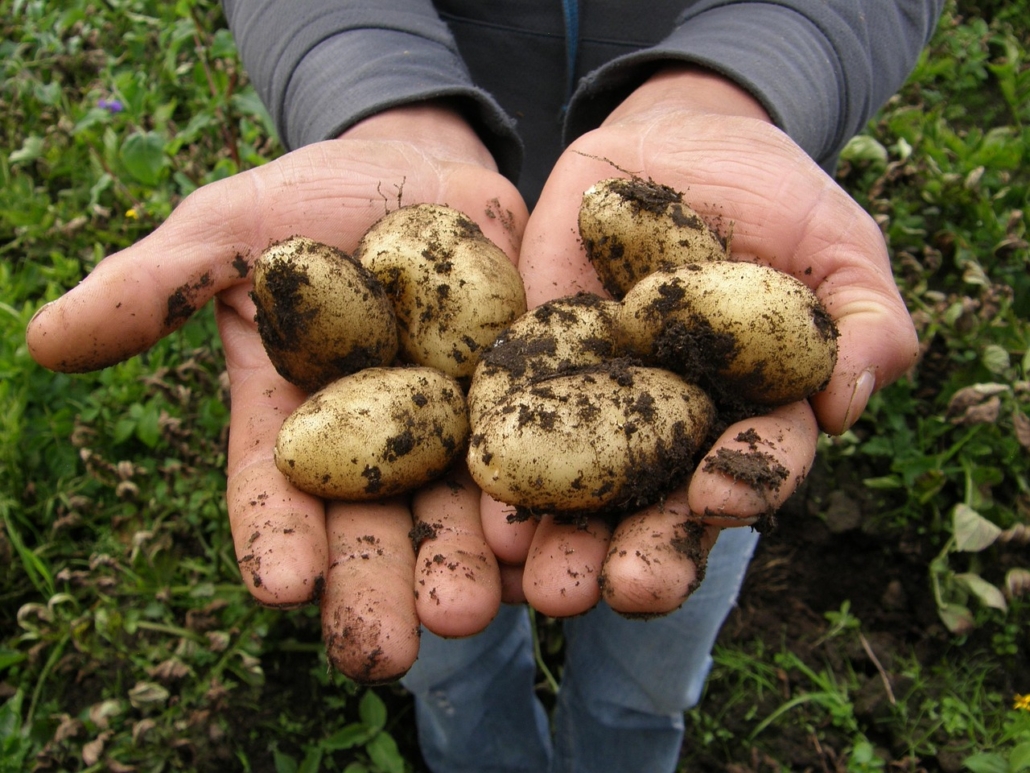
Nourishing new potatoes

Nutritional therapist Paula Sharp enthuses about the nutrition and flavour of the humble potato when in its seasonal โ€˜newโ€™ incarnation, and shares a delicious potato salad recipe.

We hope you enjoy this free article from OrganicNZJoin us to access more, exclusive member-only content

Thereโ€™s something joyful about the arrival of new potatoes. Their appearance marks the shift into early summer โ€” that moment when gardens start to speed up, days stretch out, and meals feel lighter, fresher, and closer to the earth. In New Zealand, new potatoes sit in a special place in our food culture: earlyโ€season, delicate, full of flavour, and a perfect fit for our festive tables. 
From an organic perspective, theyโ€™re a beautiful example of how nutrient density, flavour, and sustainable farming intersect. Grown without synthetic fertilisers or pesticides, organic new potatoes offer us a clean, wholesome staple that supports soil health, biodiversity, and local growers, while delivering exceptional nutrition on the plate. 

What makes a potato new? 

โ€˜Newโ€™ potatoes are planted and harvested earlier than main-crop potatoes, usually from late October through to early January, depending on region and soil warmth.

Rather than being cured like storage potatoes, they come straight to market with paper-thin skins and a moisture-rich interior. This is why they cook quickly, hold their shape well in salads, and have that signature creamy, subtly sweet flavour. 

Their fragile skins are more than just a culinary bonus; they retain more vitamins and minerals compared with older, stored potatoes. Their freshness window is short, so in season matters. 

New potatoes are more than an ingredient, in my opinion, theyโ€™re a story of soil, sustainability, and nourishment.

As we move into the festive season and the height of our growing year, they invite us to slow down, eat seasonally, and reconnect with the land beneath our food. 

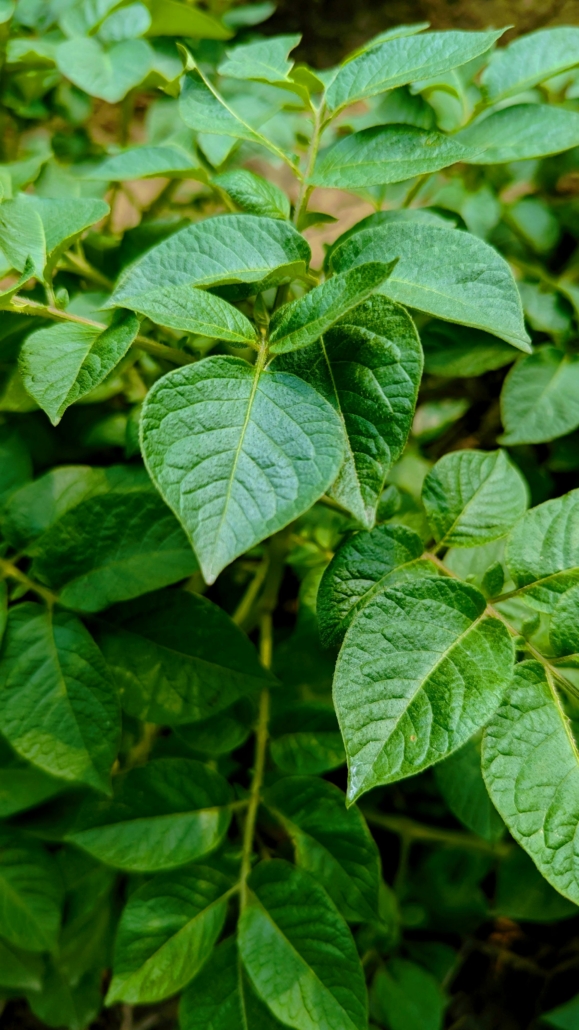
Photo: Potato foliage, by Anik Hasan, Pexels

Growing new potatoes in early summer 

Across the Bay of Plenty, Pukekohe, Northland, Hawkeโ€™s Bay, North Otago and other temperate climates, new potatoes thrive in warm soils with good drainage and plenty of organic matter.
Planting happens from late winter through mid-spring. Early varieties mature quickly, often ready within 60 to 90 days. Some of the common varieties are Jersey Benne, Cliffs Kidney, Rocket and Swift. 

Mulching, companion planting, and natural pest management are key in organic systems. Many organic growers use biological controls, beneficial insects, and proper spacing to reduce disease and improve airflow. The result is a nutrient-dense crop produced in a way that enhances, rather than extracts from, the land. 

Why organic matters for potatoes 

Potatoes are among the crops most commonly treated with fungicides, herbicides, and sprout inhibitors in conventional systems.

Choosing organic means youโ€™re supporting growers who prioritise soil structure, microbial health, and ecosystem balance, and it reduces your exposure to these chemicals. Organic potatoes come from systems where soil nutrition is built naturally through compost, cover crops, and crop rotation. This richer soil profile contributes to higher micronutrient content and superior flavour. 

Photo: sbj04769 | Pixabay

Higher in nutrition

While potatoes are often lumped into the โ€˜carbโ€™ category, new potatoes offer considerably more. Because theyโ€™re so fresh, they retain a higher proportion of: 

  • Vitamin C โ€“ supports immunity, skin repair, and iron absorption.ย (Vitamin C degrades with heat but, depending on cooking time and method, new potatoes are likely to retain more than stored potatoes.)
  • Potassium โ€“ crucial for heart function, nerve signalling, and maintaining healthy blood pressure. 
  • B vitamins โ€“ especially B6, essential for hormonal balance, mood regulation, and metabolism. 
  • Dietary fibre (especially when the skin is left on) โ€“ helps with digestion, blood sugar steadiness, and gut microbiome resilience. 

New potatoes naturally contain resistant starch, a type of fibre that feeds beneficial gut bacteria and supports metabolic health. Interestingly, resistant starch levels increase when potatoes are cooked and cooled โ€” making new potatoes ideal for summer salads and picnic dishes. 

In the kitchen: versatile, quick, and festive

With New Zealandโ€™s cherry season lasting only a few weeks, from mid-December into early January, savouring them New potatoes shine when their skins are left on. A simple steam or boil is often enough. Toss with herbs, lemon, good olive oil, or cultured cream for an instant seasonal dish. 

Theyโ€™re also ideal for festive cooking, Christmas tables, barbecues, shared platters, and light summer lunches. Their ability to hold shape without becoming floury makes them perfect for salads.

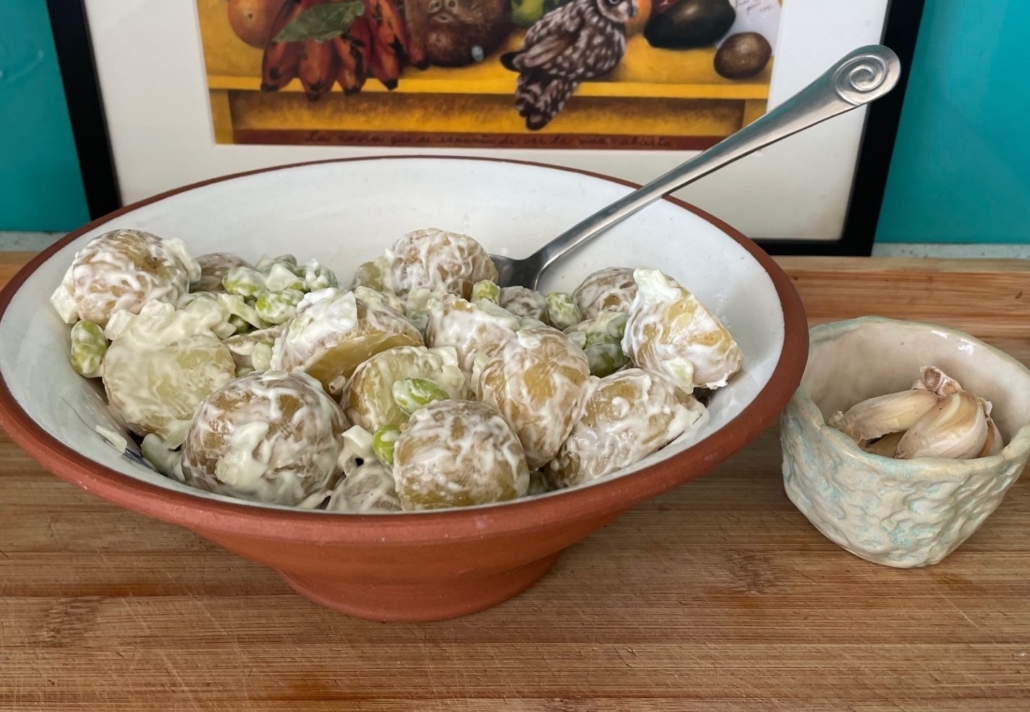
Creamy new potato salad

with edamame, herbs & lemon 

Photo: Paula Sharp

Ingredients

  • 1 kg new potatoes 
  • 1 cup shelled edamame beans (frozen) 
  • 3 spring onions, finely sliced 
  • ยผ cup fresh dill, chopped 
  • ยผ cup parsley, chopped 

Dressing

  • ยฝ cup whole-egg mayonnaise (or vegan mayo) 
  • 2 Tbsp Greek or coconut yoghurt 
  • zest of 1 lemon 
  • Juice of ยฝ lemon 
  • 1 tsp Dijon mustard 
  • Sea salt and cracked pepper to taste 

Method

  1. Boil potatoes whole until just tender. Drain and cool slightly.
  2. In a bowl, add frozen edamame beans, cover with boiling water, cover with a lid for approximately 3 minutes.
  3. Slice cooled potatoes into halves or quarters (keep the skin on).
  4. In a large bowl, add potatoes, edamame, spring onions, dill, and parsley. 
  5. Whisk dressing ingredients together. Pour over salad and gently fold to combine.
  6. Refrigerate 30 minutes before serving. 

AUTHOR BIO

Paula Sharp is a nutritional therapist supporting womenโ€™s health, digestion, hormones, skin, sleep, and energy through one-to-one consultations via Zoom. Sheโ€™s also a local guest speaker in the Bay of Plenty and regular writer for Organic NZ.

Join Paulaโ€™s free newsletter โ€“ Sharp Bite โ€“ for weekly nutrition tips, seasonal recipes, and mindset inspiration.

Photo at top of article: Alexei_other | Pixabay


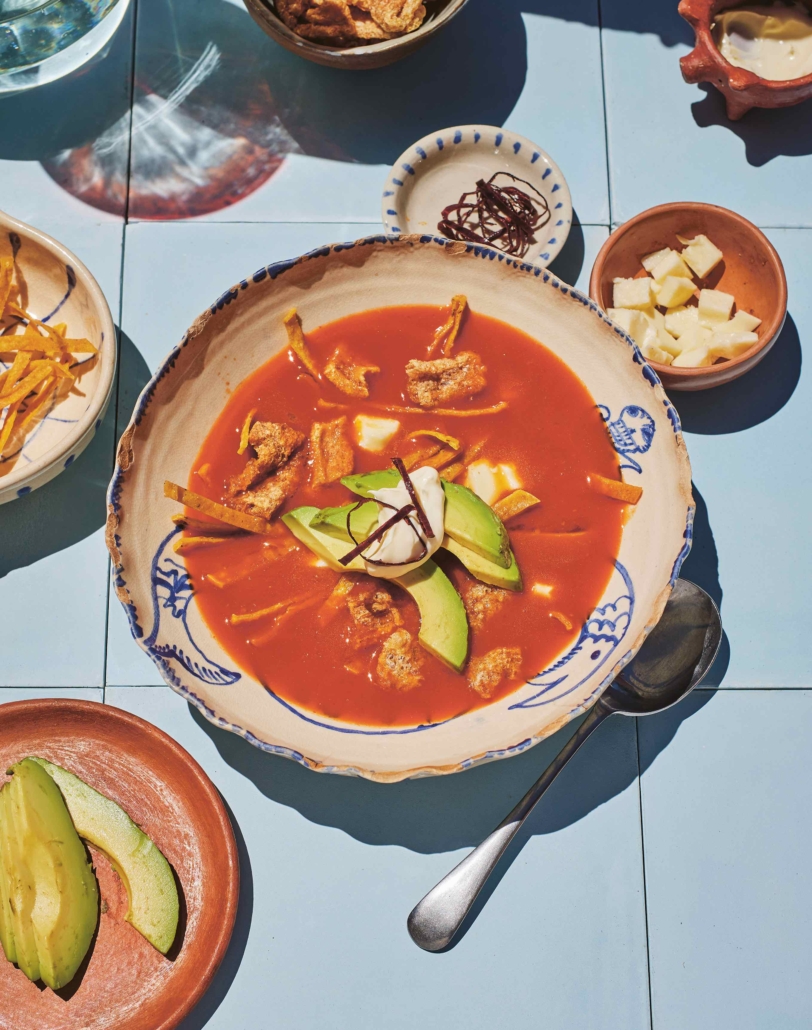
Sopa de Tortilla โ€“ Tortilla Soup

by Daniella Guevara Muรฑoz 

Sopa de tortilla is also known as sopa azteca or Aztec soup. It is a simple but delicious soup and, as the name hints, is full of tortillas. This soup has been on La Popularโ€™s menu for years. Whenever we take it off, we get complaints. So it stays on.

Images and text from Provecho: Real Mexican Food at Home by Daniella Guevara Muรฑoz, photography by Simon Bajada. Murdoch Books RRP $49.99. (Tortilla soup p.54-55)

We hope you enjoy this free article from OrganicNZJoin us to access more, exclusive member-only content

What makes this soup so delicious are the different textures โ€“ crispy tortilla strips, soft avocado, chewy cheese and a dollop of cream.
The soup is made in two stages. First is the soup base (which you can pre-make and keep in the freezer) and the second is the assembly. This recipe is traditionally made with chicken stock, but if you are vegetarian you can use vegetable stock instead.

Serves 2 litres (8 cups) / 6

2 litres (8 cups) chicken stock (see page 221 for homemade) or vegetable stock

Soup base 

  • 8 guajillo chillies, deseeded
  • 2 garlic cloves
  • 1ยฝ brown onions, cut into chunks
  • 700 g (1 lb 9 oz) ripe tomatoes
  • ยฝ bunch coriander (cilantro), leaves picked
  • 1 teaspoon dried Mexican oregano
  • 1 teaspoon ground cumin
  • 6 corn tortillas (shop-bought or see page 253 for homemade), cut into quarters
  • 20 g (ยพ oz) salt

To garnish

  • 1 guajillo chilli, to garnish
  • 6 stale corn tortillas (shop-bought or see below, or page 253, for homemade), to garnish
  • 200 ml (7 fl oz) vegetable oil
  • 1 avocado
  • 200 g (7 oz) cheese (queso panela if you can get it, but mozzarella works, too)
  • 100 g (3ยฝ oz) chicharrรณn or pork crackling (omit for vegetarian)
  • 100 ml (3ยฝ fl oz) thickened (heavy) cream

For the soup base, soak the guajillo chillies in boiling water until soft, about 5 minutes.

Once soft, drain them and put them in a blender or food processor with the rest of the soup base ingredients. Blend on high until you have a soft paste โ€“ it shouldnโ€™t have any grittiness. Pass the base through a fine-mesh strainer.

For the soup, bring the stock to a slow boil in a stockpot, then add the soup base. Simmer until the soup thickens, about 30 minutes.

Meanwhile, prepare the garnishes. Using scissors, carefully cut the guajillo chilli into thin rings and cut the stale tortillas into 5 mm (1โ„4 inch) wide strips.

Pour the vegetable oil into a small saucepan and heat to about 180ยฐC (350ยฐF). I use a thermometer to test the oil, but if a piece of bread dropped in the oil browns in about 15 seconds, the oil is at the correct temperature.

Fry the chilli until crispy โ€“ donโ€™t let the chilli burn, this happens in about 5โ€“10 seconds โ€“ then place on paper towel to drain.

In the same oil, fry the tortilla strips until crispy, about 3 minutes โ€“ these wonโ€™t burn as easily. Place the strips on paper towel.

Halve the avocado, remove the seed and cut into slices. Put all the garnishes in separate bowls on the table.

Serve the soup in a large bowl. Each person can add whichever garnishes they want. I recommend: a handful of tortilla strips, cheese, avocado, chicharrรณn, a drizzle of cream, then the fried chilli. Keep adding more as you eat.

Corn tortillas

p.253

650 (1 lb 7 oz) Masa (page 250)

  • 280 g (10 oz) masa harina (nixtamalised maize flour)
  • ยผ teaspoon table salt (optional)
  • about 375 ml (1ยฝ cups) warm water

In a mixing bowl, combine the masa harina and salt (if using). Gradually add the warm water while stirring with your hands. Continue to add water until the dough comes together and becomes soft and pliable.

The dough should hold together but not be overly sticky. If it feels too dry, add a little more water. If itโ€™s too wet, add a bit more masa harina. Knead the dough for about 10 minutes to get the best result. It should be smooth and well combined. It must have a Play-Dohโ€“ like consistency, quite soft and a little bit sticky.

A good test is to make a tortilla in a press between two sheets of thin sandwich-bag plastic (see page 253). If the edge of the tortilla has deep cracks, the masa is too dry. A rough edge is normal.

You can keep masa for a couple of days in the fridge in an airtight container. If you want to use it, take it out of the fridge about an hour before you plan to use it. Knead thoroughly with your hand and add some water if necessary.

Divide the masa into small balls (about 30 g/1 oz), slightly smaller than a golf ball. You can make them larger or smaller depending on your preference.

Preheat a comal, hotplate or non-stick frying pan over mediumโ€“ high heat. Place a ball of masa between two sheets of sandwich-bag plastic in the tortilla press (see the photographs on the following pages).

Press down firmly to flatten it into a round tortilla shape. Rotate the flattened tortilla with the plastic sheets 180 degrees, then press again gently. The tortilla should be approximately 1โ€“2 mm (1โ„16 inch) thick.

Carefully peel off one of the plastic sheets, then place the raw tortilla (with the plastic) on the palm of your hand. The tortilla should be half on your hand, half hanging freely. Peel off the second sheet of plastic.

Lay the tortilla on the preheated hotplate or in the pan by placing the freely hanging tortilla on the hotplate first, then letting the rest of the tortilla roll off your hands.

You should come in with your hand, palm facing up, at an angle of about 45 degrees. Once the tortilla has hit the hotplate, rotate your hands about 90 degrees, rotating your palm towards the hotplate, pulling away from the tortilla.

This movement, if done smoothly, should release the tortilla from your palm without the tortilla falling on itself. This is a tricky movement, and I suggest practising this on the bench first (no heat).

Cook for about 30โ€“60 seconds until the edge curls up slightly. Flip with a spatula and cook the other side for about 60 seconds, then flip again โ€“ if all goes well, it will puff up on the last flip.

(Tip: Donโ€™t try to fix a wrongly placed fresh tortilla; it will get worse.)

Remove the cooked tortilla from the hotplate and stack it with the others in a clean tea (dish) towel in a chiquihuite. The stacking is important, as it will keep cooking the tortilla. Serve the freshly made corn tortillas warm to make your tacos.


Homegrown Fruit: Pests and disease-reducing strategies

By Kath Irvine and Jason Ross

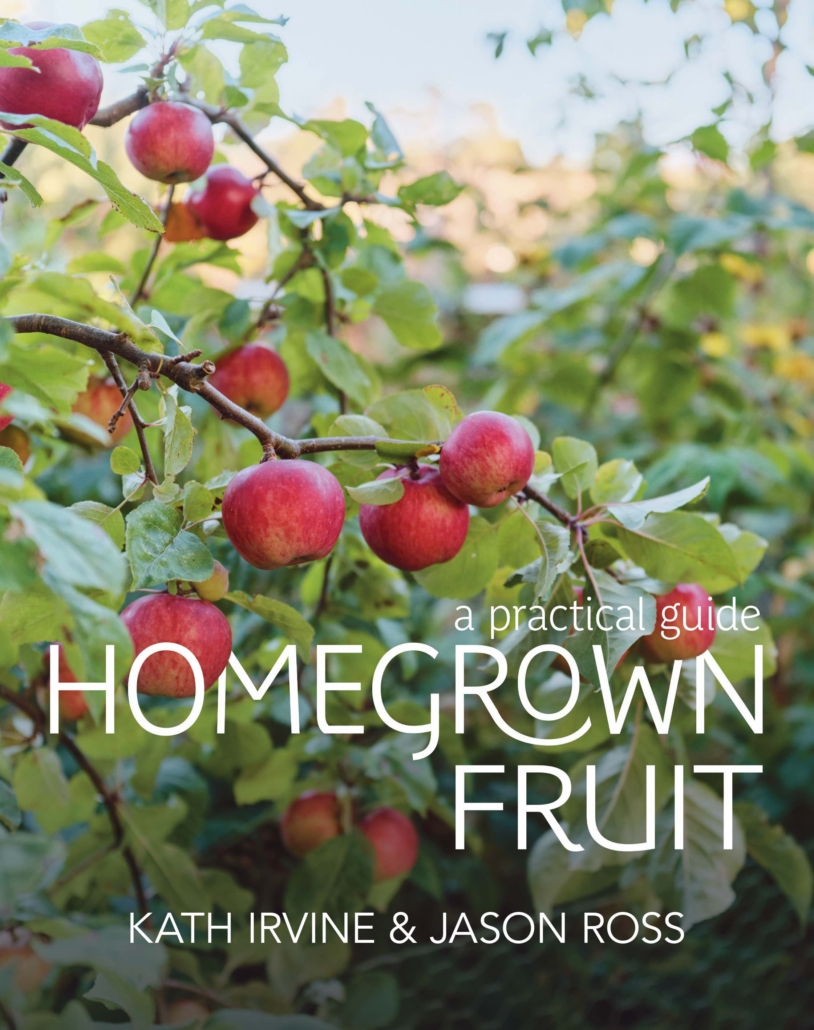
Homegrown Fruit: A practical guide is an accessible and comprehensive guide to growing fruit trees, bushes, vines and brambles in Aotearoa New Zealand.

The authors have a wealth of experience between them, and guide readers through everything from planning a home orchard, to specific types of fruit and their requirements, to care and pruning, pest, disease and weed control, and much more.

The following is a section on strategies to reduce pests and disease, extracted with permission from Homegrown Fruit: A practical guide, by Kath Irvine and Jason Ross (K+J Books, 2025) $58 RRP

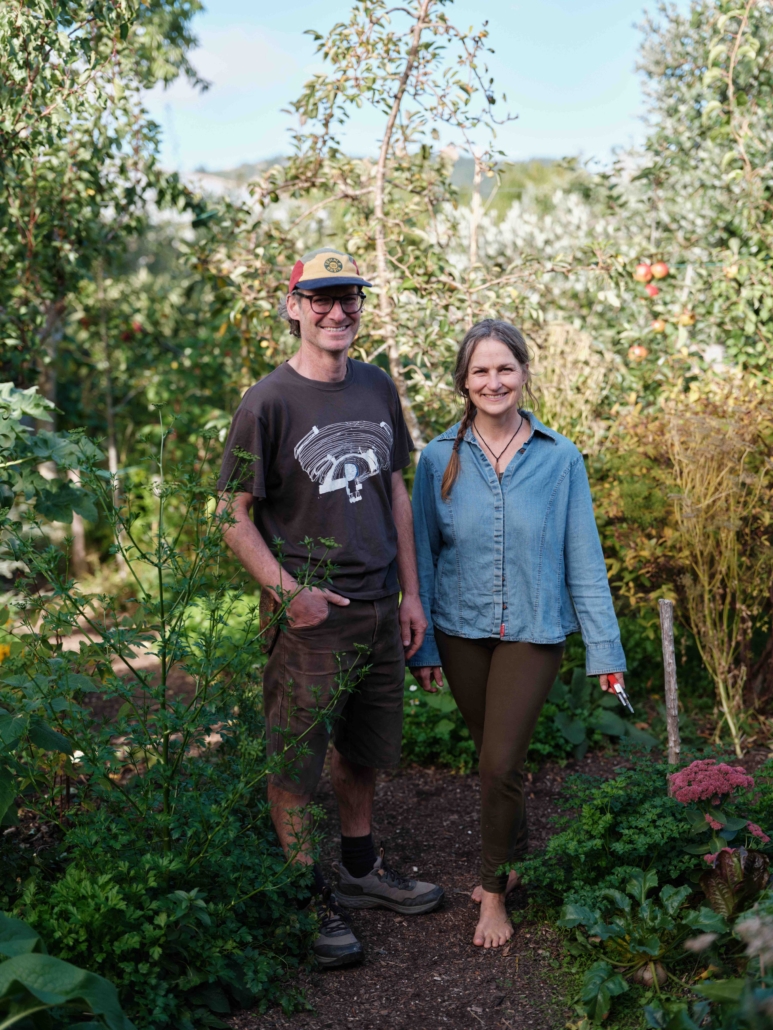
ABOVE: Cover image of Homegrown Fruit, and Jason Ross and Kath Irvine (Mickey Ross Photography)

We hope you enjoy this free article from OrganicNZJoin us to access more, exclusive member-only content

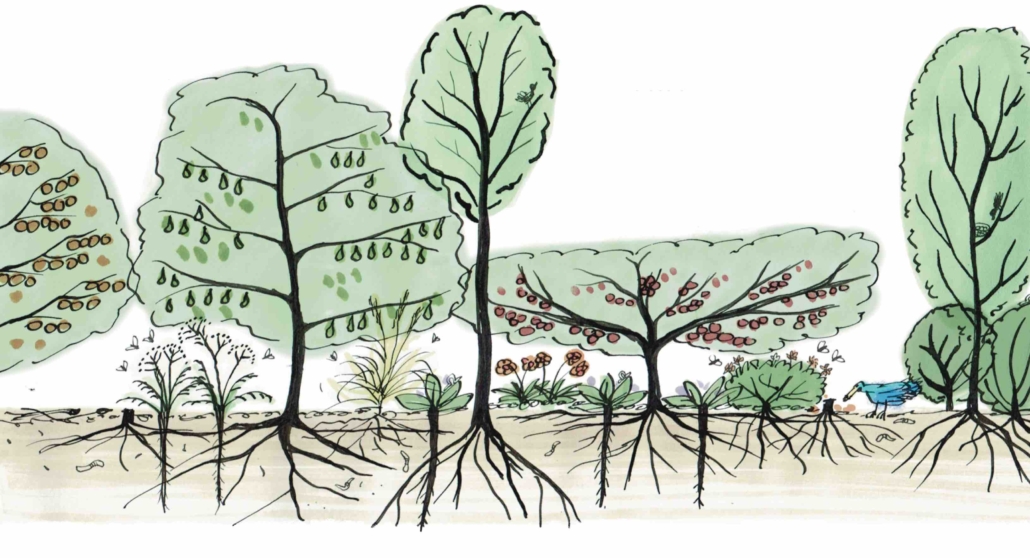
Weโ€™re big fans of sidestepping pests and disease โ€“ thatโ€™s why weโ€™re so keen on well-suited varieties, and on staying in touch with our trees and keeping health humming along. Even so, pests and disease do happen! Little bits here and there are no worries, but more than that and itโ€™s a good idea to ponder why. Itโ€™ll be a stress of some sorts โ€“ weak vigour, overfeeding, extreme weather, or because the tree isnโ€™t planted in its happy place.

If a tree continues to get hammered every year in spite of all your love, feel free to chop it down, mulch it up, and try another variety. That in itself is an excellent pest- or disease-reducing strategy โ€“ to only grow trees that thrive easily. The younger your orchard is, the more important it is to act on the first signs of pest or disease. The more established, diverse, and healthy your orchard, the more important it is to watch and let things take their natural course. If at any point tree health starts to be compromised, step in with our solutions below.

ABOVE: Illustration by Jason Ross

Pest-reducing strategies

Before you rush in to squash or spray, find out about the bugs you see on your fruit trees and make sure they are foe. You will find most are orchard friends. Itโ€™s really useful to understand what the different phases of bug life cycles look like โ€“ both for pests and predators. The juveniles can look radically different to the adults.

5 spray-free strategies

Our goal is to manage all pest problems without sprays, to lean into the wondrous network of unseen support thatโ€™s constantly in motion in our orchards.

Predatory insects

Keep a wide variety of pests in check with a wide variety of predatory and parasitic insects: parasitic wasps, hoverflies, ladybirds, praying mantis, spiders, dragonflies, damselflies, assassin bugs, lacewings, various beetles, frogs, and even earwigs โ€“ the more the merrier! Entice them in with a spray-free, wild haven, a year-round supply of nectar and pollen, and of course, some pests to eat!

Wild birds

Birds are a quid pro quo โ€“ while you may want to protect your ripening crop from them, the rest of the time birds like wax-eyes, starlings, chaffinches, and fantails are voracious gobblers of insects.

Digital control

Squashing grubs, caterpillars, or aphids is a quick and easy solution on a young tree, a dwarf or espaliered tree, or a reachable vine. Curled or folded leaves are a sign that a grub or caterpillar lurks within โ€“ open them up to see. Dimpled leaves indicate a sucking insect is at play โ€“ flip them over to check. Webbing is another sign โ€“ poke about and be nosy! You donโ€™t need to squash every single pest: get the bulk of them, or the ones within reach โ€“ leave a few for the predators. Keep at it during your check-ins.

Fruit and spur thinning

Thinning reduces pest numbers by removing their habitat โ€“ the cosy home thatโ€™s created where fruits touch.

Chickens and ducks

Chickens scratch up and gobble overwintering grubs and larvae. Ducks love slugs and snails, and both forage on a broad range of pests, from aphids to grasshoppers.

Two safer sprays: Neem and Bt

While itโ€™s our goal to be spray-free, there are times when we are both very grateful to have Neem and Bt in our toolkit. Both must be ingested to work, so the only insects that come to grief are the ones sucking or chewing the foliage or fruits. Bees and predatory or pollinating insects arenโ€™t eating foliage or fruits, so they stay out of harmโ€™s way. Many natural insecticides, like pyrethrum, garlic, or rhubarb spray, are contact killers โ€“ they nail everything they touch. We donโ€™t recommend them.

The key to success with Neem and Bt is to completely cover the foliage when you spray, and to follow up with a couple of repeat sprays to catch the next gen of egg hatchings. Repeat sprays are essential! Use your observations to guide you as to how many repeats you need.

SPRAYING TIPS
Spray at dawn or dusk, in dry weather. Use a fresh mixture each time โ€“ make a small batch so that you use it all. Rinse out your sprayer afterwards, especially the nozzle, and leave it open and upside-down to air out and dry.

Neem

Use for all sucking insects: aphids, woolly aphids, scale, thrips, passionvine hoppers, green vegetable bug, and cherry/pear slug (sawfly larvae).

  • Passionvine hopper adults are impervious to spray โ€“ catch them at the juvenile โ€˜fluffy bumโ€™ stage. Repeat at three-day intervals. By the third spray, the population will be greatly reduced. Continue in this way until there are none left.
  • Woolly aphids are a more intense pest because they suck on both roots and tops. If there are tell-tale cottony growths around the root crown, apply Neem granules to the soil at the base of the tree in tandem with using Neem sprays

Bt

Bt is short for Bacillus thuringiensis. Itโ€™s the active ingredient in many caterpillar-specific sprays. Use it for raspberry bud moth, leaf roller caterpillar, codling moth, and guava moth.

Codling moth and guava moth get a special mention because natural predators are in short supply in NZ, and they arenโ€™t so much a reflection of stress as they are a reflection of a neighbourhood thatโ€™s heaving with them. Success comes from doing a range of things that target different stages of their life cycles.

  • Spray with Neem + Bt together, weekly from petal fall.
  • Check over young fruits for tiny entry holes where larvae have burrowed in. There may also be frass โ€“ tiny piles of sawdust-like excrement โ€“ at these sites. Remove fruits and feed them to your chooks or drown them in a barrel of water.
  • Immature fruits that fall often contain larvae โ€“ send your pigs in or pick them up; this stops the next generation of moths emerging.
  • In winter, let chooks in to hunt overwintering larvae โ€“ wax-eyes and ground beetles also help with this. Needless to say, clean up all windfalls in case they contain larvae.
  • Prevent guava moth by covering trees with insect mesh soon after pollination, when fruitlets start to develop.

Homegrown Fruit: A practical guide, by Kath Irvine and Jason Ross (K+J Books, 2025) $58 RRP

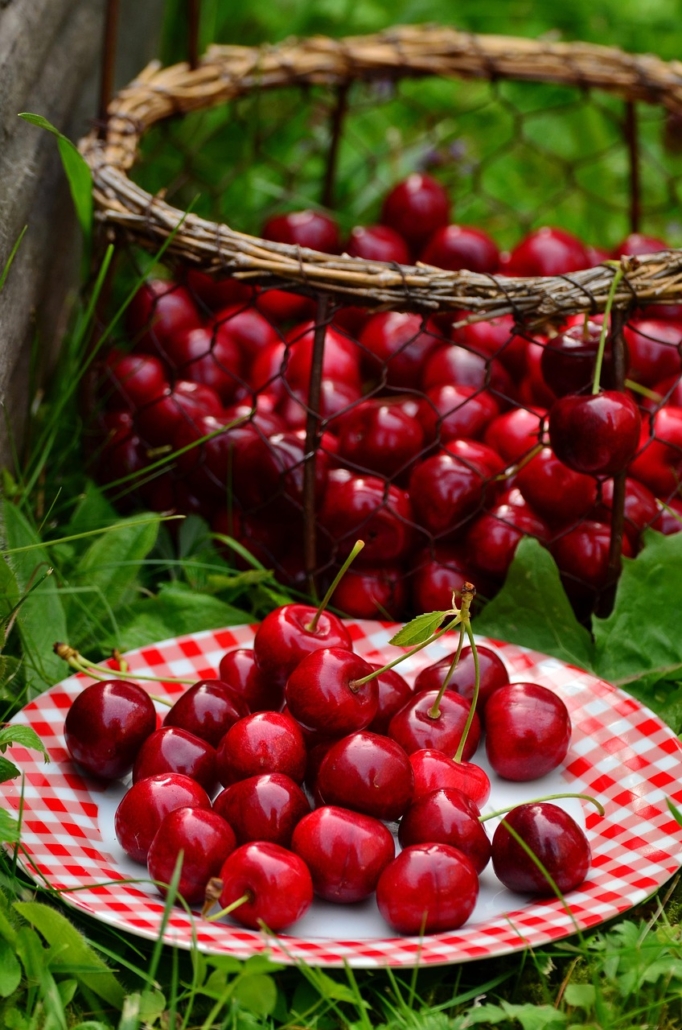
Basket of cherries

Cherries on top

A nutritional powerhouse wrapped in summer sweetness

Thereโ€™s a moment each summer in New Zealand when the fruit bowls shift โ€“ apples and pears take a step back, and cherries step into the spotlight. Their glossy skins, deep ruby tones, and tart sweetness signal summer days. For growers, cherries are a labour of love. For eaters โ€“ especially those who value organic, seasonal produce โ€“ theyโ€™re a small but mighty gift from the orchard, and one of the most nutrient-dense fruits of the season.

Nutritional therapist Paula Sharp shares her nutritional knowledge and two delicious recipes.

We hope you enjoy this free article from OrganicNZJoin us to access more, exclusive member-only content

The New Zealand cherry landscape

Cherries thrive where winters are cold, summers are dry, and the soil drains freely โ€“ in my mind making Central Otago the undisputed cherry heartland of New Zealand. The regionโ€™s sharp seasonal contrasts enhance flavour development, producing cherries that are firm, intensely sweet, and wonderfully aromatic.

Smaller organic orchards in Hawkeโ€™s Bay, Canterbury and Marlborough also contribute to the national harvest, though cherries remain one of the more climate-sensitive crops. A single late frost or a burst of heavy rain near harvesting can have consequences for the whole orchard. This vulnerability is part of what makes cherries precious – and why many organic growers invest heavily in soil health, biodiversity, and regenerative practices to increase resilience.

A nutritional deep dive

While they may be small, cherries offer a remarkably wide spectrum of nutrients and plant compounds. Their benefits go far beyond their sweetness:

1. Anthocyanins: Plant Power

The deep red-purple pigments in cherries come from anthocyanins โ€“ a group of antioxidants linked with reduced inflammation, improved circulation, and even enhanced brain health. These compounds help protect the fruit from UV stress and heat, and offer similar protective benefits in the human body.

Anthocyanins can also support cardiovascular health by improving blood vessel elasticity and lowering oxidative stress.

2. Natural melatonin for better sleep

Cherries, particularly tart varieties, contain natural melatonin – the hormone that helps regulate sleep-wake cycles. While New Zealand grows mostly sweet cherries, these still contain small but meaningful amounts of melatonin alongside tryptophan and serotonin precursors. For those who struggle with disrupted summer sleep, incorporating cherries into afternoon snacks or evening desserts can be delicious and supportive.

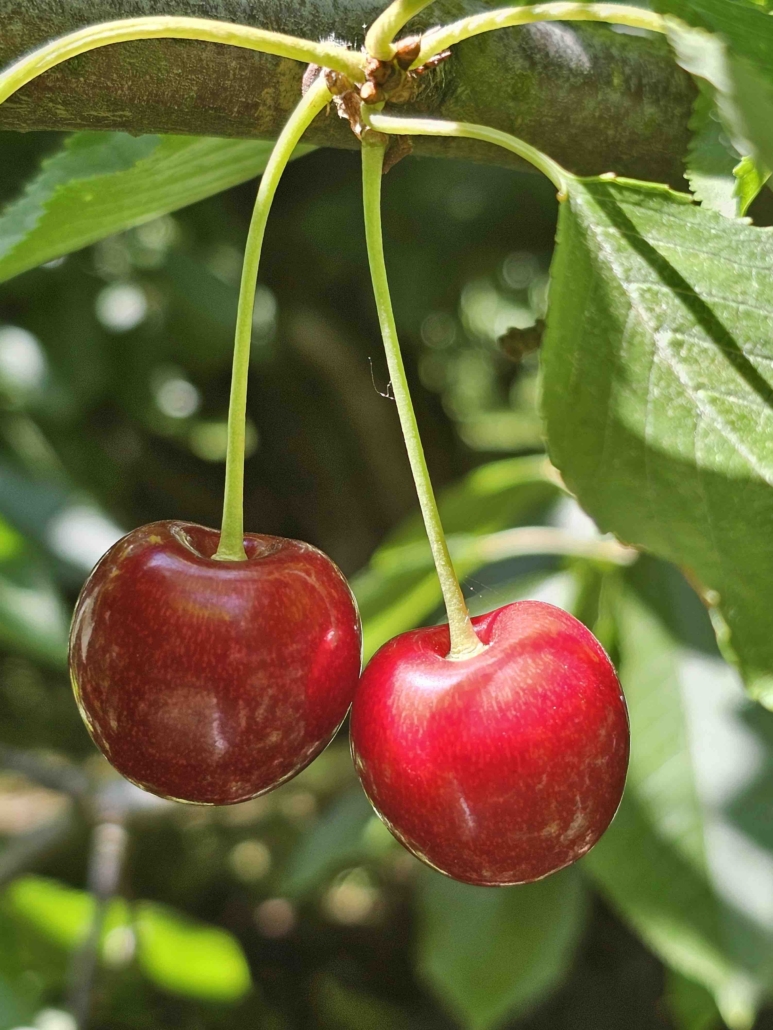
Photo: Hasmik Ghazaryan Olson, Unsplash

3. Joint and muscle support

Organic cherries contain polyphenols that may help reduce exercise-induced muscle soreness and support joint comfort. This is particularly relevant in summer when people are more active (and gardening intensely.)

4. Vitamin C and collagen support

A single cup of fresh cherries delivers a generous dose of vitamin C, which is essential for immune health and collagen production. This supports skin vitality, ideal in summer.

5. Gut health benefits

Cherries contain soluble and insoluble fibre, supporting healthy digestion and stable blood sugar levels. Their polyphenols also act as prebiotics, feeding beneficial gut bacteria. For those eating more meaty barbecues, fast food, or rich festive meals, this gentle fibre boost can be a digestively welcome.

The organic advantage

Organic cherry orchards often prioritise biodiversity, soil biology, compost-based nutrition, and minimal intervention. The result? Fruit that may contain slightly higher levels of certain antioxidants. Organic growing also avoids synthetic pesticides, reducing the chemical load on both the environment and humans; this is significant for cherries as they are eaten whole, skin-on, and often in generous handfuls.

Make the most of the short season

With New Zealandโ€™s cherry season lasting only a few weeks, from mid-December into early January, savouring them becomes a practice in seasonal appreciation.

  • Buying: Look for taut skin, deep colour and bright stems.
  • Storing: Keep unwashed in the fridge to maximise freshness.
  • Eating: Enjoy fresh, bake into summer desserts, pit and freeze for smoothies, or simmer into compotes for yoghurt and porridge.

Cherries highlight how good nutrition isnโ€™t just about nutrients, itโ€™s also about flavour, freshness, and eating in step with the seasons.

Great varieties for home growers

If you’re planting your own cherry tree, especially in regions with few frosts or higher humidity, these varieties offer the best blend of productivity, flavour, and lower maintenance:

  • Stella: The classic home-garden choice. Self-fertile, productive, and forgiving. Good-sized fruit with excellent sweetness and a reliable crop most years.
  • Lapins: Great for gardeners who want larger fruit and strong disease resistance. Also self-fertile, which simplifies orchard planning. Handles variable weather better than many other cultivars.
  • Sweetheart: Perfect for those who want cherries later in the season. Upright growth makes it easier to manage in smaller gardens, and fruit holds well on the tree.
  • Compact or Dwarf Varieties: Increasingly available in New Zealand nurseries, and ideal for urban gardens or smaller spaces. Look for dwarf forms of Stella or Lapins where offered.

Seasonal cherry recipes

Here are two easy ways to enjoy fresh cherries in season.

Fresh cherry, rocket & almond salad  

A bright, summery salad, perfect for Christmas hosting.

Serves: 4 | Prep time: 10 minutes

Ingredients

  • 2 cups fresh cherries, pitted and halved
  • 3 large handfuls rocket (or mixed baby greens)
  • ยฝ cup sliced almonds, lightly toasted
  • 80g soft goat cheese or feta, crumbled
  • 1 small red onion, very thinly sliced
  • A handful of fresh mint leaves, torn

Dressing

  • 2 tbsp extra-virgin olive oil
  • 1 tbsp balsamic vinegar (or cherry vinegar if you have it)
  • 1 tsp runny honey
  • Pinch of sea salt and cracked pepper

Method

  1. Whisk dressing ingredients together.
  2. In a serving bowl, layer rocket, cherries, onion, almonds and mint. 
  3. Drizzle with dressing and gently toss.
  4. Top with goatโ€™s cheese and serve immediately.

Photo: Conger Design, Pixabay

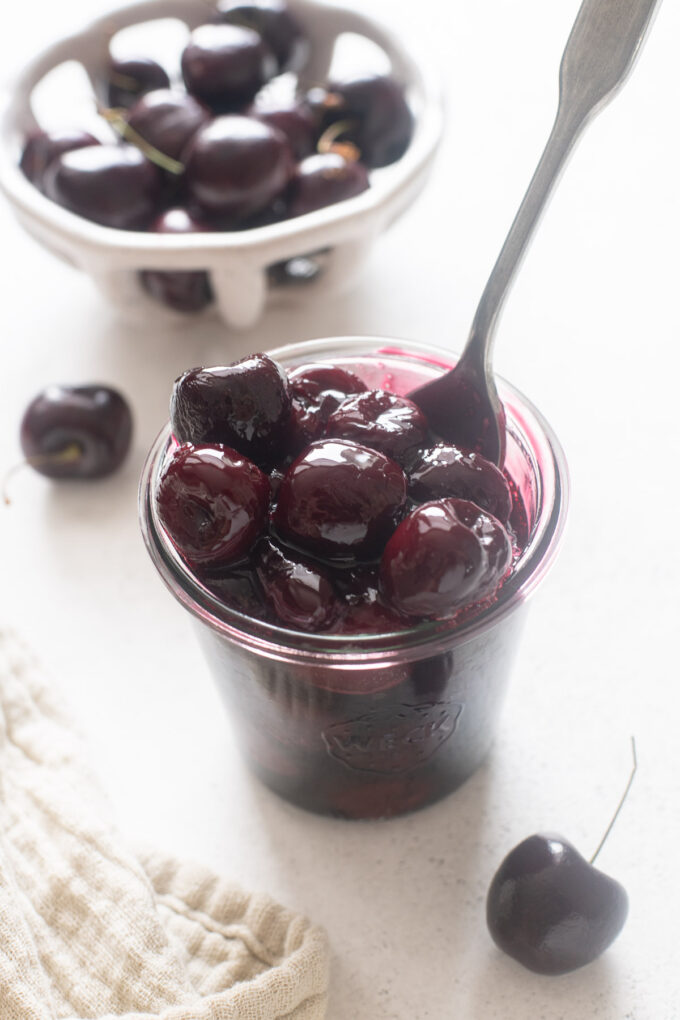
Warm spiced cherry compote

Fabulous with yoghurt, porridge, pancakes or as a dessert topping. This compote freezes well.

Serves: 4 | Prep time: 5 minutes | Cook time: 10 minutes

Ingredients

  • 3 cups fresh (or frozen) cherries, pitted
  • 2 tbsp water
  • 1 tbsp maple syrup or honey (optional)
  • ยฝ tsp cinnamon
  • ยผ tsp vanilla extract
  • 1 tsp lemon zest
  • Small pinch of ground cloves (optional โ€“ very Christmassy)

Method

  1. Add cherries and water to a small saucepan.  Bring to a gentle simmer. 
  2. Stir in maple syrup/honey, cinnamon, vanilla, lemon zest and cloves. 
  3. Continue to simmer until cherries soften and release their juices (approximately 8-10 minutes).
  4. Serve warm or cold. Refrigerate for up to four days.

Photo: Marcie Bidou, Flavor the Moments


AUTHOR BIO

Paula Sharp is a nutritional therapist supporting womenโ€™s health, digestion, hormones, skin, sleep, and energy through one-to-one consultations via Zoom. Sheโ€™s also a local guest speaker in the Bay of Plenty and regular writer for Organic NZ.

Join Paulaโ€™s free newsletter โ€“ Sharp Bite โ€“ for weekly nutrition tips, seasonal recipes, and mindset inspiration.

Photo at top of article: Oliver Hale, Unsplash


2026 Calendars For Sale!

Our Calendars are back by popular demand. We have the sought-after โ€˜N*de Gardeningโ€™ calendar, and the โ€˜Beautiful Gardensโ€™ calendar (for those who prefer to hang a calendar that doesnโ€™t get so much attention!). Both calendars include the moon phases.

Strawberries: Sweet, sustainable, and full of summer joy

Few fruits capture the feeling of summer like strawberries. Their vibrant red colour, delicate fragrance, and juicy sweetness make them one of our favourite seasonal fruits. In New Zealand, the strawberry season runs from September to April, with the peak harvest in November and December, filling gardens and markets with the scent of sunshine.

Beyond their taste and beauty, strawberries have a rich history, impressive nutrition profile, and are easy to grow, as nutritional therapist Paula Sharp writes.

We hope you enjoy this free article from OrganicNZJoin us to access more, exclusive member-only content

A brief history of strawberries

The Romans enjoyed strawberries as food and medicine, using them to calm inflammation and aid digestion. By the Middle Ages in Europe, they had become a symbol of purity and perfection โ€“ carved into churches and served at banquets.The modern strawberry, Fragaria ร— ananassa, has its roots in eighteenth century France, where two wild species โ€“ the small, flavourful North American Fragaria virginiana and the larger Chilean Fragaria chiloensis โ€“ accidentally cross-pollinated. The result was the plump, fragrant berry we know today.

Early European settlers brought strawberries to New Zealand, where the climate and soil suited them beautifully. Today, areas like Waikato, Auckland, and the Bay of Plenty are famous for their fields of the fruit, yet nothing compares to growing your own and tasting the sweetness straight from the plant.

Why grow spray-free or organic?

Strawberries are one of the most heavily sprayed crops worldwide. Their thin skin and low-growing habit make them vulnerable to pests and fungal diseases, but chemicals arenโ€™t the only โ€“ or best โ€“ solution. Growing your own spray-free or organically means your berries are free from synthetic residues, and youโ€™re supporting soil health, pollinators, and biodiversity.

Healthy soil grows healthier plants โ€” and better-tasting fruit. Strawberries grown naturally have a more intense aroma, deeper flavour, and higher nutrient levels than their conventionally farmed counterparts.

How to grow strawberries naturally

Strawberries thrive in full sun and free-draining soil rich in compost. They do well in raised beds, containers, or hanging baskets โ€” perfect for small gardens or patios.

The best time to plant strawberries in Aotearoa New Zealand is from late autumn through early spring, when the soil is still workable but not too cold.

In warmer regions like Auckland, Bay of Plenty, and Northland, ideally plant May to July so the young plants can establish roots before flowering. In cooler areas like Canterbury and Otago, plant a little later, July to October, once frosts ease.

Photo: Katharina N, Pixabay

Growing tips

  • Enrich the soil: Mix in well-rotted compost before planting.
  • Mulch: Use straw, pine needles, or pea straw to keep fruit clean and weeds down.
  • Eggshells: Crushed eggshells deter slugs and snails while adding calcium to the soil.
  • Feed regularly: Water fortnightly with liquid seaweed or compost tea for strong growth.
  • Netting: Protect fruit from birds using fine mesh secured tightly to avoid trapping wildlife.
  • Remove the first flowers after planting to help the plants focus on root growth and strength (for bigger, sweeter berries later in the season.).
  • Renew plants: Replace every three years using healthy runners for new stock.
  • Harvest strawberries when fully red and fragrant (typically begins from November to February, in milder regions fruit can continue into April).
  • Strawberries wonโ€™t ripen further once picked.

Nutrition that shines

One cup of strawberries gives your full daily vitamin C needs โ€“ excellent for immune support and collagen production. Theyโ€™re also rich in antioxidants like anthocyanins, which protect against inflammation, and ellagic acid, known for its skin and heart health benefits.

Their natural sweetness satisfies sugar cravings while supporting blood sugar balance thanks to fibre and water content. Folate, manganese, and potassium round out their nutrient profile, helping energy and mood stay steady through the warmer months.

Eat them fresh, blend them into smoothies, toss into salads, or make into compotes and desserts โ€“ strawberries are as versatile as they are delicious.

A fruit worth growing

Homegrown strawberries are one of lifeโ€™s simple pleasures. I call them natureโ€™s lollies โ€“ sweet, sun-warmed, and full of vitality.

By choosing to grow spray-free or organic, youโ€™re nourishing your body and caring for the land. Each bite is a reminder that good food, good soil, and good health are deeply connected.

Seasonal strawberry recipes

Here are two easy ways to enjoy fresh strawberries in season.

Strawberry & basil balsamic salad  

Light and fragrant. Serves 2โ€“3.

Ingredients

  • 2 cups fresh strawberries, halved
  • 1 small ball mozzarella (about 100 g), torn
  • 1 handful basil leaves
  • 1 tbsp extra virgin olive oil
  • 1 tsp balsamic vinegar or glaze
  • Pinch of sea salt and black pepper

Method

  1. Arrange strawberries, mozzarella, and basil on a platter.
  2. Drizzle with olive oil and balsamic vinegar.
  3. Season lightly and serve immediately.

Photo: May Zhu, Pinterest

Strawberry chia breakfast pots

A light make-ahead breakfast or snack. Makes 2 servings.

Ingredients

  • 1 cup fresh strawberries, chopped
  • 1 cup milk of choice (almond, oat or dairy)
  • 3 tbsp chia seeds
  • 1 tsp maple syrup or honey
  • ยฝ tsp vanilla extract

Optional: Greek yoghurt and extra strawberries for topping

Method

  1. Blend half the strawberries with milk, sweetener, and vanilla.
  2. Stir in chia seeds and remaining strawberries.
  3. Pour into two jars, stir after 10 minutes, then refrigerate overnight.
  4. Top with yoghurt and extra berries before serving.

Photo: Freepik


AUTHOR BIO

Paula Sharp is a nutritional therapist supporting womenโ€™s health, digestion, hormones, skin, sleep, and energy through one-to-one consultations via Zoom. Sheโ€™s also a local guest speaker in the Bay of Plenty and regular writer for Organic NZ.

Join Paulaโ€™s free newsletter โ€“ Sharp Bite โ€“ for weekly nutrition tips, seasonal recipes, and mindset inspiration.

Photo at top of article: Oliver Hale, Unsplash


The Floral Dream

Olivia McCord, author of this beautiful new book, The Floral Dream, uses organic practices in her flower growing.

“My initial introduction to growing was through kiwifruit. We established a kiwifruit orchard from scratch, and it is now a fully certified organic orchard.”

This gorgeous book is bursting with colour and inspiration, as well as being a practical, comprehensive guide to growing cut flowers.

The following is extracted with permission from The Floral Dream: A Guide to Growing Cut Flowers in New Zealand by Olivia McCord (Potton & Burton) $49.99 RRP

We hope you enjoy this free article from OrganicNZJoin us to access more, exclusive member-only content

Sourcing plants

There are numerous ways that you can start your dream cutting garden, and it will be dictated by the way you source your plants. What will ultimately determine the way you source your plants will be your scale of operation. If you are a small home gardener it is feasible to spend a little more on a seedling as you will be planting fewer as opposed to a small scale flower farmer who will require multiple seedlings of each variety.

The key is to plan what you want to grow so you can ensure you are sourcing your plants at the right time they are available. For example dahlias, a hugely popular item, will go on pre-sale in winter when you need to secure them to ensure you donโ€™t miss out on the varieties you were after come summer time.

Growing from seed

When I first started growing flowers I was incredibly daunted by growing from seed and believed that it was for very experienced growers only. Fast forward a few years and I now own a cut flower seed business, so it is safe to say I became a quick convert to growing from seed.

The reason I love growing from seed is the large selection of plants available (a lot of garden stores do not offer a decent cut flower range) and the inexpensive cost. The trick to growing from seeds if you are starting out is to choose annuals (perennials can be fussier) and follow the basic guidelines laid out later in this book.

You do not require fancy equipment or a greenhouse to get a range of seeds germinating.

Above: Olivia McCord

Growing from plugs

This is generally reserved for small scale flower farmers. Plugs are small seedlings of a particular variety grown in large trays. There are a number of nurseries (like Gray Floral listed in the appendix) around the country that will wholesale trays of plugs to growers. However, there are minimum quantities so this option is not feasible for home growers

Seedlings

Seedlings are fantastic as a quick way to get started as someone has done the initial work for you. They are more expensive but if you are growing a handful of plants this expense is relatively small. Just ensure you are mindful about selecting the right variety. A lot of local gardening stores sell plants in their potted colour section for pots. Therefore if you are choosing a zinnia for example you might be selecting a dwarf bedding variety that will not grow an appropriate stem for a cut flower.

There are a number of nurseries around the country starting to offer cut flower seedlings which have been noted in the back of the book.

Bulbs, tubers and corms

Bulbs, tubers and corms are a fantastic way to grow cut flowers as they are often reliable bloomers. The key is to work out what you want to plant in advance, as most spring flowering bulbs are on sale late autumn, and summer flowering bulbs are selling in winter. More information is detailed on how to grow these later in this chapter.

Cuttings and sharing

A fabulous way to grow your garden is through cuttings and sharing plants with other gardeners. I myself have taken cuttings from my neighbourโ€™s โ€˜limelightโ€™ hydrangeas and grown them on to fill my garden.

Whilst annuals can be difficult to grow in this manner, perennials lend themselves to dividing. Chrysanthemums are a wonderfully easy plant to propagate through cuttings, so join your local gardening groups and go to garden open days. They are wonderfully welcoming groups and an excellent way to grow your garden and learn valuable knowledge.

Potted plants

Potted plants, which are mature plants, are the most expensive way to add to your garden. However, it is sometimes the best option. Whilst I donโ€™t recommend buying annuals this way, as they will only last a season, buying a potted perennial, shrub or especially trees, saves you a lot of time.

I personally like to buy most of my roses as potted plants rather than cuttings as it saves me a large amount of time and adds instant flowers.

Photos: Olivia McCord


Asparagus in season: From garden to table

Few vegetables announce spring quite like asparagus. With its tender green spears and delicate flavour, asparagus is one of New Zealandโ€™s most celebrated seasonal treasures.

Nutritional therapist Paula Sharp introduces this spring star, including gardening tips, recipes and nutritional benefits.

We hope you enjoy this free article from OrganicNZJoin us to access more, exclusive member-only content

A brief history

Asparagus (Asparagus officinalis) has been enjoyed for thousands of years. Native to the Mediterranean, it was prized by the ancient Egyptians, Greeks, and Romans for its flavour and medicinal properties. The Romans were so fond of it that they had an โ€˜asparagus fleetโ€™ to quickly transport the spears to distant outposts.

By the sixteenth century it had spread across Europe, and later to the New World. Today, asparagus is enjoyed globally, with New Zealand growers producing some of the freshest and most flavourful asparagus in the Southern Hemisphere.

Harvested from September to December, asparagus thrives in regions such as Waikato, Canterbury, and Hawkeโ€™s Bay, where sandy soils and long sunshine hours provide the perfect growing conditions.

Nutritional benefits

This slender spear is as nourishing as it is delicious. Asparagus is low in calories but high in vitamins A, C, E, and K, as well as folate โ€“ vital for energy and cell repair.

Itโ€™s rich in antioxidants that help protect the body from free-radical damage and contains prebiotic fibre, which supports healthy digestion and feeds the beneficial bacteria in your gut.

Its natural diuretic properties make it light and cleansing, ideal for a springtime reset.

Gardening tips for organic growers

Asparagus is a perennial crop โ€“ once established, it can produce for 15โ€“20 years. It requires patience, but the rewards are worth it. Planting time is from mid September on, as the soil temperatures rise.

  • Site and soil: Choose a sunny, sheltered spot with free-draining, sandy soil. Asparagus dislikes wet feet. Work in plenty of compost and organic matter before planting.
  • Planting: Start with crowns (one-year-old roots). Plant them in trenches 20cm deep, spreading the roots out like a starfish, and cover lightly with soil. Gradually fill in the trench as shoots appear.
  • Spacing: Allow 40cm between plants and one metre between rows โ€“ asparagus needs room to spread.
  • Patience pays: Donโ€™t harvest for the first two years, allowing plants to establish strong root systems. From year three, you can harvest spears for about six weeks each spring.
  • Organic care: Mulch well to keep weeds down and moisture in. Feed annually with compost or seaweed. In winter, after the ferny foliage dies back, cut it down and top-dress with organic matter.
  • Growing your own asparagus is an investment, but once itโ€™s in, youโ€™ll be rewarded with tender, chemical-free spears every spring.

Photo: AnRo0002 / Wikimedia Commons

ABOVE: Asparagus spears, if not harvested, will grow into a ferny plant, and later in the season produce red berries.

Images: Kohei Tanaka / Pixabay and Nennieinszweidrei / Pixabay

DID YOU KNOW?
Purple asparagus is grown in New Zealand too โ€“ itโ€™s sweeter and higher in antioxidants than the green variety. (Aphrodisiac history: In nineteenth-century France, grooms were served three courses of asparagus before their wedding night!)
Storage tip: Trim hard ends and then stand the asparagus spears upright in a glass with 2โ€“3cm of water in the fridge.  Cover loosely with a plastic bag. It can stay crisp for up to 5 days.

Images: Timolina / Freepik and Michaela St / Pexels)

Cooking with asparagus

Asparagus is wonderfully versatile. It can be steamed, roasted, grilled, stir-fried, or even shaved raw into salads. Its delicate flavour pairs beautifully with lemon, mint, eggs, seafood, and olive oil. Quick cooking helps retain its vibrant green colour and crisp texture.

Quick cooking: Overcooking dulls colour and flavour. Just a few minutes is enough to bring out its best.

A simple preparation trick: hold a spear at both ends and bend gently โ€“ it will naturally snap at the point where the woody end begins. Save those woody ends for stock.

Why eat in season?

It simply tastes better.  Choosing local, seasonal asparagus ensures maximum flavour, nutrition, and freshness. By buying asparagus from your local grower or farmersโ€™ market between September and December, youโ€™re supporting sustainable farming while enjoying one of natureโ€™s finest spring offerings.

Asparagus is more than just a seasonal vegetable โ€“ it tastes like spring! It is a nutrient-rich powerhouse vegetable, and a very rewarding plant for gardeners. Whether roasted with garlic or tossed in a zesty salad, asparagus brings vitality to the plate and reminds us that the best food is seasonal, local, and grown with care.

Asparagus recipes

Here are two easy ways to enjoy fresh asparagus in season.

Lemon & garlic roasted asparagus

Serves 4. Simple, fresh, and perfect as a side.

Ingredients

  • 500g fresh asparagus spears
  • 2 tbsp coconut oil
  • 2 cloves garlic, finely chopped
  • Juice and zest of ยฝ a lemon
  • ยผ tsp sea salt
  • ยผ tsp cracked black pepper
  • 2 tbsp grated Parmesan cheese (optional)

Method

  1. Preheat oven to 200ยฐC (fan bake).
  2. Add coconut oil to a baking tray and heat (until liquid)
  3. Trim asparagus and arrange on the tray, add garlic, and season with salt and pepper.
  4. Toss gently.
  5. Roast for 12โ€“15 minutes until just tender.
  6. Finish with lemon juice, zest, and Parmesan if desired.

Image: Alleksana / Pexels

Asparagus, Feta and Mint Salad

Serves 4.

Ingredients

  • 400g fresh asparagus spears
  • 100g baby spinach leaves
  • 80g feta cheese, crumbled
  • ยผ cup fresh mint leaves, torn
  • 2 tbsp extra virgin olive oil
  • 1 tbsp balsamic vinegar
  • 1 tsp honey
  • ยผ tsp sea salt
  • ยผ tsp cracked black pepper

Method

  1. Trim asparagus ends off and save for stock.
  2. Blanch the spears in boiling water for 2 minutes.
  3. Refresh in iced water, drain, and cut into 3โ€“4cm pieces.
  4. In a large bowl, combine spinach, asparagus, feta, and mint.
  5. To make the dressing, put the last five ingredients in a jar and shake.
  6. Pour dressing over salad, and toss gently.

AUTHOR BIO: Paula Sharp is a qualified nutritional therapist dedicated to helping women feel their best through every stage of life.

She works one-to-one via Zoom with clients around the world, supporting womenโ€™s health in areas such as gut and digestive repair, hormonal balance, skin and hair vitality, restorative sleep, sustainable weight management, and recovery before and after surgery.

Alongside her private practice, Paula is a guest speaker and writer. Her career began in London, where she worked in the organic fruit and vegetable industry, which sparked a lifelong passion for seasonal, spray-free produce. Now based in Whakatฤne, she tends her own extensive organic garden, putting her philosophy of โ€˜food as medicineโ€™ into daily practice.

For more seasonal recipes and womenโ€™s wellness insights, explore Sharp Bite, Paulaโ€™s blog at www.paulasharpnutrition.com โ€“ a fresh bite of inspiration for healthier, more joyful living.

Photo at top of article: Almaje / iStock


Worm Farming Tips

Home gardener Michelle Coenradi has four worm farms on the go. Here she outlines the benefits, and offers some tips from her experience.

We hope you enjoy this free article from OrganicNZJoin us to access more, exclusive member-only content

I am passionate about my worms. There are so many benefits to worm farming, and itโ€™s something you can do almost anywhere, even on a balcony. Worm farms produce two types of fertiliser: a liquid (sometimes called tea or juice) and a more solid one (vermicast). I leave the siphon open and sit a bucket underneath to collect the liquid.

Benefits of worm juice and vermicast

  1. Enhances soil fertility.
  2. Promotes plant growth.
  3. Deters pests and diseases.
  4. Improves soil structure โ€“ contains microorganisms and enzymes that improve soil aeration and water retention, leading to better root development.
  5. Rich in readily available nutrients like nitrogen, phosphorus and potassium, as well as trace elements.
  6. Improved aeration and drainage results in reduced soil compaction
  7. Enhances the activity of beneficial microbes which are essential for nutrient cycling and overall soil health.
  8. Cost-effective fertiliser that you can make yourself.
  9. Vermicast is pH neutral.

ABOVE: Inside one of Michelleโ€™s worm farms (Photos: Michelle Conraedi)

A healthy home for your worms

Worms need a dark, moist and well aerated environment and a temperature between 15โ€“25ยบC. You can put in shredded paper for them to live and breed in, or a worm mat which can be purchased at hardware stores.

Worms love anything curved or round to nest in and keep themselves warm, especially avocado and watermelon skins, and pumpkin is a hit as well.

What do they like to eat?

  • 70% nitrogen-rich โ€˜green wasteโ€™ like fruit and vege scraps, eggshells, coffee grounds and tea bags (make sure theyโ€™re compostable ones). Avoid citrus fruit and the onion family.
  • 30% carbon โ€˜brown wasteโ€™, like newspaper and cardboard.

You can feed them daily but I tend to feed weekly.

When I put scraps in I sprinkle Tumbleweed worm compost conditioner over the top. This keeps the pH balanced โ€“ you can tell if the worms are struggling with an alkaline imbalance because they lose their colour and start turning white. You can also use garden lime sparingly.

The vermicast is referred to as black gold, indicating its value in the garden. I find worms are hardy and easy care; you really canโ€™t go wrong with a worm farm and they are so rewarding.

ABOVE: Michelle’s vegetable garden flourishes with the addition of vermicast and liquid from her worm farms.

More information

There is lots more information about worm farming online, such as these tips from the Compost Collective.

Photo at top: Compost Collective


Broccoli: A Winter Hero

As the cold settles into our gardens and kitchens, one green vegetable continues to thrive: broccoli. Nutritional therapist Paula Sharp introduces this winter hero, including gardening tips, recipes and nutritional benefits.

We hope you enjoy this free article from OrganicNZJoin us to access more, exclusive member-only content

This pretty vegetable that looks remarkably like a small shrub has a fascinating history, impressive health credentials and in my opinion a starring role in the winter vegetable patch. Broccoli is more than just a basic side dish; itโ€™s a powerhouse for human health.

From Ancient Rome to Kiwi gardens

Broccoli (Brassica oleracea var. italica) was grown in the Mediterranean over 2000 years ago. It was developed by ancient Romans from wild cabbage, and its name comes from the Italian broccolo, meaning โ€˜flowering crest of a cabbageโ€™ (broccoli is the plural). Broccoli belongs to the nutrient-rich Brassica family, along with cauliflower, kale, Brussels sprouts and cabbage.

Broccoli made its way through Europe and into our kitchens much later, and today it is a staple in many New Zealand gardens, especially in winter. This cool-season crop doesnโ€™t just survive frosts; it thrives in them.

Broccoli plants growing in a raised bed. Photo: Rachael & Zane Ross / Flickr CC BY-NC-SA 2.0

Growing broccoli

Broccoli loves cool, crisp conditions, making it ideal for late autumn and winter planting in New Zealand.

Sow seeds or transplant seedlings from mid-autumn, and youโ€™ll be harvesting heads from June through to September, with August being a prime time in many regions.

You can still sow seeds or transplant seedlings in August or early September. Plug plants will also continue to thrive particularly in cooler areas or a chilly spring.

For best growth:

  • Plant in full sun
  • Use well-drained, compost-rich soil
  • Keep soil moist but not soggy
  • Space plants well to allow airflow and strong head formation

Photo: Gretta Hoffman, Pexels

Youโ€™ll know itโ€™s ready to harvest when the central head is tight, deep green, and about the size of a fist. Cut just above the first set of leaves. Many varieties produce smaller side shoots after the main head is removed, giving you bonus crops well into spring.

Broccoliโ€™s nutritional benefits

Broccoli truly earns its superfood status. Packed with vitamin C, fibre and antioxidants, broccoli is a winter immune-booster. Its compounds โ€“ sulforaphane, glucosinolates and indole-3-carbinol โ€“ help fight inflammation, support hormone balance and protect against cellular damage.

Key nutrients:

  • Vitamin C โ€“ For immune defence, collagen production, and iron absorption
  • Vitamin K โ€“ Vital for bone health and blood clotting
  • Folate โ€“ Essential for DNA repair and cell growth
  • Potassium and magnesium โ€“ Help regulate blood pressure and muscle function
  • Iron โ€“ Supports energy and oxygen transport
  • Calcium โ€“ Supports bone health

Powerful phytochemicals:

  • Sulforaphane โ€“ A compound linked to reduced inflammation, detoxification, and potential cancer-fighting properties
  • Lutein and zeaxanthin โ€“ Support healthy vision and protect against eye strain

Photo: Freepik

The best ways to eat broccoli

Different cooking methods impact nutrient availability, so it pays to mix things up:

  • Light steaming helps preserve sulforaphane and vitamin C
  • Roasting enhances flavour but slightly reduces heat-sensitive nutrients like vitamin C
  • Raw broccoli (like in slaws or salads) keeps vitamin C levels high but may cause bloating or discomfort for people with sensitive digestive tracts.
  • Stalks and leaves are edible too: dice them into soups, stir-fries or make vegetable stock for extra fibre and flavour. I sneak these into bolognaise sauces, meat or vegetarian pies and rice dishes (donโ€™t tell my children).
  • NB: Older broccoli stalks or stems can be very fibrous.  If so, peel these before dicing and cooking.

Absorption tips

Pair broccoli with a source of healthy fat (like olive oil, avocado, or tahini) to absorb fat-soluble vitamins like Vitamin K. Combine it with vitamin C-rich foods (like lemon juice or capsicum) to boost plant-based iron absorption.

Why eat in season?

Choosing in-season broccoli means youโ€™re getting it at its freshest, most nutritious, and most affordable. It also supports local growers and reduces the environmental impact of long-haul transport. Whether you grow it yourself or pick it up from your local farmersโ€™ market, broccoli in August is a winter win โ€“ it just tastes better.

Purple sprouting broccoli โ€“ photo: Conall/Flickr

Broccoli recipes

Here are two easy ways to enjoy broccoli while itโ€™s at its peak.

Lemon and garlic broccoli

Serves 4 as a side dish.

  • Lightly steam florets from a medium head of broccoli for 4โ€“5 minutes.
  • Toss with 2 teaspoons of extra virgin olive oil, 2 cloves of minced garlic, a pinch of flaky sea salt, and a squeeze of fresh lemon juice.

Simple, fresh, and perfect as a side.

Creamy broccoli and pumpkin soup

Serves 4. This makes a beautifully textured soup with the broccoli florets and blended pumpkin.

Ingredients

  • 1 onion
  • 4 cloves garlic
  • 1 large teaspoon olive oil
  • 1 medium pumpkin or large butternut squash
  • 1 large broccoli head
  • 1 litre vegetable stock

Photo: Paula Sharp

Method

  1. Dice the onion and dice or mince the garlic, then sautรฉ in oil.
  2. Cut the pumpkin or squash into cubes.
  3. Chop the broccoli stem (save the florets for later), and simmer with the stock until soft. For a thicker soup, add less liquid. 
  4. Blend until smooth with a stick blender.
  5. Cut the rest of the broccoli into florets and steam them.
  6. Add florets to the soup and season well.
  7. Top with a sprinkle pumpkin seeds and a swirl of Greek yoghurt or coconut cream.

AUTHOR BIO: Paula Sharp is a nutritional therapist working one-to-one via Zoom to support womenโ€™s health, restore gut health and digestion, hormonal balance, skin and hair, sleep, shifting weight and health pre- and post-surgery. www.paulasharpnutrition.com

She is also a guest speaker, giving talks to companies on nutrition and mindset. In London she worked in the organic fruit and vegetable industry, and now she is based in Whakatฤne, growing her own extensive spray-free garden.

Photo at top of article: Alabama Extension, Wikimedia Commons