Images and text from The Good Life by Gillian Swinton, photography by Francine Boer Photography and Gillian Swinton. Published by Allen & Unwin NZ, RRP $45.00.
We hope you enjoy this free article from OrganicNZ. Join us to access more, exclusive member-only content
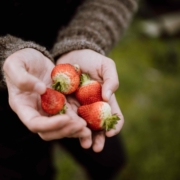
Planting strawberries in winter might sound ridiculous, but it is a great activity to do while the garden is dormant. When your strawberry plants are in the ground, you should notice runners coming off each mature plant. These runners are future strawberry plants, meaning that if you look after your plants, strawberries can become yet another self-sufficient crop.
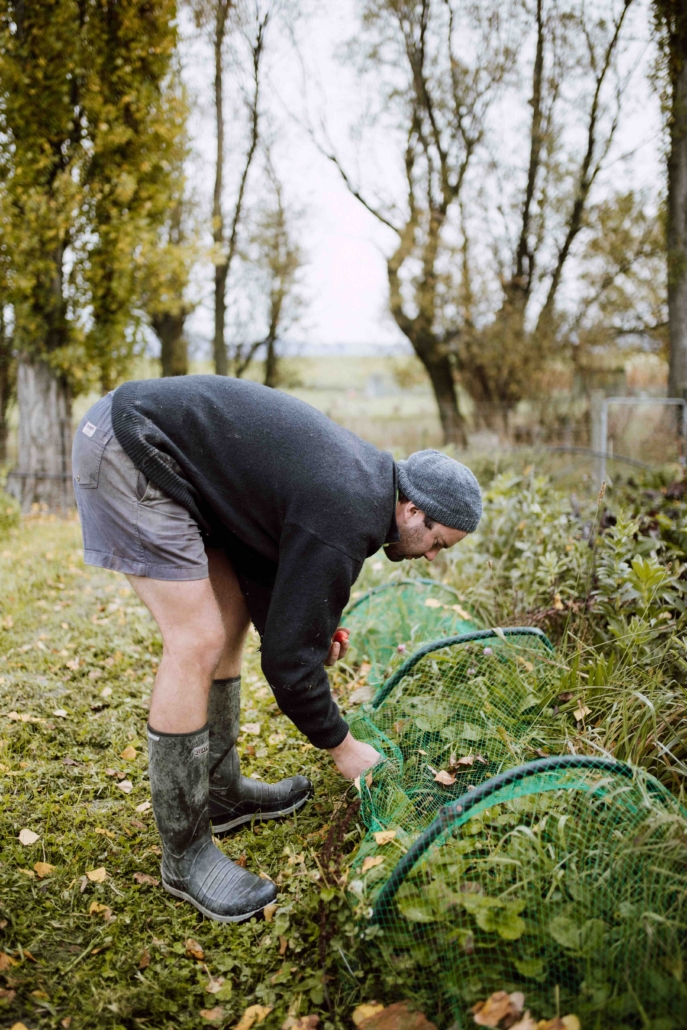
Strawberry plants are going to remain in your garden for a few years, so consider where you’re placing them. Wherever you plant them, they will need a bit of love in the beginning to ensure they fruit in summer. I’ve chosen to plant ours in the paddock next to our garlic crops, as they make great companions. Keep in mind they will need protection from birds, so growing them in a berry house or in an area you can easily cover is key!
Hamish harvests strawberries from under the bird netting
To obtain runners, find a healthy strawberry plant and locate the running stem from the original plant. There may be a few plants on one runner, and you can take them all. Look for little roots and healthy crowns developing at the base. I trim these down and plant them in a seed-raising mix until spring when the soil temperatures rise.
You could do this in autumn or spring, but I find taking the runners in winter, then keeping them in good soil and well fed with seaweed tonic, means I can build healthy roots in time for a head start in spring.
I also build their future garden beds, ready for the runners when it gets warmer. For my strawberry bed, I:
fork the ground gently to get some air into the soil.
add compost.
add chicken poop — it’s acidic, which strawberries love!
add leaf mulch and grass clippings — grass clippings in winter are fine to add as there are no seeds. Mixing them with leaves makes a powerhouse combo.
add weed matting. This will protect the plant, suppress weeds and stop any fruit in summer from sitting on the ground. Many gardeners dislike using weed matting, but we use it happily for our strawberry beds. You could replace weed matting with wool or a heavy mulch of pea straw. We get some big winds in spring, so pegging down weed matting helps keep our organic materials from being blown away, as well as retaining soil moisture.
blow-torch holes into the matting. Melting the matting seals the holes and makes it easier for us to plant the runners.
add an irrigation line under the weed matting, to be hooked up in spring when the runners are planted.
When it comes time to plant in spring, get the young plants and plant in the holes in the matting. You may have to dig down through the layers, but make sure not to cover the crown (the stem where the leaves develop from) with soil. Water in with seaweed tonic and keep plants well irrigated through spring and summer.
New plants won’t yield much fruit in their first year, but they will do better in years two and three. Keep covered with netting to prevent birds (and dogs) from getting in. With some care each year, you shouldn’t have to buy strawberries or strawberry plants again!
Cover of The Good Life by Gillian Swinton
https://organicnz.org.nz/wp-content/uploads/sites/2/2025/05/FrancineBoerPhotography-Lauderburn2.0073.lowres-scaled.jpg25601707membershiphttps://organicnz.org.nz/wp-content/uploads/sites/2/2024/09/OrganicNZ-2024-Masthead.pngmembership2025-05-26 12:44:282025-07-04 16:24:29Strawberries – a self-sufficient crop
Dr John Flux’s neighbour once called to see if he had died – because the grass had grown so long! The Lower Hutt ecologist is an advocate of the no-mow movement because of its many environmental benefits, and describes here how he has implemented it for the past four years in his garden and on the footpath verge.
We hope you enjoy this free article from OrganicNZ. Joinus to access more, exclusive member-only content
ABOVE: Green desert: The house with lawns as bought in 2016.
The origin of lawns
Lawns are said to derive from Marie-Antoinette’s wish to show she was rich. The habit spread to English nobility, and then everyone else. Naturalists, the early ecologists, realised how lifeless they were: W H Hudson wrote in 1919: “I am not a lover of lawns… Rather would I see daisies in their thousands, ground ivy, hawkweed, and even the hated plantain with tall stems, and dandelions… than lawn grass.”
The benefits of No-Mow
Today ecologists list many advantages of No-Mow:
an improved habitat for insects, and the birds reptiles, fish, and frogs that rely on them;
less petrol for mowing (5% of our carbon footprint);
increased carbon sequestration, continuing for many years;
reduced flooding (Cyclone Gabrielle damage was due to cut grass mud-flow, and forest trash);
it stays green and lowers the risk of wind-blown embers spreading fires;
and it saves money.
So I started to implement No-Mow in 2021 to show these advantages.
Implementing No-Mow
The first step was to ask the city mayor for permission not to mow the grass verge beside the footpath. He said to contact the environment section, who all thought it a good idea; but verges came under transport. Their only condition was clear views for motorists turning the corner, so the height limit was one metre. Check your local council rules if you want to put No-Mow in practice on your verge or berm.
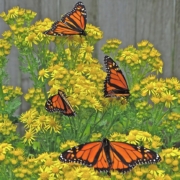
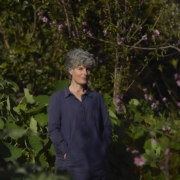
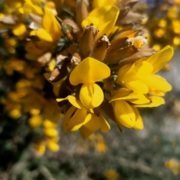
The second step should be easy: just sit back and watch what happens. But Western humans are born to interfere with nature to make things ‘better’. Resist the temptation, or at least try a No-Mow patch. (Do not expect stability – in New Zealand ecological succession ends in forest, and you may prefer tussock.) I confine gardening to watering, weeding, and fertilising raised beds with compost; no sprays of any kind. We know ragwort is a dreadful weed that will spread everywhere, but it didn’t, as explained later, and monarch butterflies love the two or three plants that flower each year (as pictured in the photo at the top of this article).
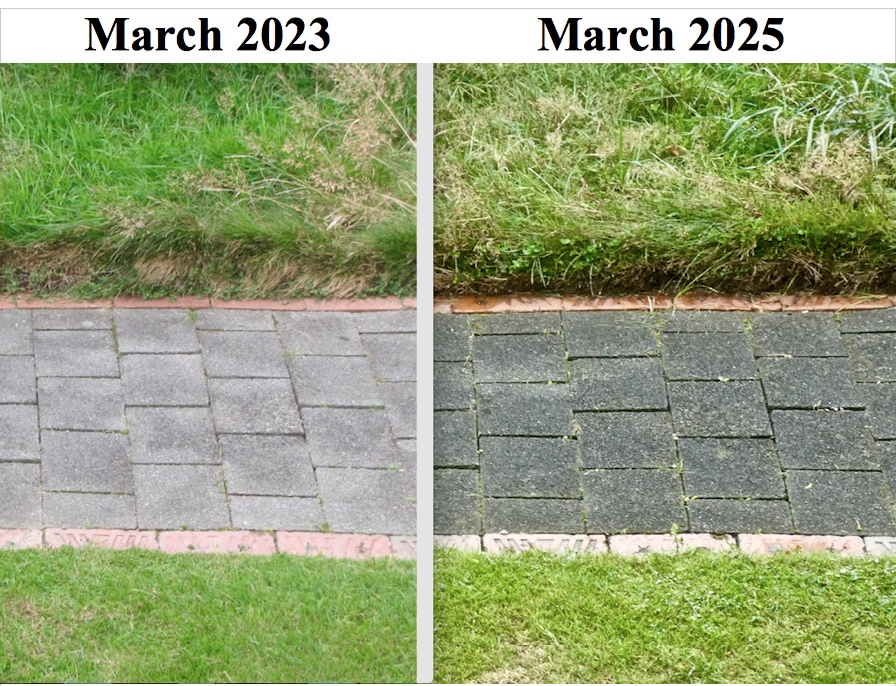
ABOVE: The roadside verge in 2021 (top) and 2025 (lower image)
Unexpected benefit: two apple crops a year
When we bought this house in 2016 it was in clear view from the gate, but today only the front door is visible. The neat brown lawn now reaches your knees and stays green. I was very surprised at the rate native trees grew once No-Mow established a complete ground cover that prevented the soil drying. They reached four to five metres in five years.
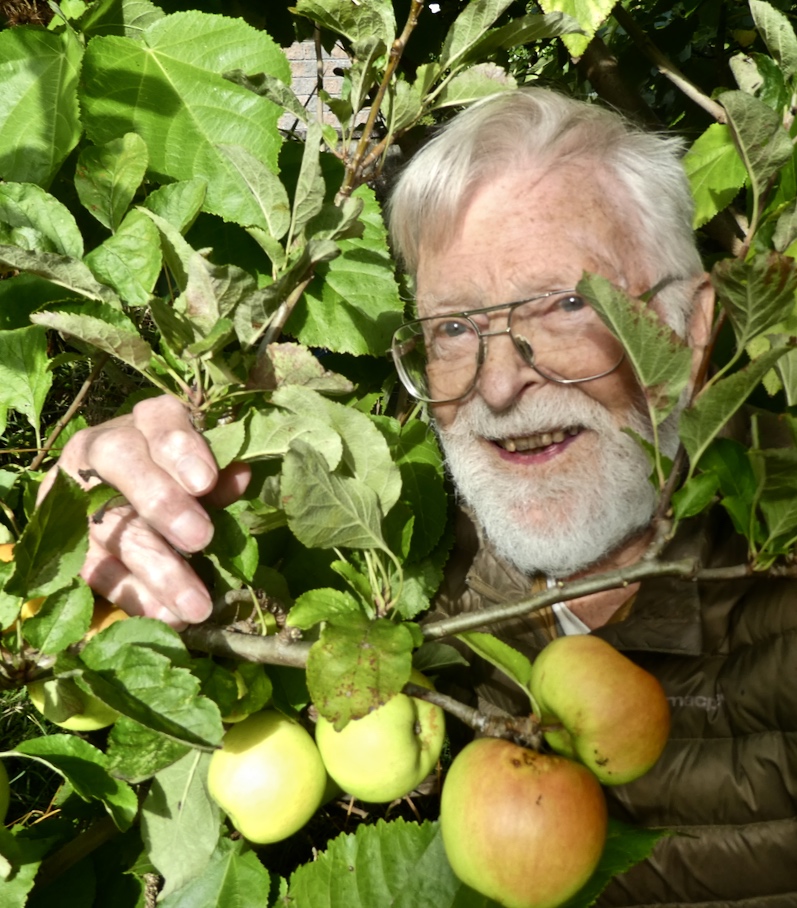
Apple trees (Sturmer, Cox’s Orange, and Russet) are pruned to two metres high, and all three produce two crops a year, summer and late autumn. Other gardeners have not reported this, so it does not seem to be a result of climate change, but pears, plums, figs, and feijoas still bear one crop a year.
Dr John Flux with a Sturmer apple tree in his No-Mow garden. The apples are ripe now (April 2025), and the second crop will be the normal time in August.
Managing the No-Mow garden
This front garden remains No Mow apart from clearing grass against the house for ventilation, and 30cm wide tracks I cut regularly with a push mower for access to prune, pick fruit, and show visitors round. These tracks are now a mix of short grass and white clover.
Most lawns are mixtures of about five grasses, e.g. brown top, fescues (chewings and creeping red), sweet vernal and turf ryegrass is a common lawn. Other species are chosen for a hard-wearing surface (playing fields) or different climates (kikuyu is frost tender). Our berm had kikuyu accidentally introduced in a load of topsoil by the original owner; it dominates that bit of No-Mow (see photo above) and is good for attracting attention – such as when a neighbour called to ask if I had died.
An experiment
On part of my lawn I set up an experiment: half was mowed, weeded, and watered, as normal. The other half has not been touched in any way since 2021 (see below). Each year the No-Mow area grasses grow about 20cm high and flower heads reach 30–50cm. Sparrows and finches enjoy the seeds until it all dies back to the green base over winter.
For the photos below, I cut the flap of grass that normally covers the orange bricks to show the thick underlay, which is ideal for delaying and filtering runoff in heavy rain. Visitors are impressed that no weeds have managed to invade this patch, despite all the dandelions growing and seeding on the mown lawn opposite. It explains why ragwort in the front garden remains an isolated clump. And I hand out copies of God, St Francis, and Lawns (google it!).
Still, problems remain. Ivy spread over a quarter acre of our previous garden, so I pick out every bit I find here. Kikuyu crawls in from the berm, under the fence and under the No-Mow plants. It is very hard to kill; I chuck it back over the fence where it came from. Muehlenbeckia australis climbs everywhere, but can be traced back and cut lower down. M. complexa is the worst, spreading at ground level in all directions looking for any plant to climb in a twisting spiral. I hope copper butterflies arrive soon to eat it, although many insects probe the tiny flowers.
ABOVE: The near side (lower part of both images) shows a normal lawn grass mix that has been cut, weeded, watered as needed. The far side (upper part of both images) shows an identical lawn, completely untouched since 2021, and nothing has changed. Some people expect No-Mow to become wild, but after the first year nothing changes. The lawn flowers and dies back to the same level.
Bountiful biodiversity
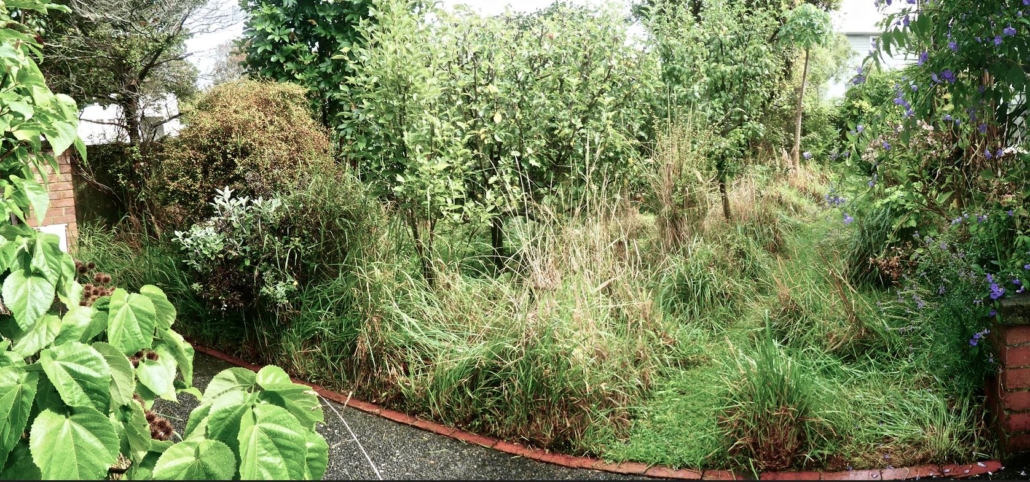
Looking across the garden from the front gate to the steps into the house gives a typical view of half the garden. The photo below shows, from left: pale green whau (Entelea arborescens), Muehlenbeckia australis climbing on a dead tree, M. complexa, Castlepoint daisy Brachyglottis spp, pate (Schefflera digitata), Cox’s Orange apple, māpou (Myrsine australis) growing easily through cocksfoot grass with flowers two metres tall, pear, and the tall bare trunk of mountain papaya (Vasconcellea pubescens).
The grass below the trees is being shaded out, and a closed canopy will lead to a totally different ground cover. What will happen?
Ecology education
I try to get people interested in ecology – which has been taught in every school in Russia since 2001, and in China. It explains why cutting berms is now illegal throughout Scotland, and many cities in England do not allow lawns anywhere, only shrubs and meadow flowers.
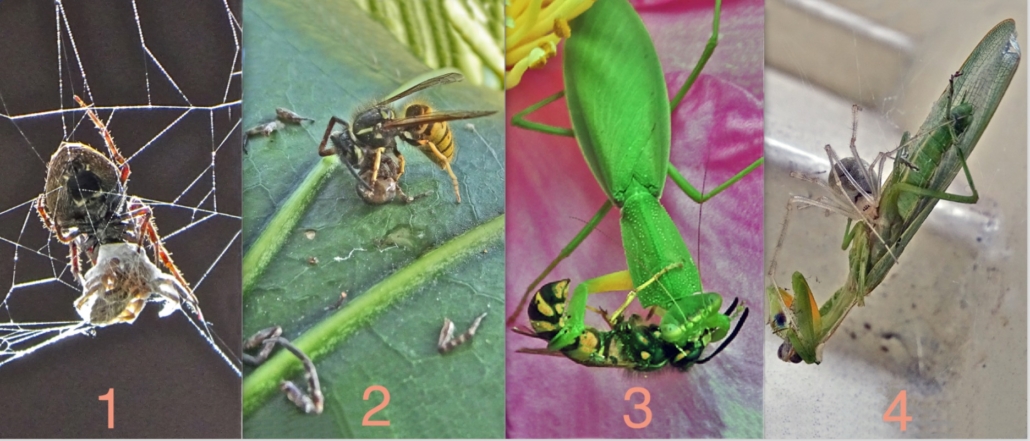
China’s leader in ecological urbanism, Kongjian Yu, completed 200 ‘sponge cities’ by allowing rivers room to spread; stop-banks only make the next flood worse. Two simple rules from Barry Commoner that I find useful are: Everything is connected; and Nature knows best (The Closing Circle, 1971). To illustrate this, below is a predator circle in my garden.
ABOVE: Predators, like weeds, are never simply good or bad: even introduced wasps – they stop cabbage white caterpillars eating brassicas. Pictured from left to right are: 1) spider eating spider, 2) wasp eating spider, 3) praying mantis eating wasp. 4) spider eating praying mantis.
Dr John E C Flux was an ecologist in the Ecology Division of DSIR for 35 years, Landcare Research for two years, and NZ Ecological Research Associates for 10 years, with a special interest in hares and starlings.
NZ Ecological Research Associates was a company set up at at AgResearch’s Wallaceville campus in Upper Hutt by a group of about 30 redundant DSIR staff, from Ecology, Botany, and Soil Bureau. There were also a few members in Auckland and Nelson, and the group worked on a wide range of things -including spiders on offshore islands, heather on Mt Ruapehu, swamp plants, pest control in orchards, new highway locations, and overseeing Zealandia’s fence construction. It disbanded about 15 years ago.
https://organicnz.org.nz/wp-content/uploads/sites/2/2025/04/Monarch-butterflies-ragwort-John-Flux-no-mow-garden.jpg992955membershiphttps://organicnz.org.nz/wp-content/uploads/sites/2/2024/09/OrganicNZ-2024-Masthead.pngmembership2025-04-16 14:23:052025-04-17 13:18:52Join the No-Mow movement!
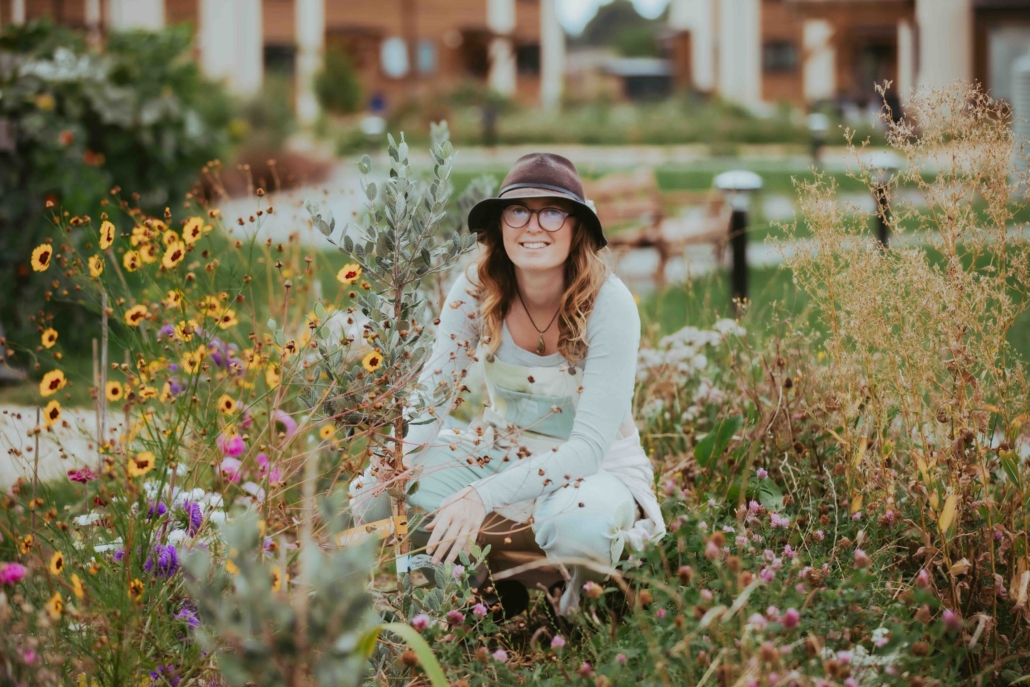
In an increasingly disconnected world, many people are seeking ways to live more closely with both the environment and one another. For Simone Woodland, a dream to create a different way of life led to the Tākaka Cohousing project in Golden Bay.
Hannah Schenker tells the story.
We hope you enjoy this free article from OrganicNZ. Joinus to access more, exclusive member-only content
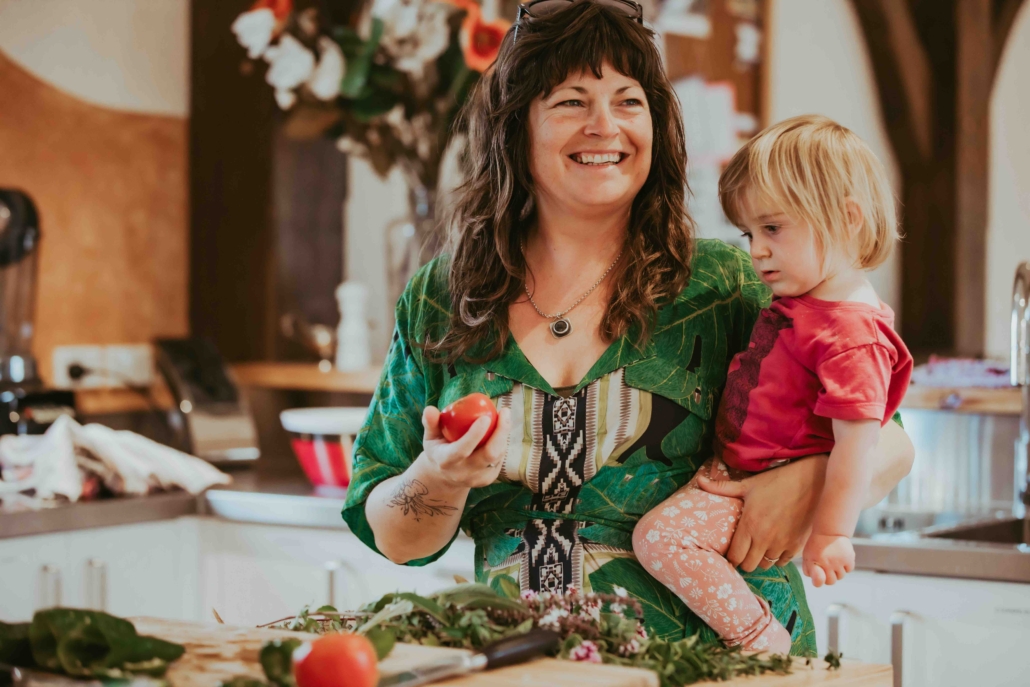
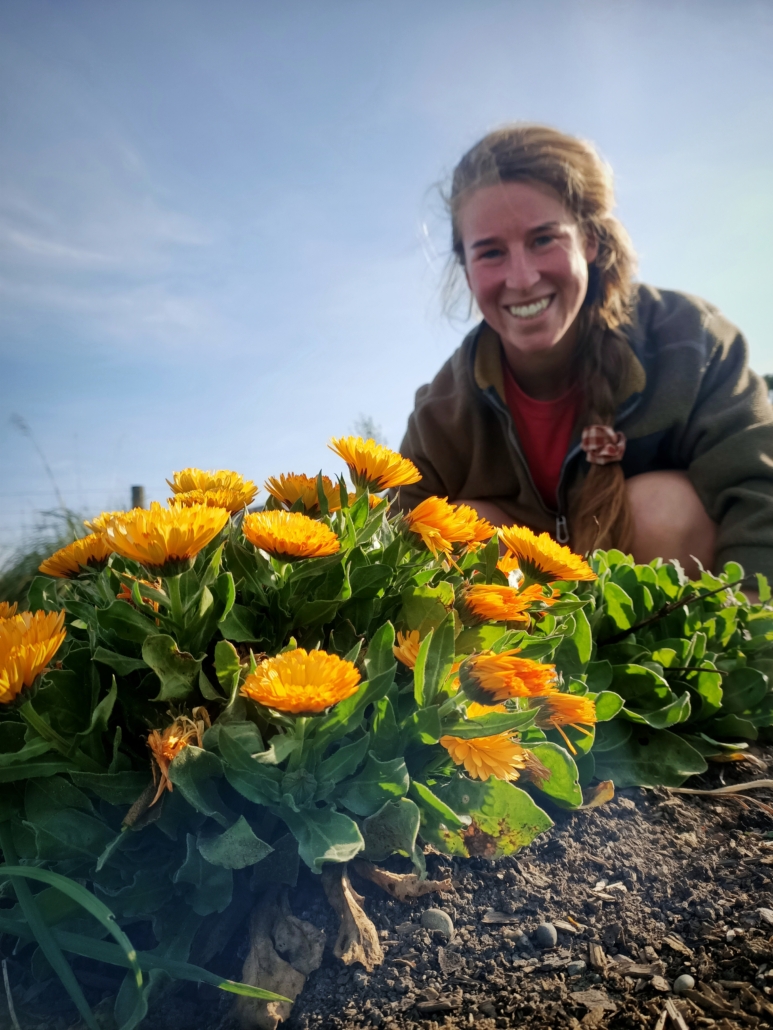
ABOVE: Simone Woodland and her daughter Frida
The birth of a dream
Simone Woodland’s dream began to take shape in 2017 when she applied to become an Edmund Hillary Fellow, and travelled to New Zealand. Driven to live more harmoniously with herself, others, and the land, she discovered cohousing. Her vision became clear: she could create a supportive community for her family to live in, while regenerating the land. From this seed, Tākaka Cohousing was born.
Originally from the UK, Simone trained in architecture and urban design before becoming disheartened by the industry and shifting to social entrepreneurship. In Aotearoa, she began exploring alternative, minimalist living through her early business Tiny Lifestyle.
Her passion for community building and sustainability deepened as she transformed this into another business, Elemental Design and Build, further honing her knowledge and interest in eco-conscious, natural construction. To bring her cohousing vision to life, she drew on these experiences and co-founded Mōhua Ventures, a housing development company owned by a charity, Te Hapori Hauora Community Land Trust.
But her love of community started much earlier. “When I was a kid, my dad hosted annual street parties in our little cul-de-sac,” says Simone. “It brought all of our neighbours together around a bonfire, sharing kai and doing silly things like three-legged races. It broke down barriers and we became friendly with our neighbours. He showed me that you can create community wherever you are.”
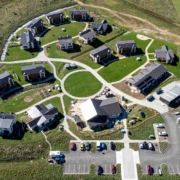
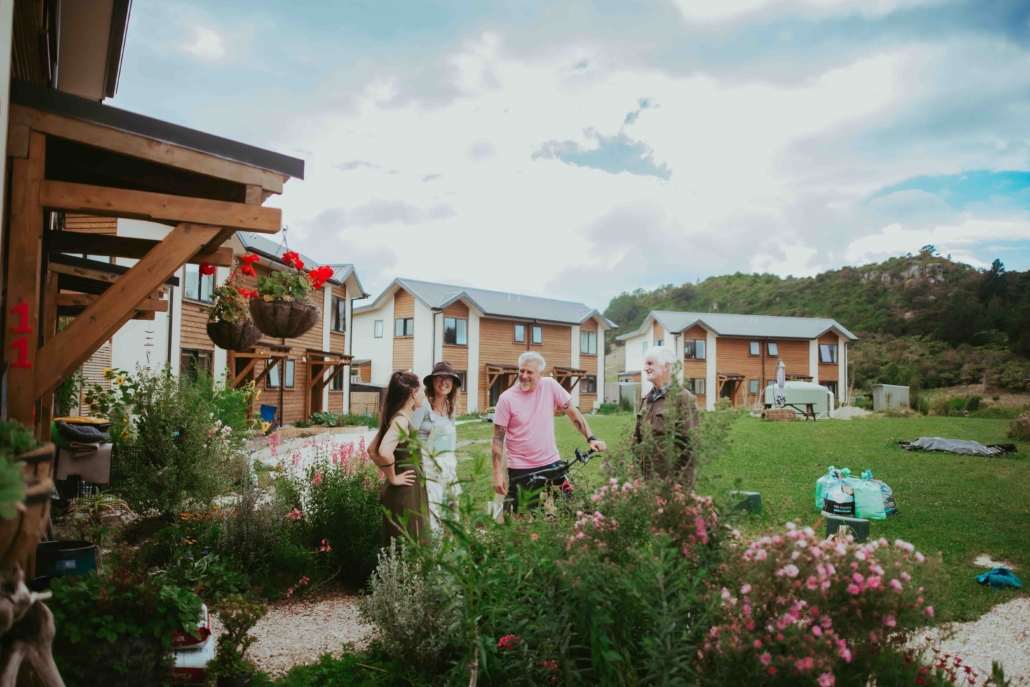
ABOVE: Tākaka Cohousing from the air
The benefits of cohousing
Cohousing offers a refreshing alternative to traditional suburban living. The concept originated in Denmark in the early 1970s and has since spread globally. It is a community-based housing model where individuals own private homes but share common spaces and facilities. It blends personal privacy with social connection, fostering collaboration, sustainability, and a supportive environment. Residents actively contribute to decision-making and community life, creating a stronger, more connected neighbourhood.
Loneliness is a growing issue in New Zealand, exacerbated by our individualistic society. A 2018 Stats NZ survey found over 650,000 New Zealanders experienced loneliness at least some of the time in the past four weeks. (https://loneliness.org.nz/nz/facts/many-kiwis-feel-lonely/).
Cohousing can help counteract that. Living in a close-knit neighbourhood opens up possibilities for interactions that foster personal growth, increasing the health and wellbeing of residents, promoting intergenerational connection.
Cohousing also offers environmental, social, and economic benefits. Sharing facilities reduces individual costs and space needs, while sharing green spaces means you don’t have to grow and tend everything on your own.
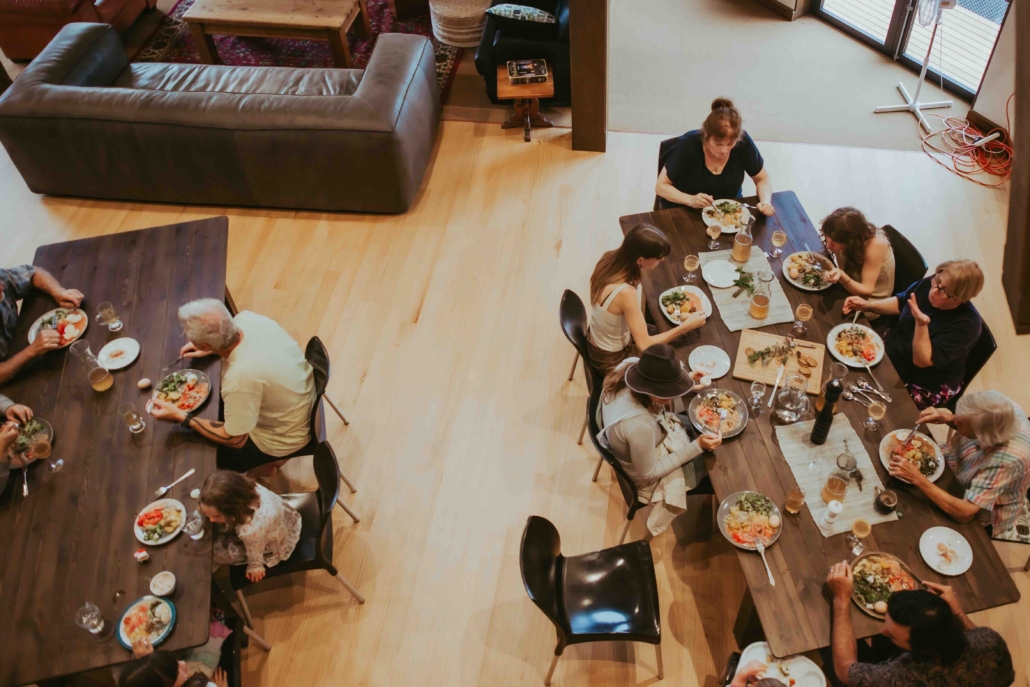
ABOVE: Residents meeting outside the three-bedroom duplex homesABOVE: Sharing a meal in the Common House
How Tākaka Cohousing works
Homes are sold at cost with individual unit titles, which banks recognise for mortgage approvals. Residents own their own home and the land directly beneath it, and a share of the common land and facilities, managed by a body corporate.
Architecture and urban planning principles are used to create a pedestrian-friendly layout, with car parking kept to the outside of the neighbourhood. The physical design promotes social interaction in “bump spaces”, allowing spontaneous interactions to occur in daily life. This means you don’t always have to pre-arrange catch-ups and cuppas and diarise everything – it happens quite naturally.
The first neighbourhood has 34 fully occupied duplex homes, with a mix of single and double-storey two- and three-bedroom layouts. Two more neighbourhoods are planned for construction in 2026 and 2027, with a similar mix of options now open for expressions of interest.
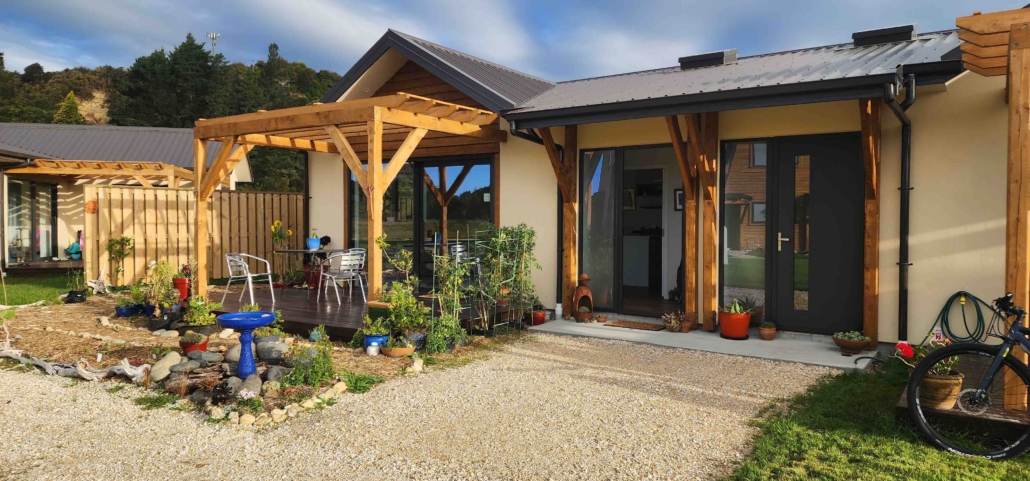
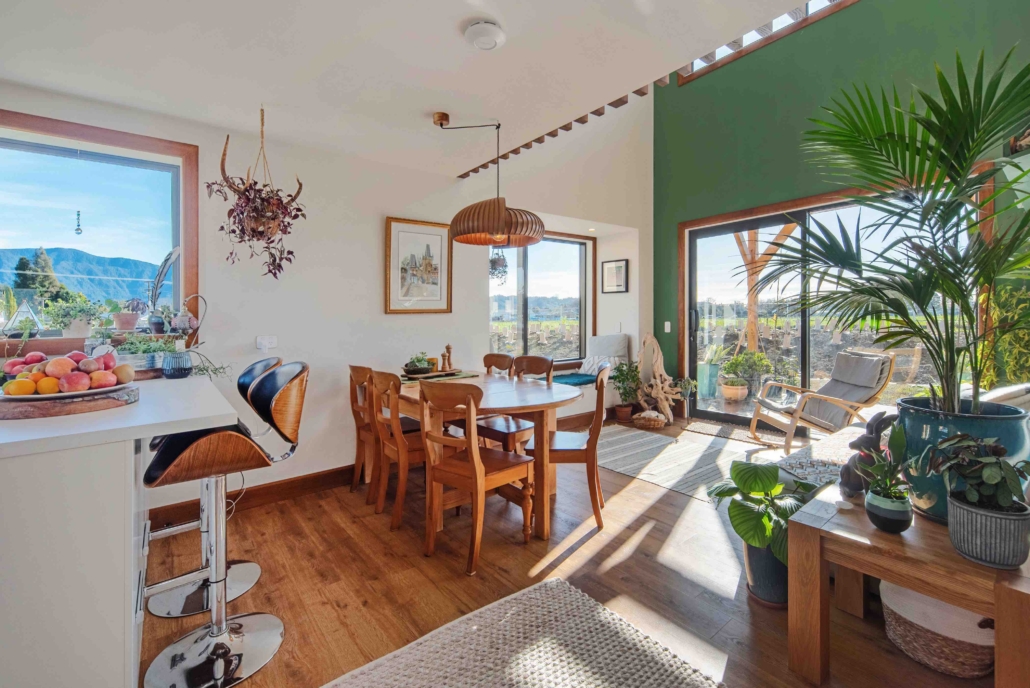
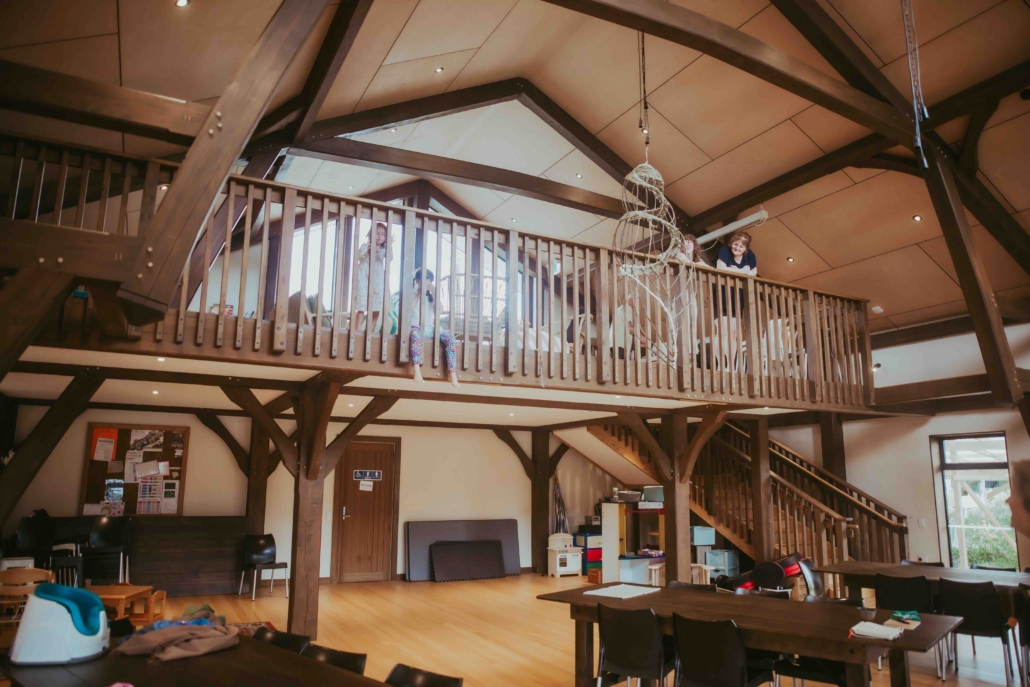
ABOVE: Left – Exterior of the two-bedroom, single-level duplex. Right – Interior showing dining and living areaABOVE: Left – Interior from living area showing mezzanine above Right – Kitchen
Recipe for success
A big part of why Tākaka Cohousing has succeeded is Simone’s approach of creating a dedicated company to drive the project forward. Rather than relying on a group of peers to navigate the complexities of development – something that often leads to slow progress or burnout – she founded Mōhua Ventures, a company with the experience and knowledge needed to deliver the vision.
Through the company, she is able to maintain the momentum of the project, while being a resident herself gives her firsthand experience of what works and what can be improved as the development grows.
The project is currently entering its second phase, with two further 18-home cohousing neighbourhoods to be built on the remaining land along Meihana Street, near Tākaka township. Seven hectares of land surrounding the neighbourhoods will be regenerated into publicly accessible parkland through a community land trust.
ABOVE: A carpeted mezzanine in the Common House offers comfy lounge space for board games and movie nights.
Spotlight on sustainability
The duplexes at Tākaka Cohousing feature Terra Lana insulation made from recycled sheep’s wool, thicker walls to increase insulation, concrete floors for added thermal mass, and non-toxic paint from The Natural Paint Co. “The health of the whānau living in our homes is our top priority,” says Simone. “It’s about creating spaces that are not just energy-efficient but truly healthy to live in—warm, dry, and well-insulated.”
The Common House was built by Elemental Design and Build, guided by Graeme Scott’s passion for traditional timber framing. This off-grid natural build was crafted using untreated, non-toxic and sustainably sourced heartwood lusitanica (Cupressus lustitanica – related to macrocarpa) for the framing, staircase, railings and balustrade, and a couple of extra-long pieces of macrocarpa heartwood for framing, all stained with Osmo natural wood stain.
All of the wood was milled on site, keeping transport and carbon footprint to a minimum, and its natural non-toxic qualities preserve the health and wellbeing of the builders and contractors during construction, and the residents who use the space. Eucalyptus was sourced from Riwaka for flooring, skirting and architraves. Inside the walls is regular H1.2 boron-treated timber. The external weatherboards are macrocarpa (not milled on site, sourced from Totally Timber, and stained with a natural oil stain).
The walls are made using hempcrete panels, manufactured by Kohu Hemp using their own formula of hemp hurd and hydrated lime, and coated in lime plaster by Solid Earth. Hemp is a crop that enhances soil health, and grows in just three months. It creates a breathable, natural product with high insulation values. Hempcrete sequesters carbon dioxide for 50 years.
Additionally, the project acknowledges the importance of mana whenua (local iwi) as kaitiaki (guardians), integrating cultural connections into its development. Mōhua Ventures is owned by Te Hapori Hauora, Mōhua Community Land Trust – a registered charity.
Te Hapori Hauora governs the land surrounding the cohousing neighbourhoods and has a tripartite structure, with representatives from mana whenua, the cohousing neighbourhood, and the wider Mōhua (Golden Bay) community. The Trust is planning to create a publicly accessible parkland and community facilities on the land surrounding the cohousing neighbourhood, regenerating the whenua for generations to come.
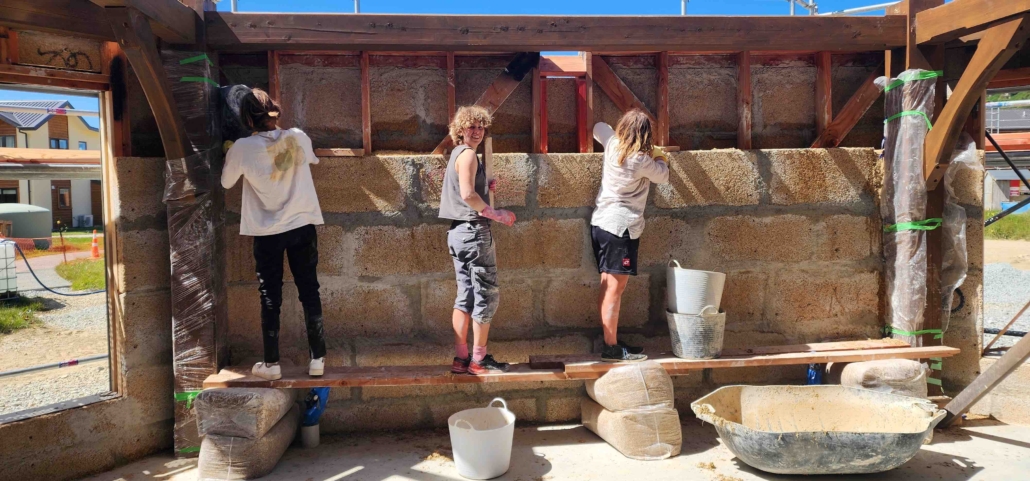
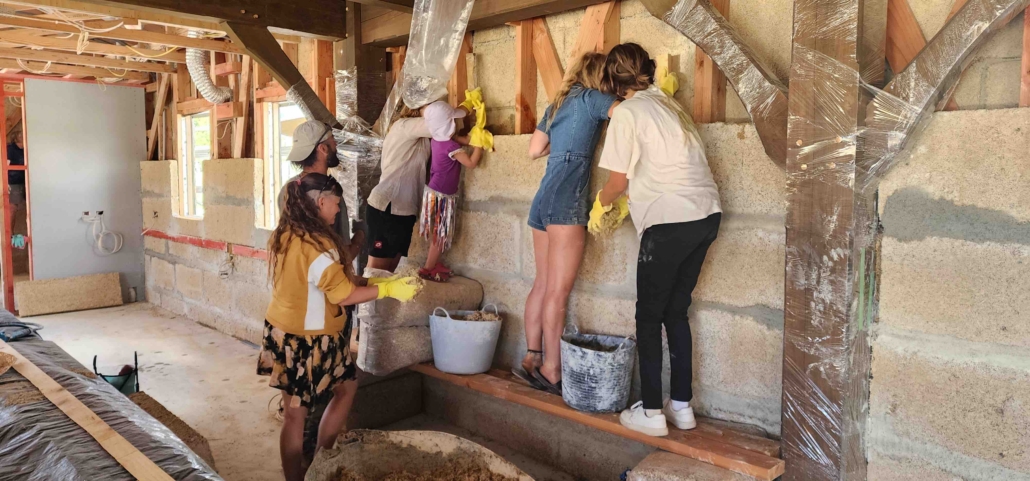
ABOVE: Willing workers installing hempcrete panelsABOVE: Getting the whole family involved – hempcreting the Common House
Cohousing in Aotearoa NZ
Cohousing in Aotearoa is still finding its feet, but the momentum is growing as more people realise the benefits of living in community. Pioneering projects like Earthsong (32 terrace homes and apartments in Auckland) and Toiora (21 passive homes in Dunedin) have shown what’s possible, but many other initiatives still struggle with the usual roadblocks – funding, land access, and red tape. Despite these challenges, the desire for a more connected, sustainable way of living is stronger than ever.
“We are now expanding our horizons to support other communities with their plans to create sustainable, alternative housing solutions,” Simone says. Mōhua Ventures has an experienced, professional team that can help with understanding project feasibility, project management, and community building. “We would love to hear from other communities we can support.”
Who lives here?
Residents come from diverse backgrounds and life stages. For Kirsty and Duane, the desire to explore alternative education for their two children led them to cohousing. Recognising the need for community support in their unschooling and life learning approach, they found Tākaka Cohousing to be the perfect fit. “We all live such a rich life,” says Kirsty, highlighting the benefits of a safe, supportive environment where children thrive and connect with people of all ages.
“The kids are constantly playing with their friends, are safe to walk, bike ride, and run around the neighbourhood without any worries about cars,” she says. “They’re learning and connecting with everyone all the time and have developed some amazing friendships, not just with the other children, but also other adults, while gardening or attending working bees. Their contribution is valued, and their opinion is considered.”
For some, the location is the biggest drawcard. Golden Bay is known for its beautiful landscapes bordered by two National Parks, for the sacred waters of Waikoropupū Springs, and its friendly and creative community.
“It’s the ease of access,” says resident Mazarine Fitzgerald, “to be able to connect with yourself, and nature, and the land.” For her, what makes Tākaka so special is also the “sense of community, real friendship and belonging, and all the wholesome events that happen here.”
ABOVE: Residents Mazarine Fitzgerald (left) and Kate Burness (right)
Shared facilities and gardens
The Common House is central to community life, hosting everything from social gatherings to morning dance sessions. It offers shared laundry facilities, a meeting space, kitchen, extra storage, a bedroom for guests, and hosts monthly meetings and potluck dinners.
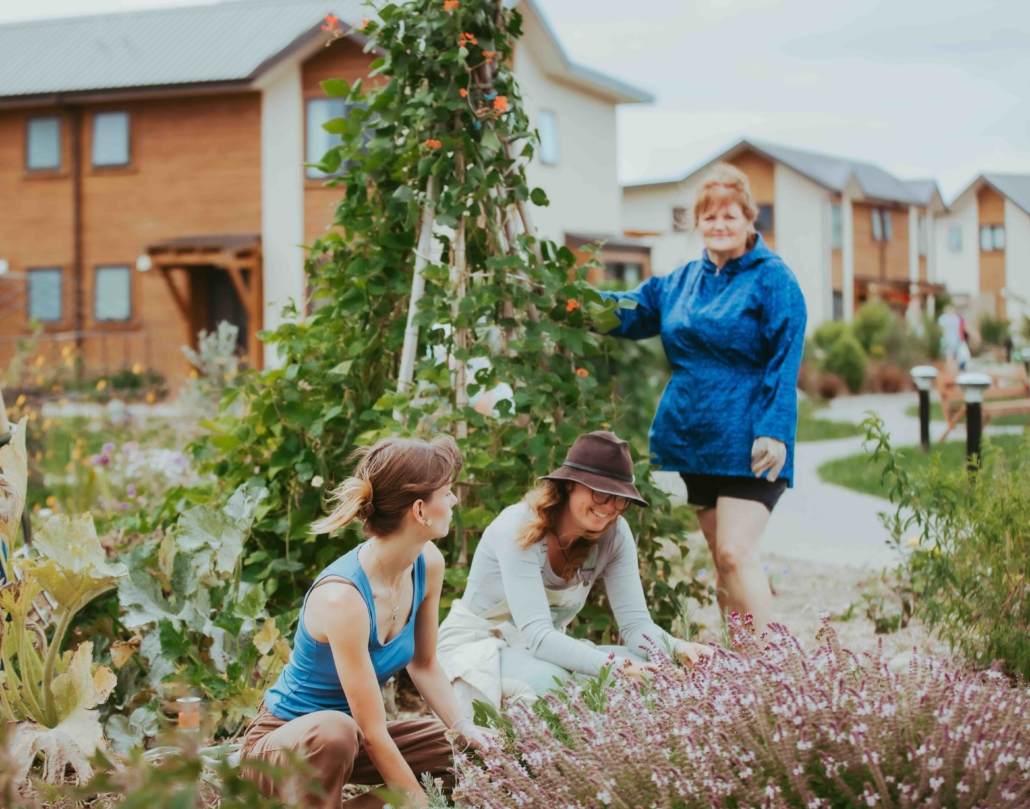
Gardens are another shared resource, allowing residents to grow and share produce, and reduce their reliance on external sources. “We get together for working bees, we plant, weed, and harvest food,” says Simone. “I love it because I’m learning so much about gardening. Doing it together lightens the load and benefits more than just yourselves, and the kids are growing up knowing where yummy fresh food comes from.”
Tākaka Cohousing is more than just a housing development – it’s a community that embodies the values of connection, collaboration, and environmental stewardship. For Simone and many others, it represents a new way of living that aligns with their principles and their vision for a better future. With its blend of shared resources, healthy homes, and a supportive social dynamic, Tākaka Cohousing is proving that the future doesn’t have to be a solo journey – it can be a shared experience.
ABOVE: Sharing gardens reduces the load for all, while increasing the amount of produce to share. Residents, left to right: Phoebe Fulton, Mazarine Fitzgerald and Deb Rolston
Hannah Schenker is a freelance writer, proofreader, and team assistant at Mōhua Ventures. She’s also mama to a beautiful five-year-old, living a life rich in family and creativity.
https://organicnz.org.nz/wp-content/uploads/sites/2/2025/03/DJI_0169-scaled.jpg16002560membershiphttps://organicnz.org.nz/wp-content/uploads/sites/2/2024/09/OrganicNZ-2024-Masthead.pngmembership2025-03-27 14:34:272025-03-28 12:23:38Living Better, Together
Soil & Health member Jenny Williamson shared some photos from her garden near Feilding, taken in February 2025.
We hope you enjoy this free article from OrganicNZ. Joinus to access more, exclusive member-only content
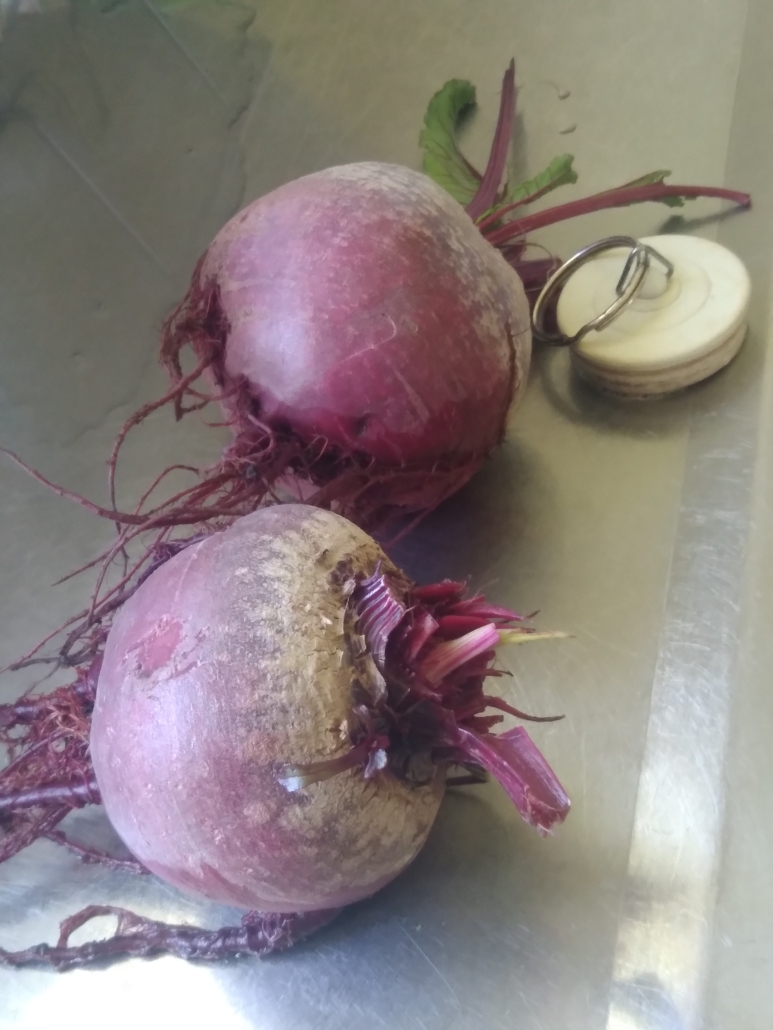
Jenny Williamson’s favourite vegetable is beetroot, which grows extremely well in her garden. She grows two varieties: Detroit Dark Red (pictured) and Monorubra (a cylindrical variety).
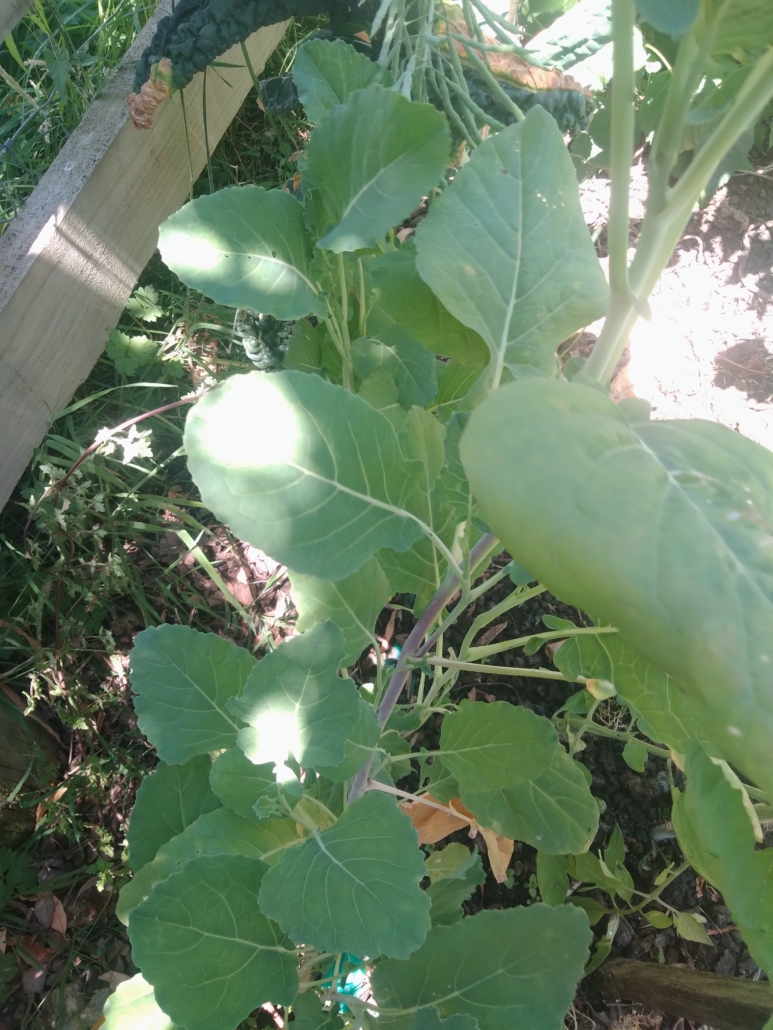
The green leafy plant is Daubenton’s kale, a perennial plant that Jenny grew from a cutting planted in the spring. It’s growing well even in part shade. Read more about perennial brassicas here.
ABOVE: Left – Detroit dark red beetroot Right – Daubenton’s kale, grown from a cutting
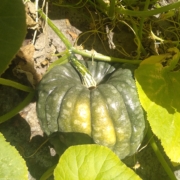
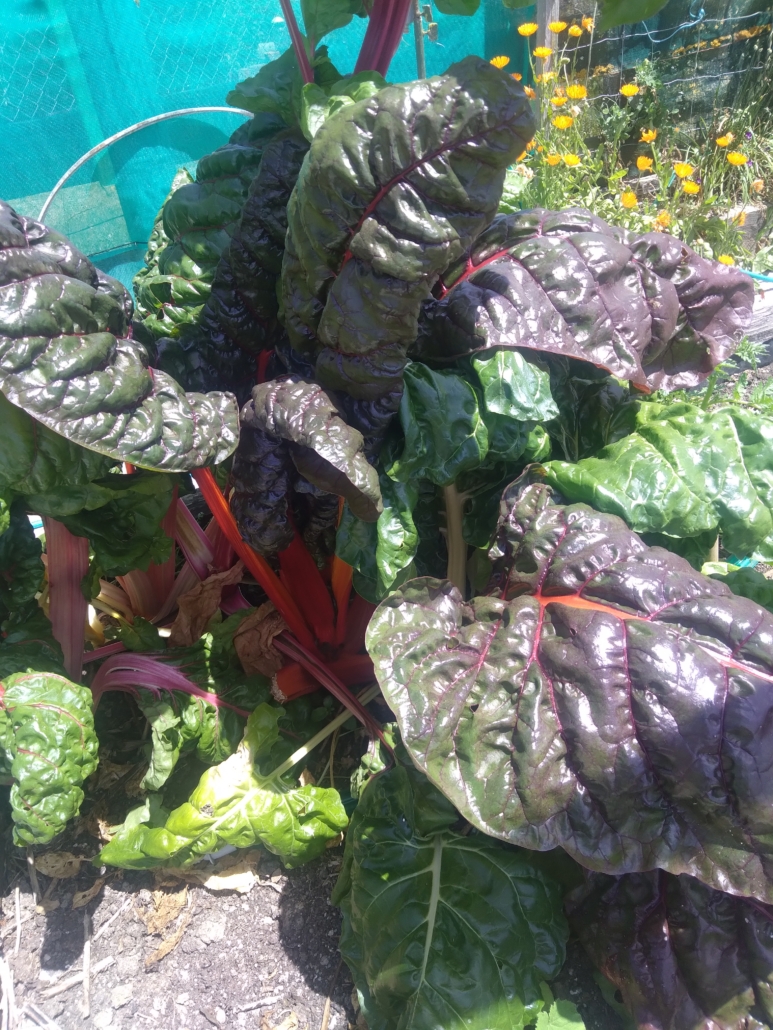
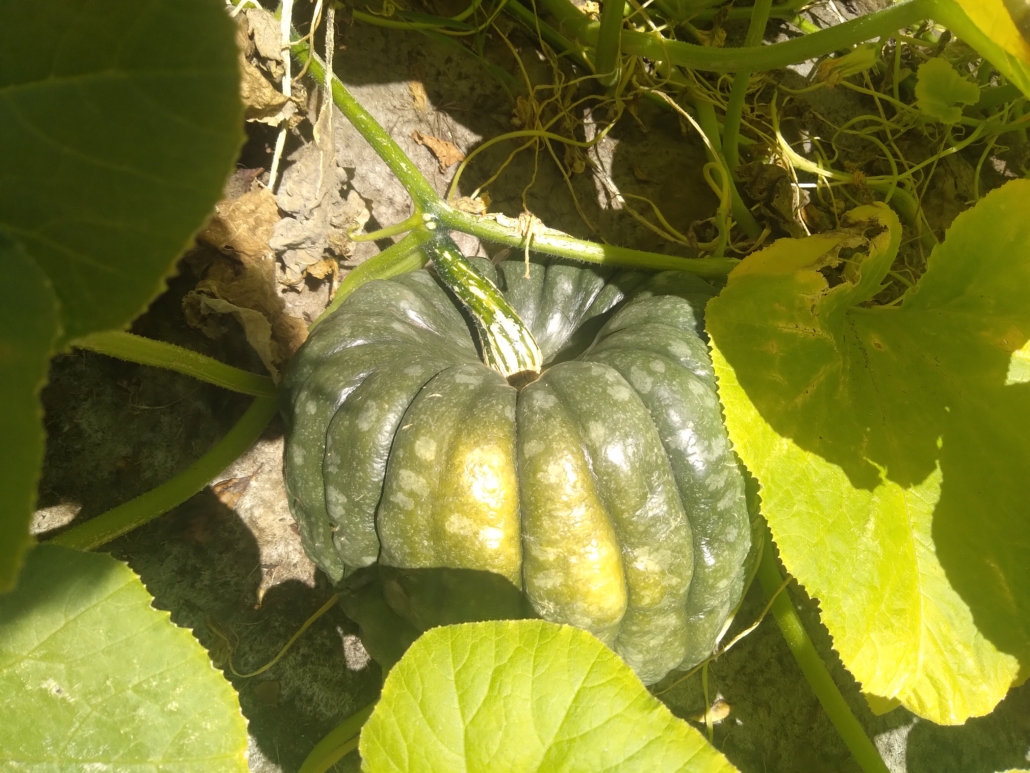
The silverbeet pictured is Rainbow Lights, and the pumpkins Jenny is growing this season are Queensland Blue and “just the usual supermarket grey”. Jenny saved seeds of both of these from the previous season.
“I have had tomato blight and have not been able to solve it, unfortunately,” says Jenny. “I’m not keen on spraying. I grew the tomatoes from saved seed from last year so I’m disappointed in this result. Others I got from a friend are looking all right, and of course the cherry tomatoes don’t seem to be bothered by anything.”
Sometimes success comes unexpectedly. “I have also had a great crop of bok choy (or maybe it’s pak choi) which I did not sow. It just came up and must have been in my compost, although I have not had this vegetable in my garden for several years!”
ABOVE: Left – Rainbow Lights silverbeet; Right – Queensland Blue pumpkin
https://organicnz.org.nz/wp-content/uploads/sites/2/2025/02/20250122_140305-scaled.jpg19202560Staff Writerhttps://organicnz.org.nz/wp-content/uploads/sites/2/2024/09/OrganicNZ-2024-Masthead.pngStaff Writer2025-02-25 15:07:222025-02-25 15:07:23Photos from Jenny’s garden
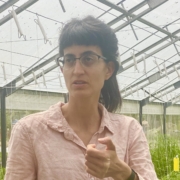
Sarah Smuts-Kennedy has dedicated her life to cultivating change – not just in the soil, but in the way we grow, learn, and connect to the land. From her early days as an artist to becoming an advocate for biology-first regenerative horticulture practices, she has helped reshape how we view the potential of food production in our cities and its capacity to heal the soils we grow in.
Sarah shares her transformational journey, the challenges and triumphs of founding For the Love of Bees (FTLOB), their model farm OMG and the Earthworkers Hort 101 educational pathway.
We hope you enjoy this free article from OrganicNZ. Joinus to access more, exclusive member-only content
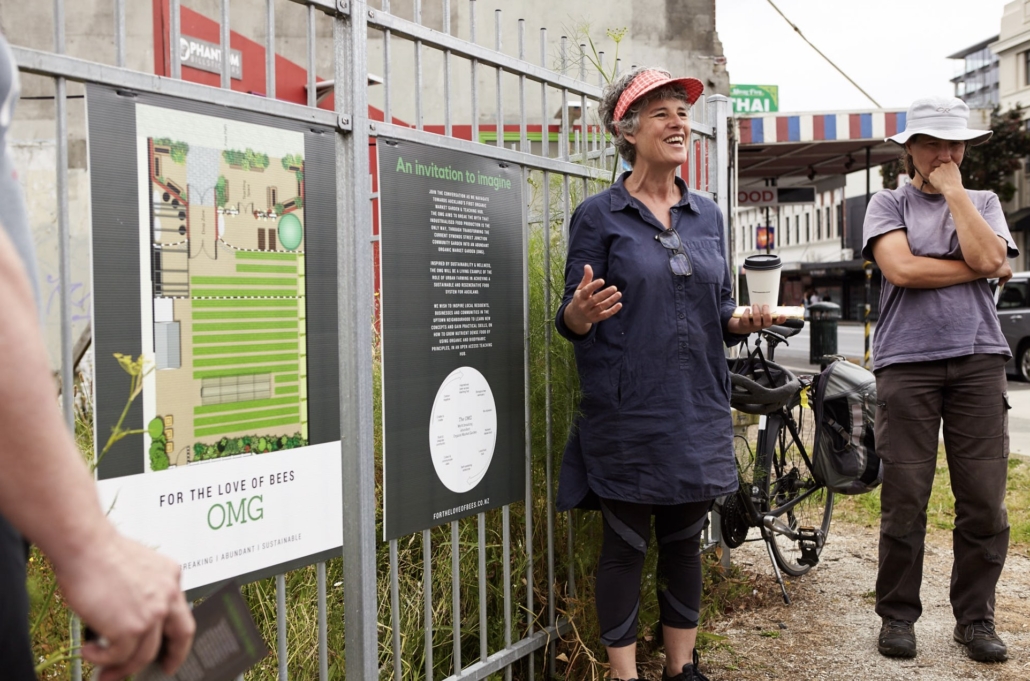
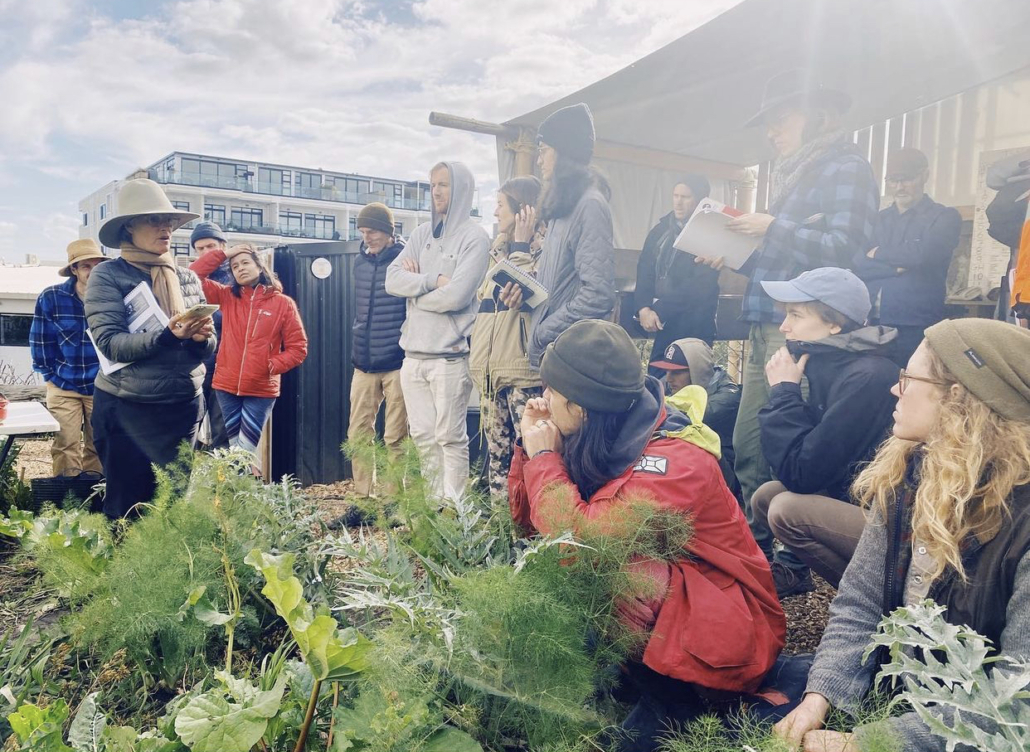
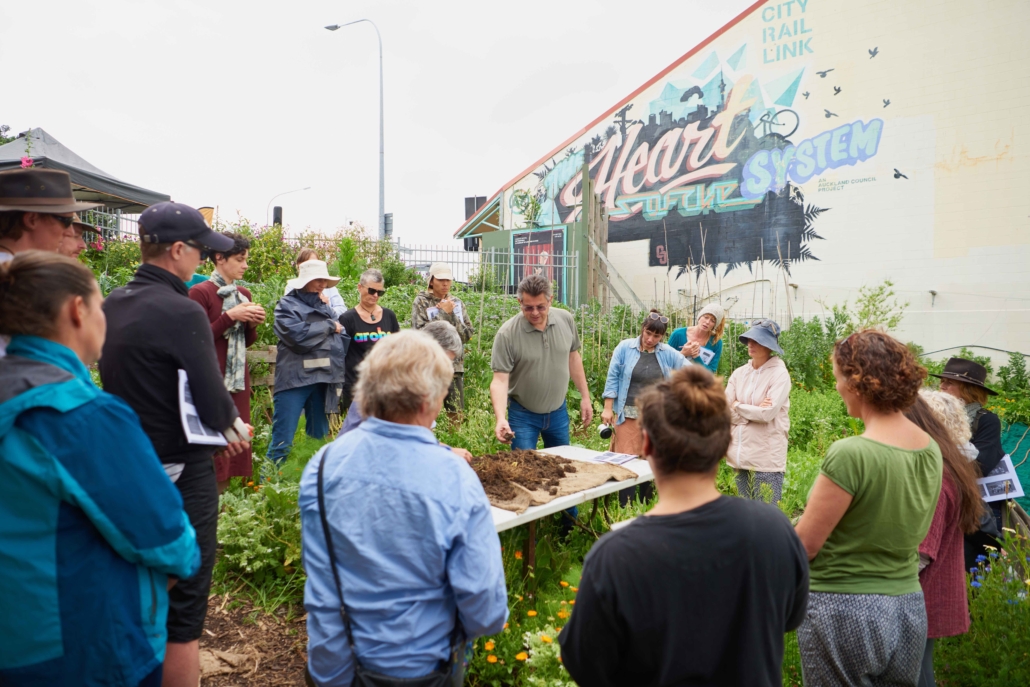
ABOVE: Sarah Smuts-Kennedy, establishing interest in the OMG farm in central Auckland, 2017
Tell us a bit about your background, Sarah. You’ve had quite a diverse career journey.
I’ve had an unconventional path, to say the least. I was an actor for over 20 years, from the ’80s through to the early 2000s. In the early 2000s I moved to Australia and became an artist and in 2005 I got to travel to India and exhibit my art in New Delhi. That experience really changed my perspective on the world. I began to use my art practice to explore the environmental issues we were facing, like deforestation and coal mining in Australia.
By 2010, I realised that my art wasn’t having the kind of impact I wanted. I was highlighting problems but not providing solutions. So, I decided to make a shift. I enrolled in a Permaculture Design Course at the same time I began an Master of Fine Arts and started working with biodynamic practices, committing myself to learning how to regenerate land I had just moved to which we named Maunga Kereru. I wanted to focus on solutions and find ways to share these practices with others.
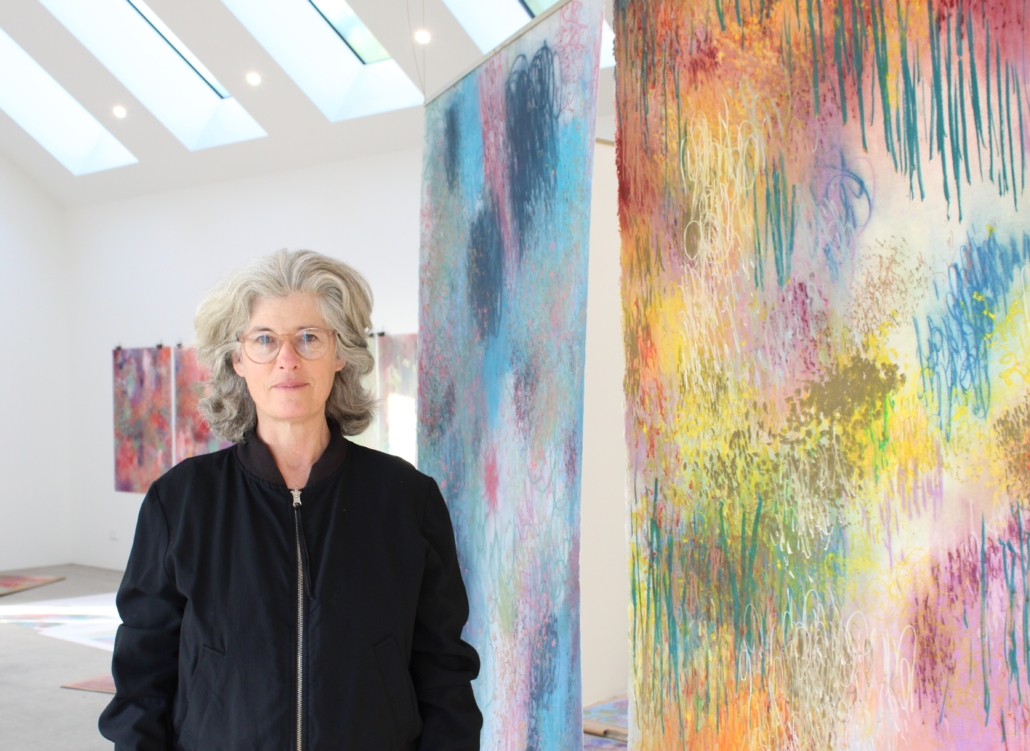
ABOVE: Sarah in her studio at Maunga Kereru, 2023
You’ve had quite an impact in the regenerative urban farming community. How did For the Love of Bees and Earthworkers come to be?
In 2014, I worked on a collaborative artwork called ‘The Park’, which aimed to bring bees into the city and encourage people to engage with their local food sources. Through this project, I connected with Daniel Schuurman, who introduced me to the idea of using fungi to improve plant health.
I realised that while art could bring attention to environmental issues, it was through practical action that real change could be made. This led to the creation of For the Love of Bees, a project focused on reimagining urban environments as safe spaces for bees. We wanted to build a community that would prioritise biology-first regeneration horticulture. Over the years, that vision grew into Earthworkers, an educational platform designed to equip people with the skills they need to regenerate the land and grow food sustainably.
To date, over 200 people have graduated from Earthworkers, many of whom are now working professionally in the sector, spreading the knowledge they’ve gained through workshops and projects of their own.
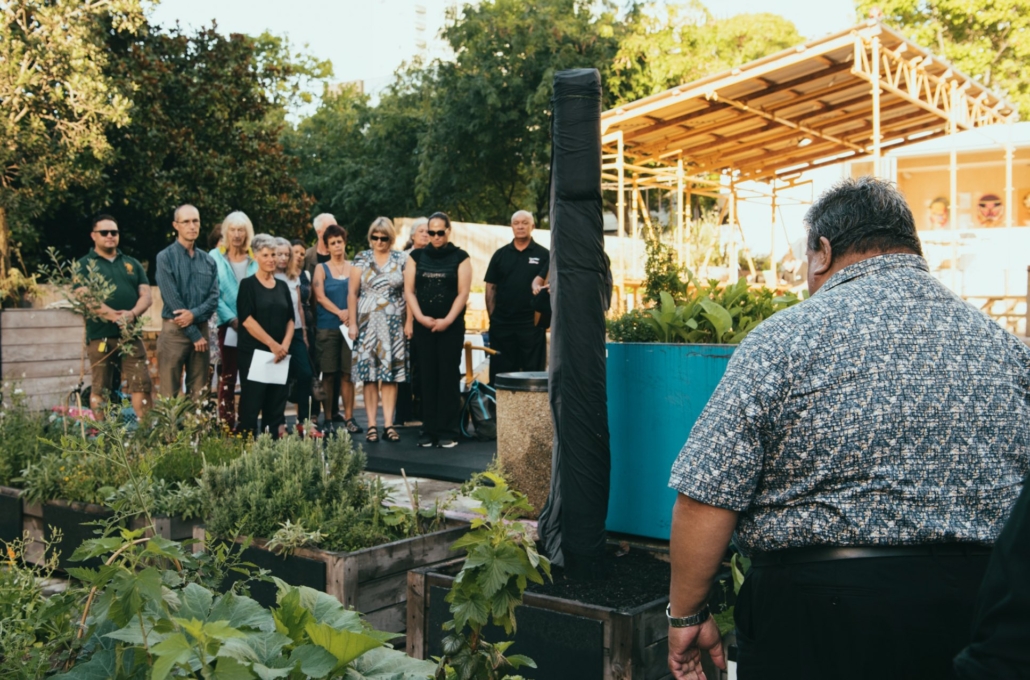
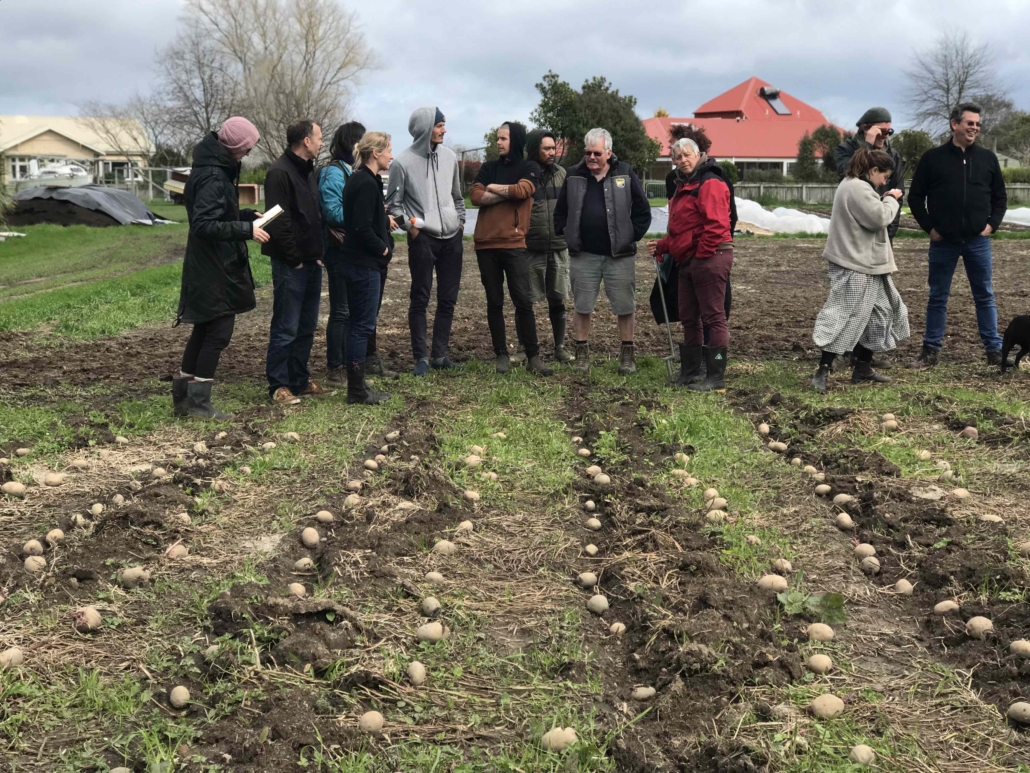
ABOVE: Pōwhiri for the Rongoā gardens at Wellesley St, central Auckland, pre OMG (2017)ABOVE: Sarah (at left, wearing a hat) with Earthworkers participants at OMG (Organic Market Garden) in 2021
What led you to focus on education and mentorship in the agricultural sector?
I’ve always believed in learning from those who are actually doing the work. There’s so much theory out there, but hands-on experience makes the difference. After taking various courses and learning from experts like Graham Sait and Jodi Roebuck, I realised that no one was offering an educational pathway that combined learning with ongoing mentorship.
When you’re starting out in regenerative farming, so many questions arise in the field. Without proper support, it’s easy to fall back on old habits or resort to quick fixes – like pesticides or even organic fertilisers that may not always benefit the ecosystem as a whole. That’s why we integrated post-course mentoring into Earthworkers Hort 101.
The idea is that students don’t just leave with knowledge; they have a community to lean on as they continue to learn and grow. The mentorship component ensures that they implement the practices and make decisions that prioritise soil health—the foundation of any regenerative system.
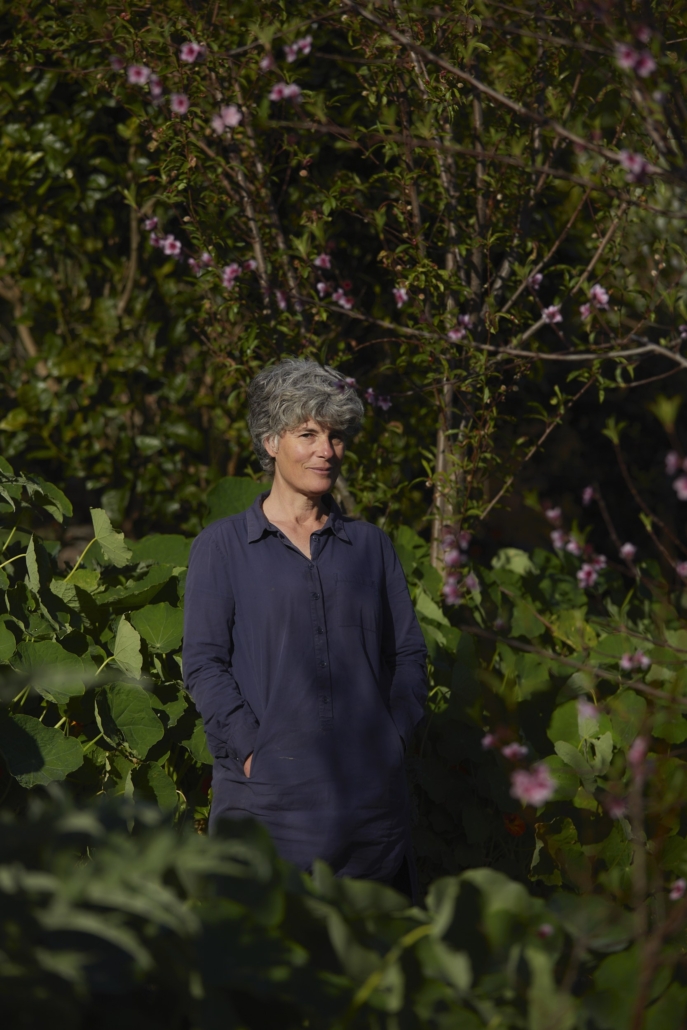
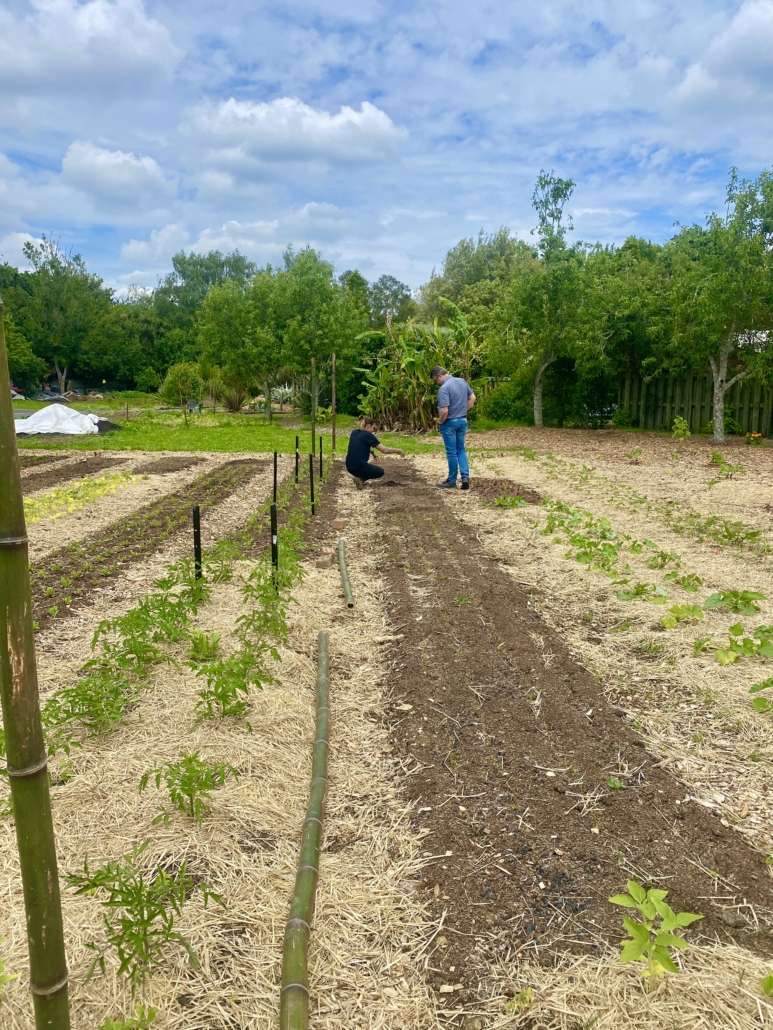
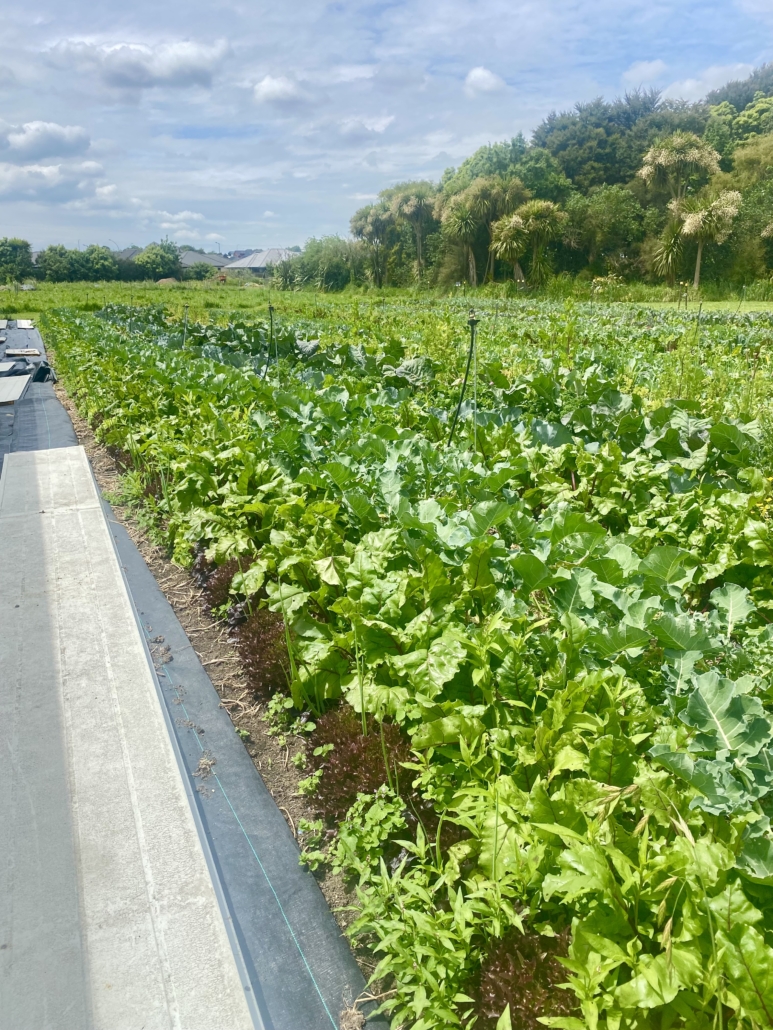
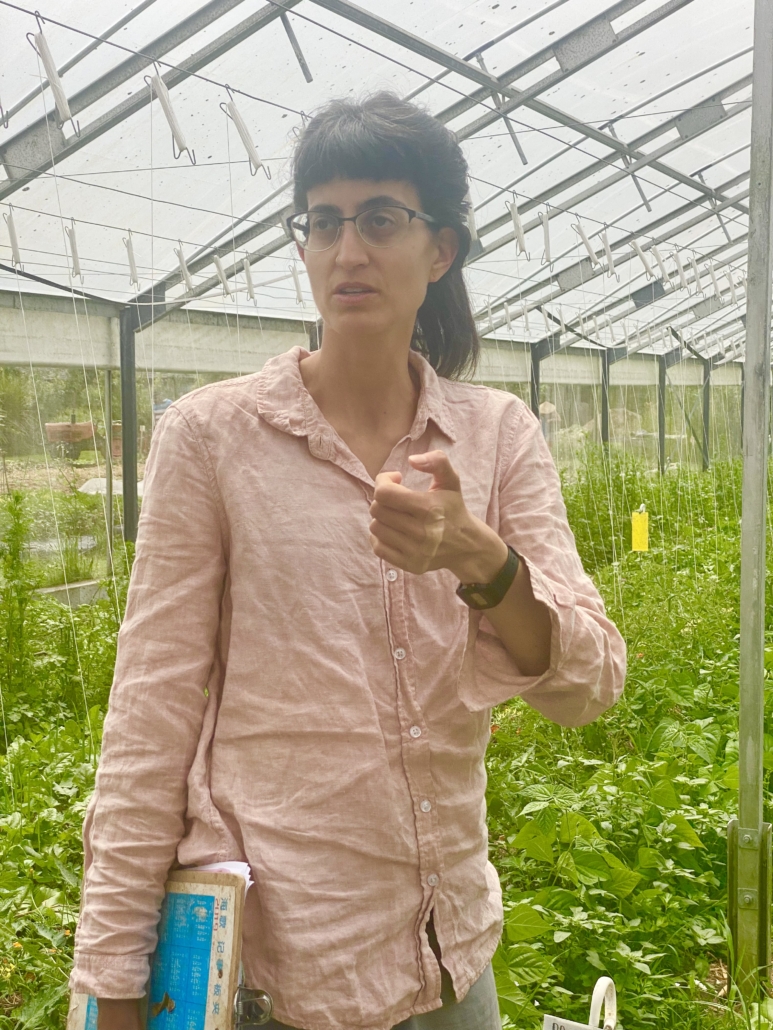
ABOVE: Left – Sarah Smuts-Kennedy at Maunga Kereru, which she describes as a syntropic research gardening project. Right – Sarah teaching at an event at Solstice Organics, Whenuapai, organised by OrganicFarmNZ in February 2025
What makes Earthworkers Hort 101 different from other agricultural courses?
Our course is built around a biology-first approach to regenerative farming. We focus on soil remediation and fostering healthy ecosystems as the foundation for sustainable food production. Biology-first means prioritising the health of the biological engine of the soil, which leads to healthier plants and greater economic resilience for growers.
But it’s not just about theory – it’s about learning through doing. Our five-day intensive course is split between a deep dive into soil science in the classroom, and hands-on fieldwork. We teach everything from the microbial world and mineral cycles to soil testing and plant health monitoring. In the afternoons, we take these concepts into real-world settings – farms, community gardens, or home gardens – where students see regenerative systems in action. We teach on model farms that actively use the principles we promote, because seeing is believing. We teach people to investigate their own site’s condition and only make the amendments it needs, with a less-is-more approach.
Most importantly, after the course ends, we don’t just send students on their way – we provide ongoing mentorship. Our alumni network has become an incredible resource, with experienced graduates mentoring new students and sharing their knowledge. This sense of community is one of the most valuable aspects of the programme.
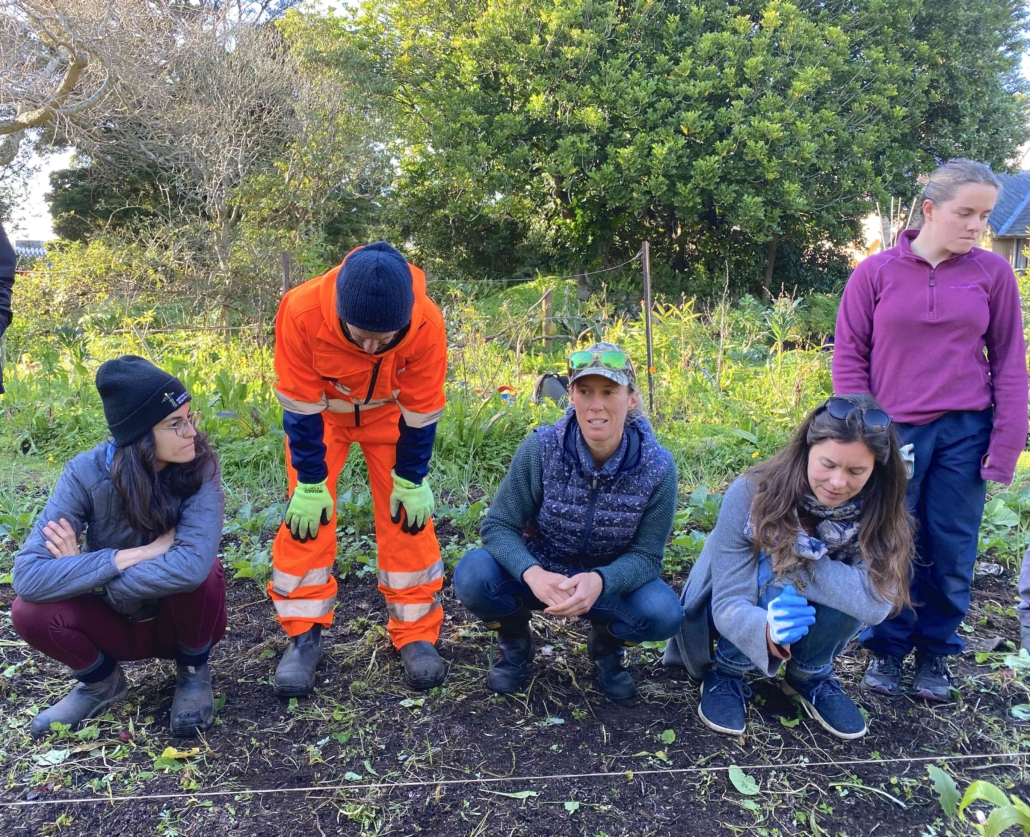
ABOVE: Sarah (centre in pale grey) and participants in Earthworkers 101 at Kaicycle, Pōneke Wellington, 2021
“True learning happens in the field, side by side, hands in the soil.” – Sarah Smuts-Kennedy
Why do you believe that food biology-first regenerative production is key to addressing environmental challenges?
Biology-first regenerative agriculture is one of the most powerful tools we have to combat biodiversity loss and heal farm ecosystems. It restores soil health, which leads to better food production and resilience against climate extremes.
We see the results firsthand – year after year, crops thrive, yields improve, and produce lasts longer due to higher nutrient density. This means healthier food for consumers and fewer pesticide residues, which is a growing concern for many. Farmers want to grow better, but they face barriers: time, money, and the risk of change. That’s why education and support are critical. We’re now seeing larger-scale growers becoming interested in regenerative techniques, and we believe it’s important to offer a locally supported pathway that harnesses the knowledge of their own communities.
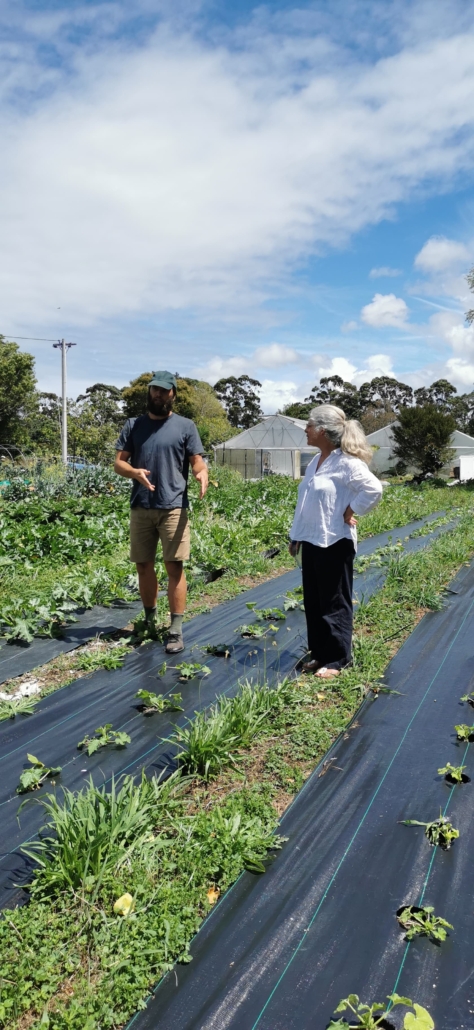
ABOVE: Sarah teaching her neighbour from Kauri Ora, February 2025
What’s next for you and For the Love of Bees?
Separating the farm (OMG) from the Earthworkers educational pathway was a tough decision, but it’s allowed us to focus fully on expanding Earthworkers. We want to develop resources to help people learn how to regenerate their land, no matter where they are, and support our alumni who are expressing a desire to train to be regenerative agronomists like Daniel.
I get excited seeing how our alumni continue to innovate and inspire others. We’ve built a strong community, and by supporting each other, we can keep growing this movement. Ultimately, my goal is to keep learning, keep teaching, and keep building a world where people are more connected to their land and food. If we can do that, we’ll be well on our way to healing both our landscapes and our communities.
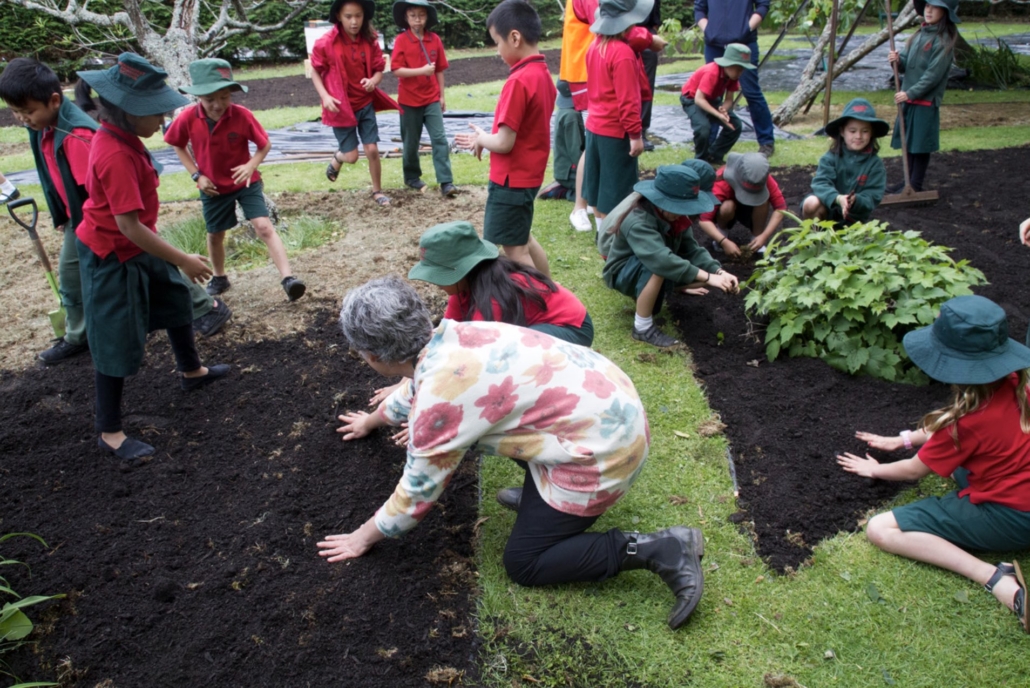
ABOVE: Sarah with school children in Auckland at Highwic Historical House. This was a pasture painting project, in collaboration with Auckland Council, Enviroschools, Parnell Rotary, and Newmarket and Parnell primary schools.
Any final thoughts on teaching and learning?
It has always been important to me that teachers practice what they teach. While I am not a commercial grower, I have spent the last 15 years deeply immersed in regenerative growing. Maunga Kereru, my 10-acre property just 45 minutes north of Auckland, has served as both sanctuary and laboratory—a place where mistakes have become lessons, and experiments have shaped my evolving understanding of ecosystems.
One of my greatest teachers has been the land itself—specifically, a 400-square-metre food forest that I regenerated from an engineered, compacted clay driveway. Over 15 years, this hard clay has transformed into the heart of food production at Maunga Kereru, providing evidence that even the most degraded soils can be revived through thoughtful interventions and design.
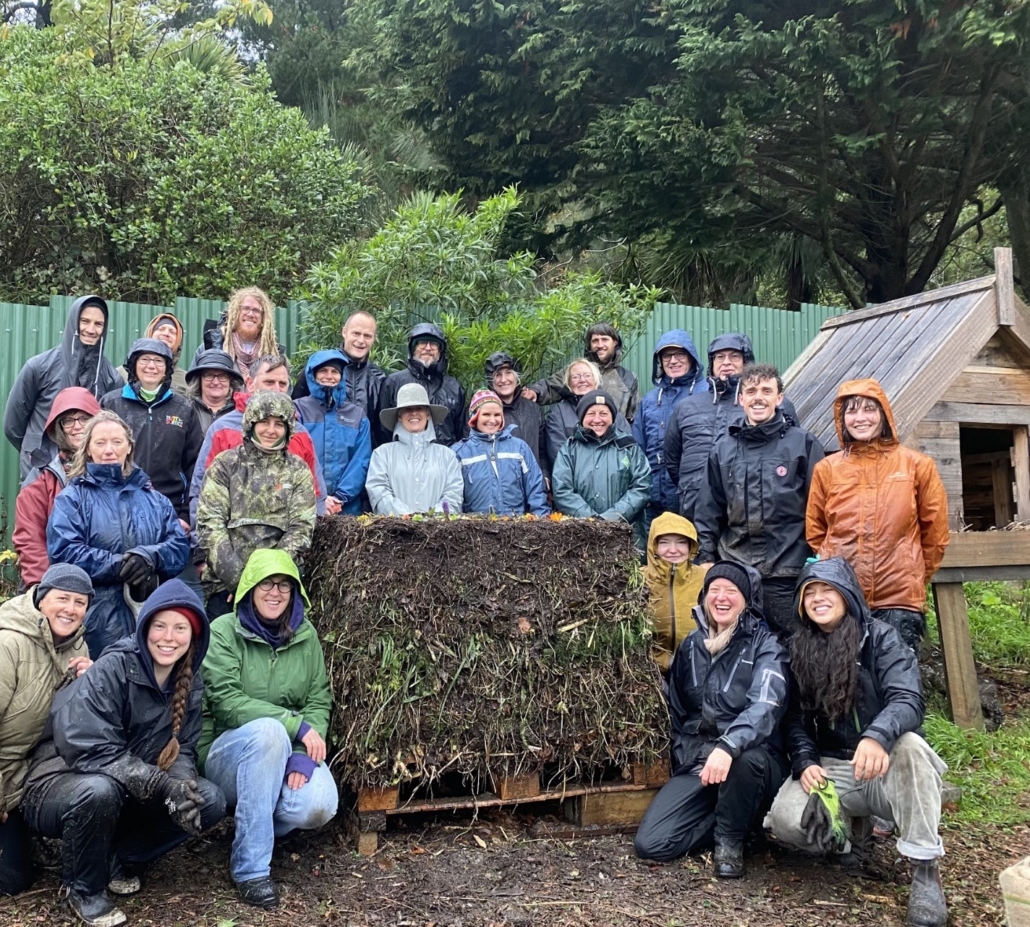
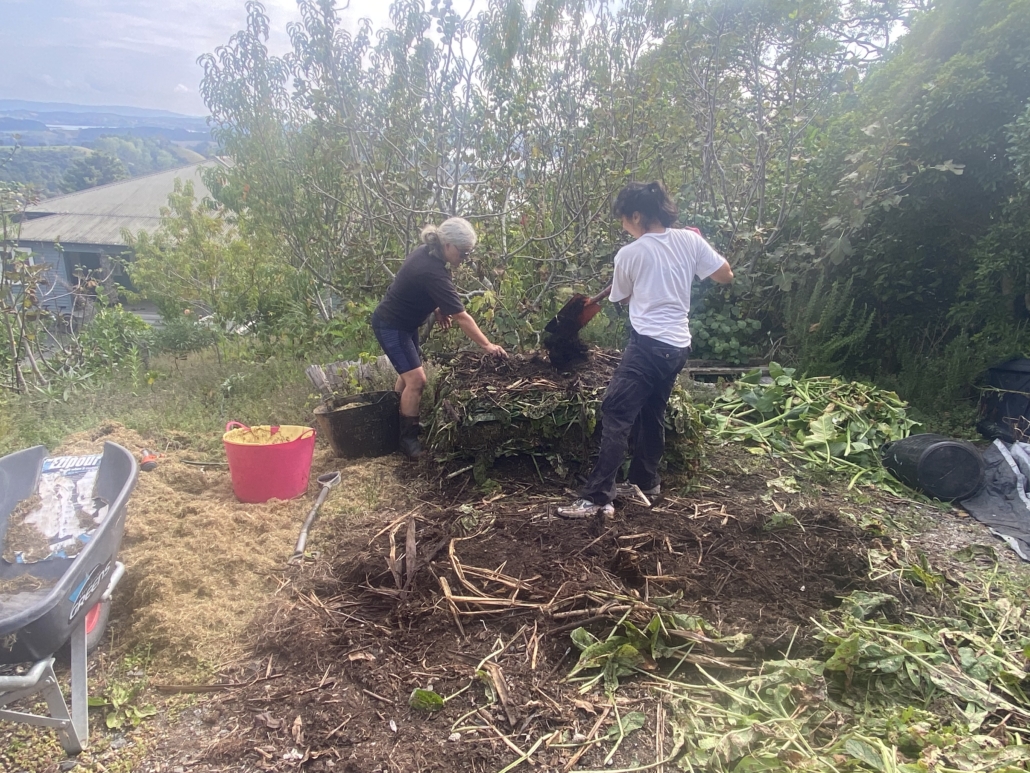
ABOVE: Photos from Sarah’s land, Maunga Kereru, Mahurangi West. Left to right: establishing compost, working bee, spring blossom amidst lush growth
I began learning how to teach here—first with my WWOOFers, then through workshops with the biodynamic community, and later with the FTLOB and OMG communities. For the past eight years, I concentrated my teaching at the FTLOB OMG farm, but my systems were always tested and refined here at home. More recently, I’ve returned to teaching at Maunga Kereru, where students can see permaculture, biodynamic, syntropic, raised beds, and traditional horticulture integrated side by side.
My knowledge is valuable, but I wouldn’t feel confident teaching Earthworkers Hort 101 without Daniel’s 40-plus years of experience as a grower and agronomist leading us. I am still a student, and each time I participate in an Earthworkers course, I integrate more complex ideas into my knowledge base. As Daniel always says, we are all learning together.
We invite the growers who host Earthworkers Hort 101 on their farms to run modules, and we encourage students to bring their own experiences into the conversation.
After all, true learning happens in the field, side by side, hands in the soil.
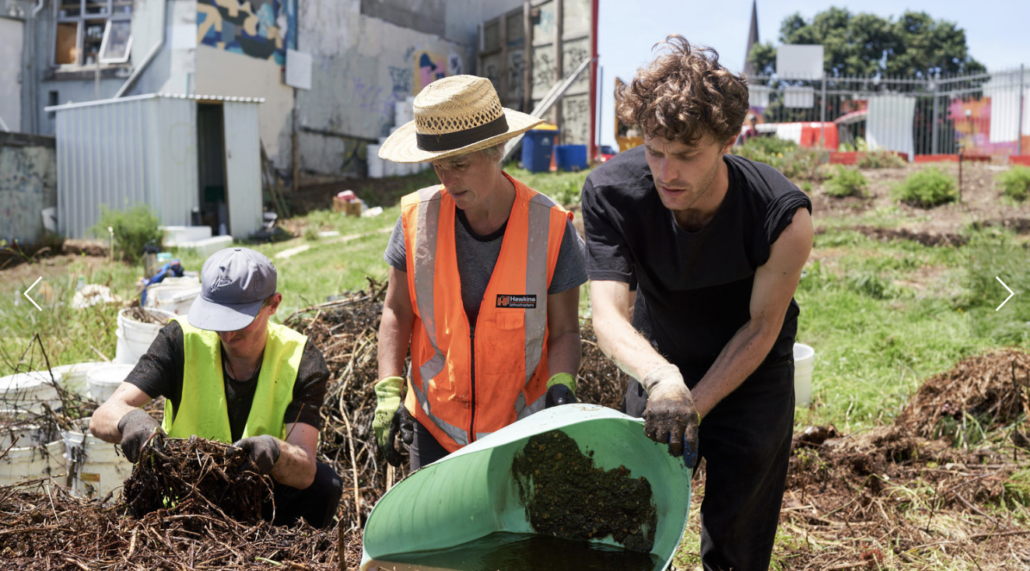
ABOVE: Levi Brinsdon-Hall, Sarah Smuts-Kennedy and friend at the first working bee at OMG, 2018. Photo: Aaron McLean
Earthworkers Hort 101
In 2025 we at the FTLOB organisation are dedicating our focus on creating an educational pathway that will allow growers to journey with us from beginners to agronomists.
The Earthworkers Hort 101 March course in Kirikiriroa/Hamilton was a huge success.
With two more courses this year, growers will be able to advance their training and benefit from the ongoing post-course mentoring programme.
COMING UP: Earthworkers Hort 101, 21–25 July 2025, Pōneke/Wellington
We are thrilled to be returning to this urban farm and community compost hub that hosted us four years ago, and being able to contribute to the region’s growers biology-first regenerative methods.
As he deepens his knowledge of organic and regenerative horticulture and the links with soil, food and health, Chris McIntosh has found his life journey coming full circle.
We hope you enjoy this free article from OrganicNZ. Joinus to access more, exclusive member-only content
Seeds planted in childhood
Raised on his grandparents’ farm, Chris McIntosh had a childhood steeped in traditional practices. “They cooked everything from scratch, preserved food, and had animals,” he recalls. His grandfather, a market gardener from Holland, unknowingly planted the seeds of horticulture in him. These experiences became his happiest childhood memories and set the foundation for his later passion for growing food.
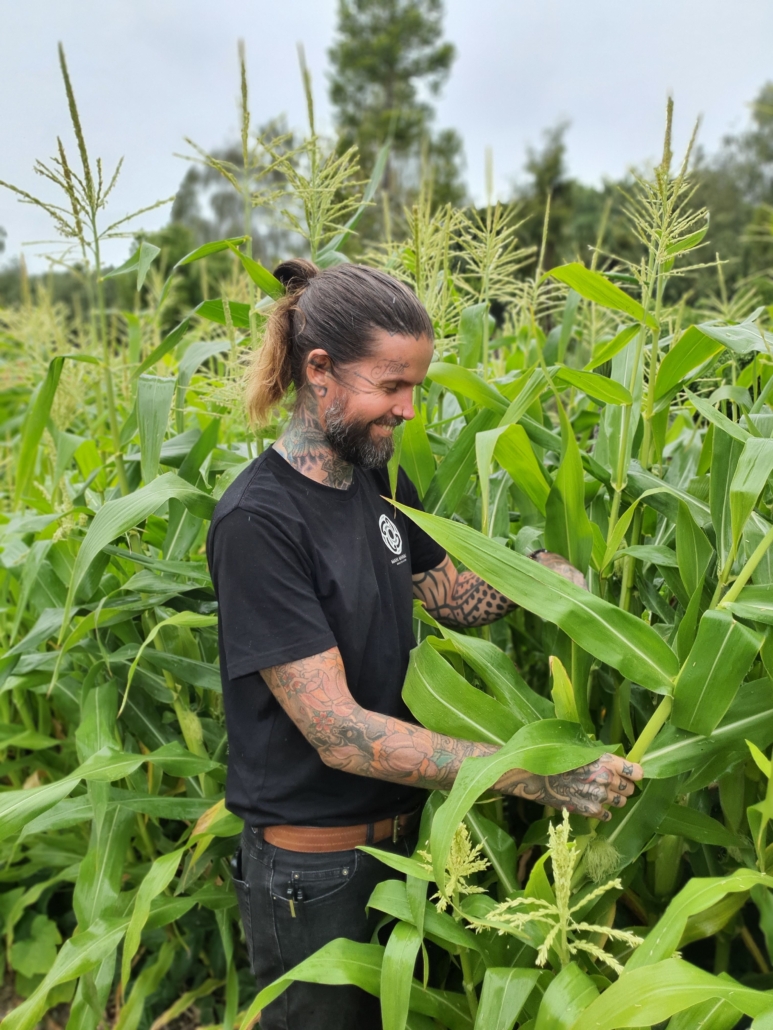
As a chef, Chris’s approach to food was always health-driven. “Most chefs focus on flavor. My first question is, ‘Is this healthy?’”
Health challenges forced him to scrutinise ingredients and their sources. “When you start asking where food comes from, it becomes pretty scary.” This curiosity and necessity drove his journey into horticulture.
ABOVE: Left – Chris is well pleased with the corn crop at Ethos in January 2025. Photo: Wade Aukett, Anglican Action Right – Chris in the Ethos kitchen
Starting with Earth Stewards
Chris found the culinary industry to be a toxic environment, so he left, and took a leap of faith. He had no job but had always dreamed of starting a farm. A friend introduced him to Warwick Hutchinson, who offered him land to begin Earth Stewards, a certified organic urban farm project in Hamilton inspired by North American regenerative farming pioneers like Curtis Stone and Jean-Martin Fortier.
“I approached the farm with methods I learned online,” Chris explains. But the labour-intensive practices of broadforking and double digging weren’t sustainable. He pivoted to no-till horticulture, laying heavy compost directly on the soil, which worked well initially. Over the years of growing Chris has realised that one size does not fit all in horticultural practices.
ABOVE: Chris (centre, arms folded) with a group visiting Earth Stewards in 2019. Photo: Sarah Smuts-Kennedy
Ethos: A new chapter
Chris’s second urban farm project reflects his deeper understanding of horticulture. It’s a café called Ethos, located within the social enterprise of Mahi Mihinare – Anglican Action farm, also in Hamilton.
“Starting another growing project gives me a chance to apply everything I’ve already learned. But it also makes me realise there is so much more I want to know about regenerative horticulture.”
From creating his own potting mix to understanding soil chemistry, he emphasises the importance of getting it right from day one. “If you don’t get a good start, you don’t get a good outcome.”
Soil testing has become really essential, something he has learnt from the mistakes he has made which have taught him valuable lessons. “This season for example, one bad input material has affected all our growing beds, and I’ve had to spend months trying to recover from it.” This was bought-in compost that turned out to be very poor quality.
The Ethos project also gives Chris the freedom to explore the connection between food culture and horticulture. “Food culture is born around what we can grow in season locally, not what we can import. I’m trying to find my identity within the food industry and our culture.”
The integration of this new urban farm with the Ethos café means he is focused on using surplus produce to create preserves adding value to their produce. “This way, we make the most of what we grow, while educating customers on seasonal, local food.”
Lessons learned
Key takeaways from Chris’s journey include:
Observation is a horticulturist’s greatest tool: “Nature is always speaking to us. Everything in nature is perfect. Why am I so arrogant to think I know better?”
Holistic thinking: Health, soil, and community are interconnected. “You can’t just focus on one aspect and hope the rest falls into place.”
Importance of systems: “As a chef, I’ve learned the value of good systems. Without them, nothing flows, whether in the kitchen or in the garden.”
Hosting the Earthworker Course
Chris is extending his learning, connection and growth not only by participating in the Earthworker Course, but at the same time by offering to host the course coming up in late March at the Mahi Mihinare conference facilities where Ethos is located.
“I want to be part of the biology-first regenerative horticulture movement and learn from others on this path. I already have a few years of urban farming under my belt, and I recently completed the Nutri Tech Solutions course in Australia with Graeme Sait, but I know Daniel [Schuurman] has more to teach me here on my own site, and I also sense being part of the Earthworker network will be invaluable for growing my confidence and ability as a horticulturist.”
He sees this as an opportunity to refine his skills and contribute to a broader community of regenerative growers. “I hope to support other projects and participate in further education opportunities to become an agronomist like Graeme Sait and Daniel.”
“I’ve spent years practicing, but now I want to understand how the system works beneath the soil. To become a good steward of it.” – Chris McIntosh
ABOVE: Spring garden at Ethos Cafe gardens. Photo: Wade Aukett, Anglican Action
Mentorship: Daniel Schuurman’s support
A key figure in Chris’s journey has been Daniel Schuurman, the lead teacher and mentor for Earthworkers. Daniel has over 45 years of lived experience as a grower, giving him a long-range perspective as an agronomist and consultant. He began supporting Chris during his time at Earth Stewards and has continued to guide him through the challenges of his new project at Ethos.
“Daniel’s depth of knowledge and ability to connect science with lived experience have been invaluable,” Chris says. “His mentorship has helped me navigate complex challenges and saved my arse a few times. Slowly his support is helping me build necessary foundational knowledge. ”
ABOVE: Chris and Daniel at the vege gardens at Ethos discussing how to remedy the impact of the poor quality bought-in compost. Photos: Sarah Smuts-Kennedy
A transformative opportunity
The Earthworker course will be a transformative opportunity to deepen his understanding and connect him with like-minded growers. “I have a million questions a week, and being part of the Earthworker Alumni network will allow me to tap into a growing community of regenerative practitioners who prioritise ecosystem and community restoration.” For more information about the Earthworker Alumni network, see the first article in this series here.
Chris is excited to learn specific practical skills, including:
Making his own biological inoculations for seeds and brewing applications for soil and foliar use.
Understanding the nitrogen cycle and how minerals like phosphorus interact with fungi.
Improving his composting techniques to prepare for creating his own seed-raising mix, inspired by Earth Stewards manager Coral Ramiro.
Developing effective mulching strategies to improve soil health and water retention.
How nutrition affects plant health, impacts on a plant’s ability to photosynthesise, be pollinated effectively, and encourage its relationship with soil microbes.
The five-day immersion into the chemistry and biology of thriving horticultural systems is particularly exciting for Chris. “I’ve spent years practicing, but now I want to understand how the system works beneath the soil. To become a good steward of it.”
Chris feels passionate about making biology-first regenerative horticulture his life’s work. He’s especially eager about the prospect of joining a small cohort of Earthworker Alumni in 2025, participating in a research group that will receive expert coaching to achieve a higher level of mastery. “This is an incredible opportunity to deepen my expertise and contribute to the future of regenerative horticulture.”
The bigger picture
Chris’s vision extends beyond his garden. He dreams of a world where people reconnect with the land and embrace community living. “Everyone has moved away from horticulture because of the materialistic dream of city life. We’ve lost our connection to the very thing that sustains us.”
By hosting the Earthworker course and sharing his journey, Chris hopes to inspire others to return to the land and take responsibility for their food and health. “If we work with nature instead of against it, we can create a sustainable future for ourselves and our communities.”
Sarah Smuts-Kennedy is the founder of For the Love of Bees and OMG (Organic Market Garden in central Auckland), and co-founder of the Earthworkers programme.
Earthworkers Hort 101
24–28 March 2025, Hamilton
Hosted by:
Coral Ramiro and team at Earth Stewards
Brit and James Stembridge of Tomtit Farm
Chris McIntosh at Ethos Café’s new start-up farm
These three farms will showcase regenerative farming practices in action. Participants in the course will learn from these growers who have experience of managing farms and offer models of what’s possible using biology-first regenerative methods.
https://organicnz.org.nz/wp-content/uploads/sites/2/2025/01/20250121_142918-cropped-med-res-scaled.jpg11632560membershiphttps://organicnz.org.nz/wp-content/uploads/sites/2/2024/09/OrganicNZ-2024-Masthead.pngmembership2025-01-23 11:41:062025-01-23 11:41:07From paddock to plate and back again
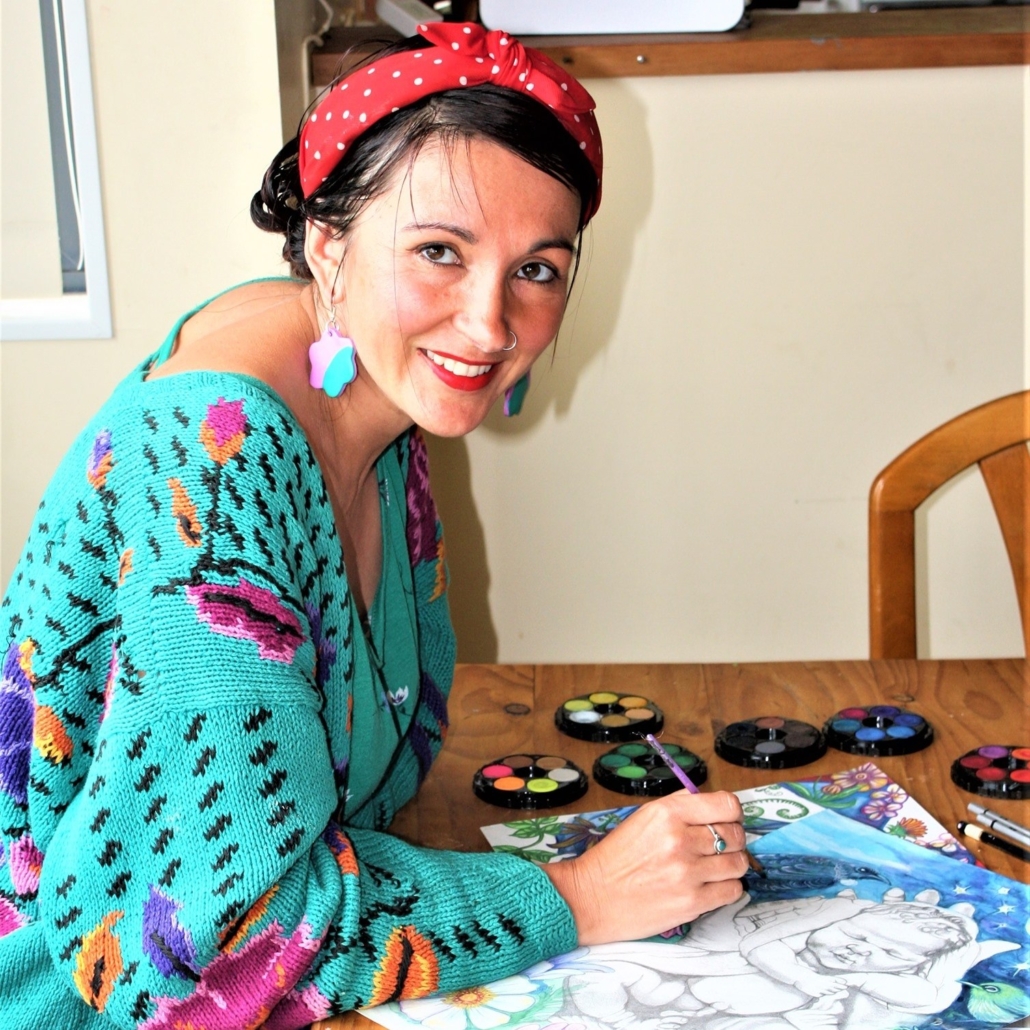
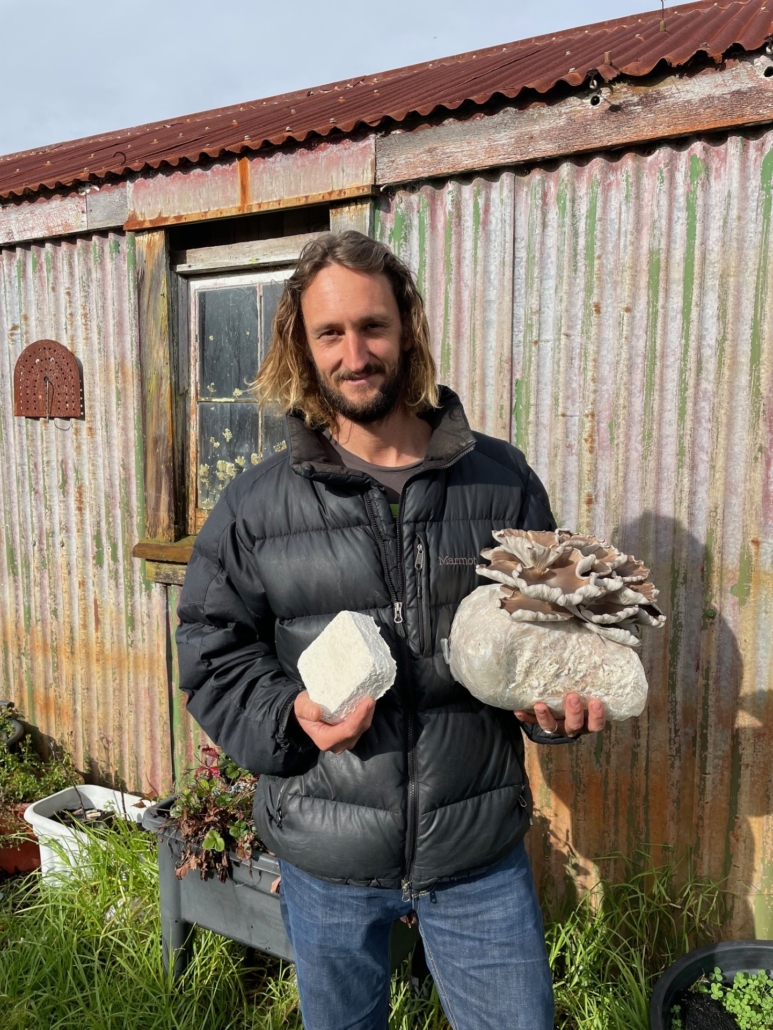
Lenny Prinz and Jodi Collins are next generation homesteaders living in Ōpōtiki, Eastern Bay of Plenty. In 2009, Lenny started as a fungiculturalist: growing mushrooms and cultivating their spawn. Jodi is a potter and artist, committed to growing the couple’s children with the principles of sustainability and child-led learning.
Lenny has expanded the utility of farmed mushrooms by developing compostable packaging using mycelium, as an alternative to polystyrene. Jodi also works using zero-waste principles. In her creative work she upcycles and recycles to produce art with humour and meaning, and more formal pieces.
Nutritional therapist Paula Sharp met Lenny and Jodi at an oyster mushroom workshop, and tells their story here.
We hope you enjoy this free article from OrganicNZ. Joinus to access more, exclusive member-only content
Organic lifestyle
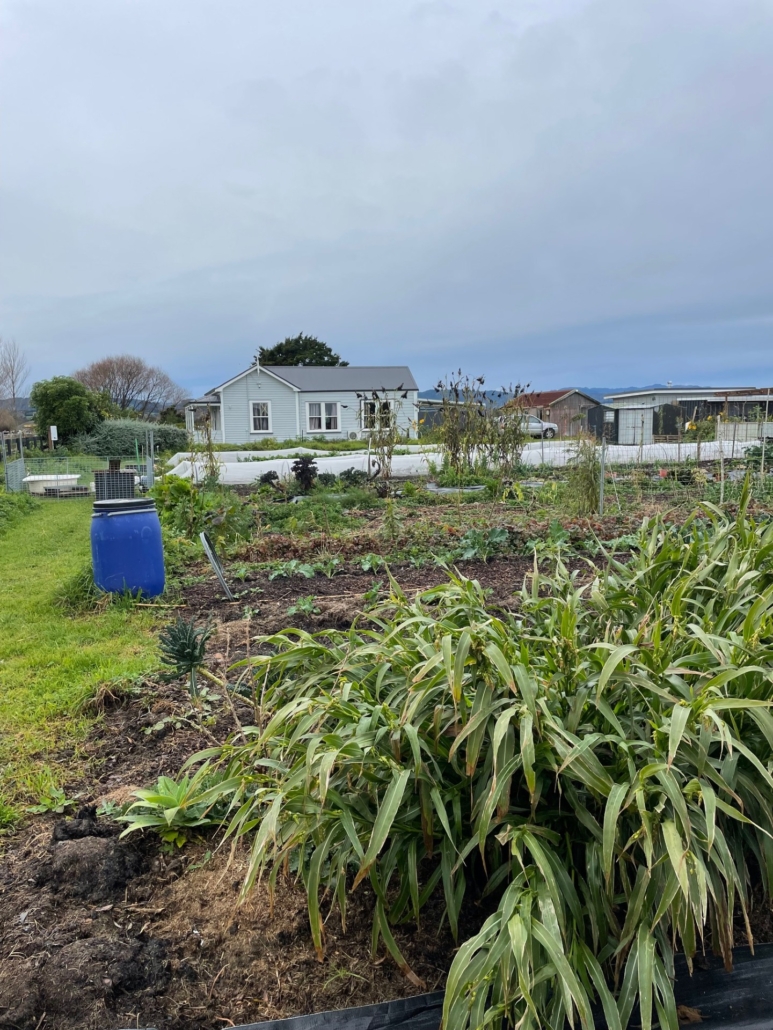
Ōpōtiki, gateway to the East Cape, has become home for Lenny and Jodi’s family. Their homestead was built in 1907 and now boasts a huge spray-free vegetable garden using agroforestry methods. There are ducks, young chickens turning over the compost heap, while mature hens roam and lay their eggs (unpredictably at times) near their mobile coop.
Three generations live here: Lenny’s father, Lenny and Jodi, and their three children, Juliana (10), Albaer (7) and Iver (2). Life is hectic as they balance planting, growing and harvesting with hunting, home schooling, creativity, mushroom cultivation, the science of mycelium, and agroforestry education.
Lenny’s parents emigrated from Germany in 1990 in the wake of Chernobyl’s creeping contamination concerns. They chose to settle in Whakatāne and later Pikowai, near Matatā, in order to provide an organic lifestyle for their family. Lenny, now is his 30s, is doing the same thing for his family. Lenny and Jodi’s ethos is multi-layered: to connect people with the land and growing, to invest in the future of their family and community, and to live a sustainable and honest life.
Jodi is an advocate for homeschooling, and can offer advice for parents and carers in the homeschooling network, or considering being part it.
ABOVE: Left – Jodi at work on her art Right – Some of Jodi’s playful creations
Spawning and supporting
In his small sterile (and mobile) laboratory, Lenny grows mushroom spawn. Fourteen years of experience, previously in Raglan, mean that Lenny is an expert in his field. Pink and grey oyster and native tawaka (poplar) mushrooms are currently his most popular.
It takes approximately 14 days to grow Petri dish spawn to colonised substrate ready to fruit. The substrate is a carrier product (for example straw or sawdust), and it’s colonised when the spider web strands of mycelium grow through it. One of Lenny’s business activities is to send spawn and colonised substrate around New Zealand to different growers. They fruit the mushrooms and sell them or use them within their own businesses.
Lenny is driven to support regional growers, particularly now as many small entities have suffered in the post-covid period. Many business costs are increasing, but Lenny is reviewing how to make his products cheaper and more affordable so they can reach more people and help the survival of small businesses. He also coaches and mentors start-up growers to be fully functioning businesses, teaching people how to grow from spawn to then market mushrooms and/or grow their own spawn for marketing purposes.
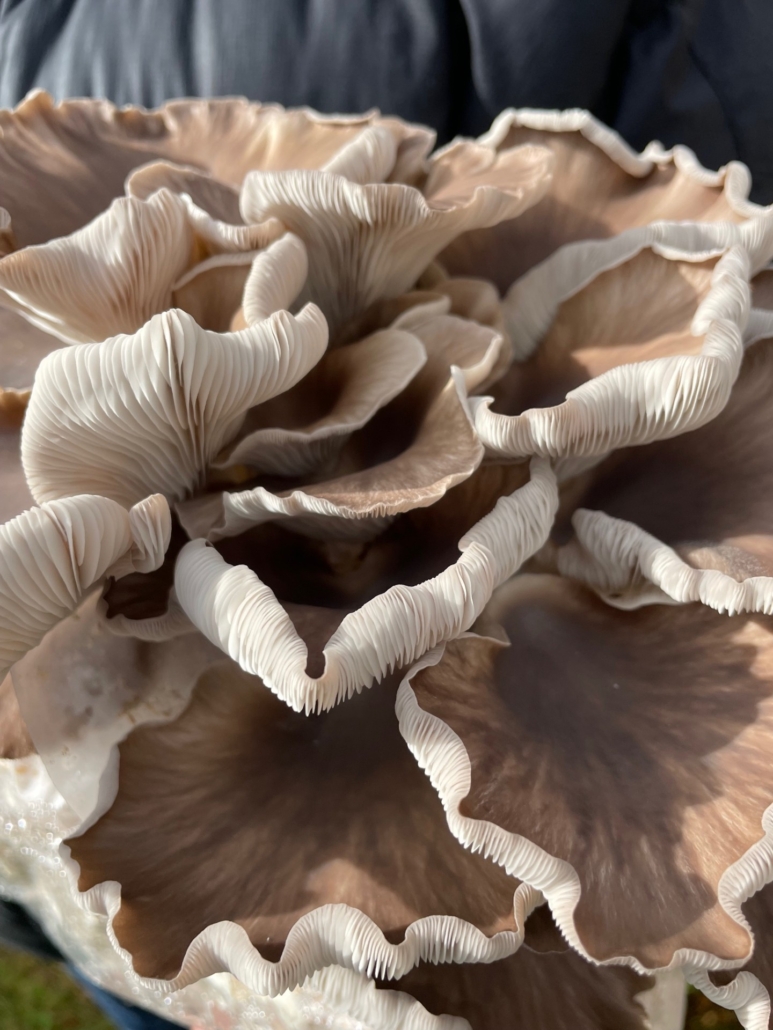
ABOVE: Left – Lenny Prinz with his compostable packaging made of mushrooms, and oyster mushrooms. Right – Close-up of oyster mushrooms.
Native mushrooms
Lenny is successfully experimenting with native edible mushrooms in order to supply spawn or mushroom fruit to the New Zealand culinary market. He spends time foraging, on the hunt for endemic species that he can replicate as spawn, picked from local surroundings. New Zealand’s strict biosecurity laws mean there’s no opportunity to import different mushroom varieties, but this doesn’t faze him in the least. “We just need to eat closer to home. I want to make our native mushrooms available to Kiwis.”
Native edibles that Lenny cultivates besides the tawaka and oyster varieties are the New Zealand native shiitake, pekepeke-kiore (New Zealand lion’s mane), enoki, hakeke (wood ear), garden giants (or wine caps because of their colour), turkey tail and the New Zealand reishi (of the Ganoderma family).
Lenny is interested in the nutritional and medicinal value of mushrooms. His most popular medicinal varieties are turkey tail, reishi and hakeke. Turkey tail is a tough, leathery mushroom that is best brewed as a tea or tincture and supports immunity. New Zealand reishi is renowned for its immune-boosting qualities too and supports sleep. Wood ear or hakeke is used to treat colds, reduce fevers, and to strengthen the cardiovascular system. (If you’re new to medicinal mushrooms, always consult a professional before use).
Soil health, mycorrhiza and carbon sinks
The link between mushrooms and other produce is very clear to Lenny; it’s soil health. Good quality soil produces nutrient-dense vegetables, fruit and animals. Mushrooms, specifically mycorrhiza fungi, have a big part to play in soil quality.
Most mushrooms (button, oyster, reishi etc) live and feed on dead matter, whereas mycorrhizal mushrooms grow in close, symbiotic relationships with the living roots of plants or trees. Mycelium strands of the fungi attach themselves to the root of the host, expanding the reach of the root to absorb and transport nutrients and water to the tree. In return, the tree provides the mycorrhiza with sugars and starches produced through photosynthesis.
We would recognise mycorrhizal fungi as the edible fruiting bodies of mushrooms such as truffles, chanterelles and porcini. There are many more which are not edible. Edible mycorrhiza are notoriously difficult to cultivate, but all grow well in the wild. There is even more magic to this relationship: these fungi act as natural carbon sinks. They can hold carbon produced by the host in their tissues and the surrounding soil. Like biochar, mycorrhizal fungi have a part to play in our carbon solution.
ABOVE: Left – Lenny was involved in the installation of this no-dig vegetable garden at the McKenzie family’s home as part of Te Pātaka Kai a Toi mentorship project
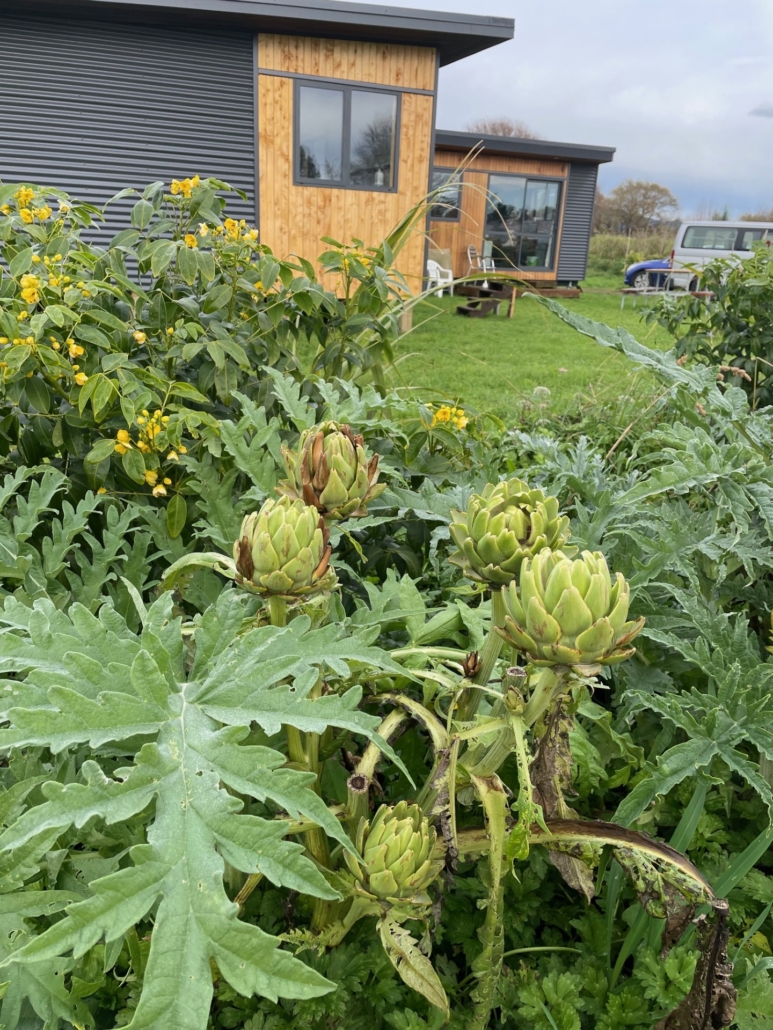
Right – Globe artichokes at Jodi and Lenny’s family farm
Sharing the knowledge
Lenny shares his knowledge as a sustainable gardener and mushroom educator. He supports regional growers, and coaches start-up enterprises to fully functioning businesses.
On his land he runs mushroom growing workshops and shares sustainable gardening tips with curious people. He doesn’t keep secrets around his growing techniques but shares his knowledge and experience so others can try it out in their own gardens or with their mushroom growing. For example, after years of using different activated straw as his growing compound for the mushroom mycelium, he has found a soya and pine pellet mix which is affordable, less time consuming and more sustainable.
Gardening and community food sovereignty
Similarly, he shares his version of food forestry, using his land as his example; it works for him. Lenny and Jodi use a variety of growing practices. They’ve created a vegetable garden using companion planting, organic matter, no-till farming practices and agroforestry (larger plants sheltering vulnerable leafy greens and providing pollinating insect food). And it’s working to keep the soil healthy and crops abundant – last season the kūmara patch produced some tubers weighing as much as six kilos each!
Lenny and Jodi have planted a fruit orchard and sell spray-free seedlings cheaply. They’re always thinking of how to give back to the land and its people. More recently Lenny has worked with Ihi Kura Gym to create a garden supplying food to its members, and with Te Ao Hou Trust to project manage local growing ventures. Lenny is helping to grow growers, using the foundations of food sovereignty.
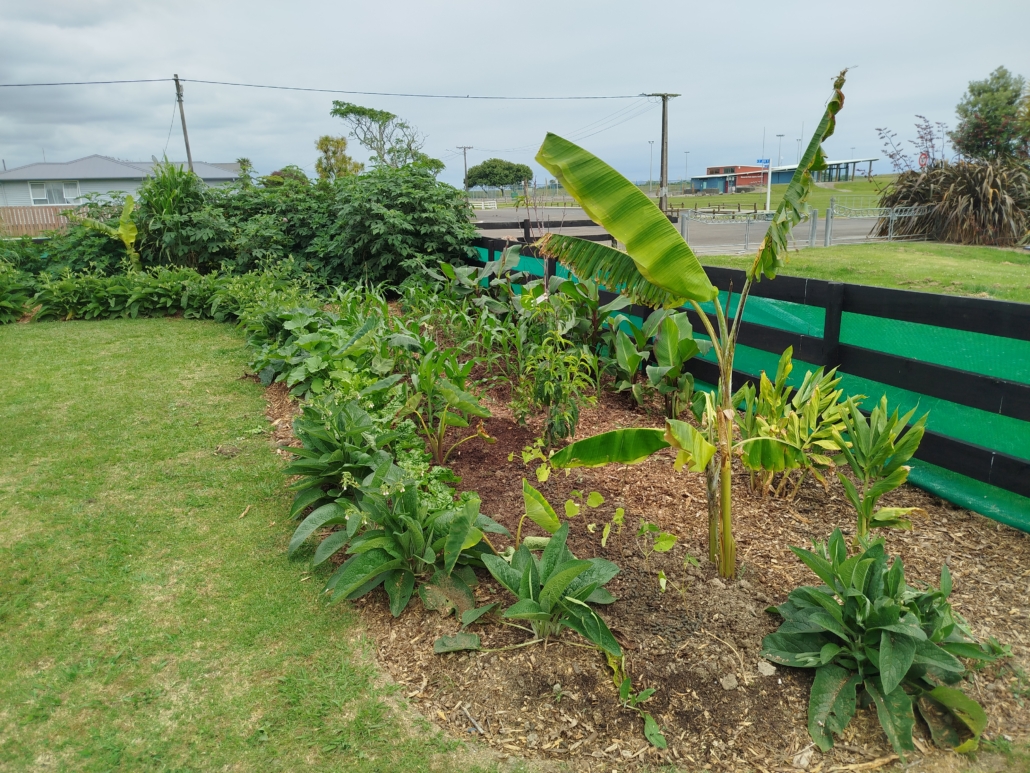
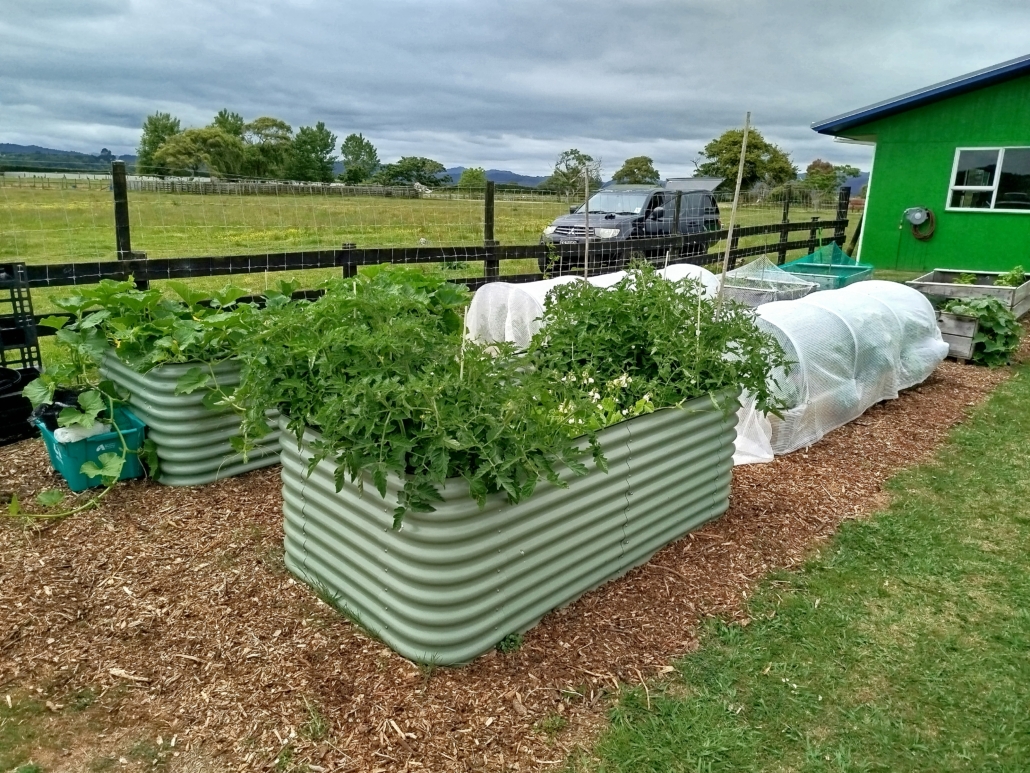
ABOVE: Left – the beginnings of a food forest at Ihi Kura Gym, as a border around a children’s play area Right – raised beds at Ihi Kura Gym, Ōpōtiki
Compostable fungi packaging
Over the years, Lenny has immersed himself in the science of mushrooms and the various uses for mycelium and mushroom compounds. Perhaps the cap on the top of his fungi is that he’s part of a team spearheading compostable packaging.
As chief technology officer for the company BioFab, Lenny has been instrumental in developing an alternative packaging material made from agricultural waste and mycelium, aimed at replacing polystyrene. This multi-use product can be domestically or commercially composted within 30 days.
BioFab recently located its operations to Australia in order to broaden its reach in the Australasian packaging market. Its mission is ‘to significantly reduce the harm toxic materials are causing to the planet and encourage a world where waste streams regenerate, rather than destroy our natural environment.’ www.biofab.bio/
ABOVE: An example of the compostable mushroom packaging from BioLab
Growing humanity
Perhaps even more important than growing mushrooms, fruit and vegetables is that Lenny Prinz and Jodi Collins are growing humanity. They’re focused on the health and wellbeing of their family, their community, New Zealanders and making change globally. And there’s no doubt this inspiring couple are making a positive difference.
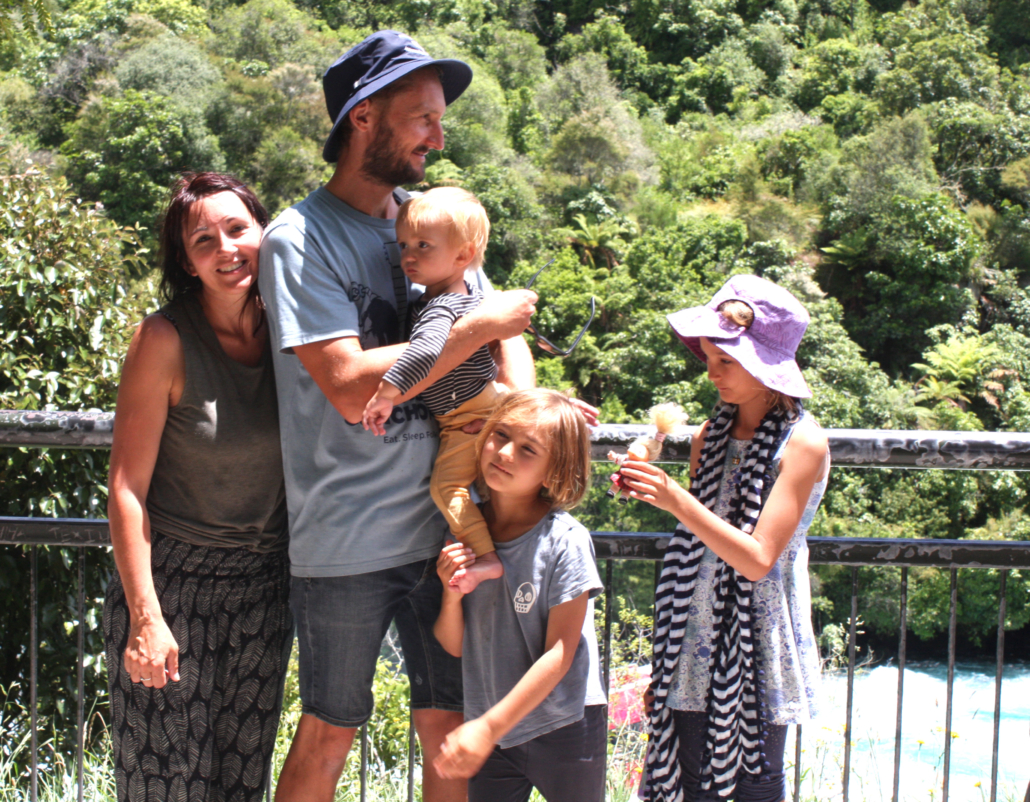
ABOVE: Jodi and Lenny with their children Iver, Albaer and Juliana PHOTO: John Bell
Casing layer: A layer of water-holding material, layered on top of a substrate to promote mushroom growth.
CO2: Carbon dioxide gas is exhaled by mushrooms.
Colonise: Mycelium is grown from one substrate to the next. Once the intended substrate is completely dense with white, it is fully colonised and ready to produce mushrooms or be transferred onto the next substrate.
Culture: A pure mushroom strain.
Flush: When mushroom substrates produce mushrooms.
Fruit-body, fruiting body, mushroom: The edible part of the mushroom
Gills: The underside of the cap, thin lines
Incubation: Period of time between substrate inoculation to mushroom.
Mycelium: This is the bulk of the mushroom; it is a fine root like structure that secretes enzymes digesting material externally.
Mycology: The study of fungi.
Pasteurisation: Process that kills most spores and other non-beneficial organisms in bulk substrate.
Spawn: Sterilised grain or sawdust with a selected mushroom culture grown through it.
Spores: Mushroom ‘seeds’. Tiny microscopic single celled reproductive product that are dropped from the gills of the mushroom.
AUTHOR BIO: Paula Sharp is a nutritional therapist working globally via Zoom to support women’s health, restore gut health and digestion, hormonal balance, skin and hair, sleep, shifting weight and health pre- and post-surgery. www.paulasharpnutrition.com
She is also a guest speaker, giving talks to companies on nutrition and mindset. In London she worked in the organic fruit and vegetable industry, and now she is based in Whakatāne, growing her own extensive spray-free garden.
https://organicnz.org.nz/wp-content/uploads/sites/2/2025/01/IMG_4121cropped-scaled.jpg11862560membershiphttps://organicnz.org.nz/wp-content/uploads/sites/2/2024/09/OrganicNZ-2024-Masthead.pngmembership2025-01-22 11:21:182025-04-03 16:25:43Mushrooming with next-gen homesteaders
Coral Ramiro is the manager of Earth Stewards certified organic urban farm in Kirikiriroa Hamilton, and an alumna of the Earthworkers Hort 101 programme.
She tells her story to Sarah Smuts-Kennedy.
We hope you enjoy this free article from OrganicNZ. Joinus to access more, exclusive member-only content
Coral’s journey to organic regenerative growing
Sarah began by asking Coral how she became a regenerative grower and how the Earthworkers course helped shape her path.
“My journey into regenerative farming began far from the soil and was an unexpected turn,” says Coral. “I actually trained as an interior designer in Spain, but had to move to London in 2008 after the recession made it impossible to find any work there. It was in London while living in a tiny flat with no access to nature, that I started to notice I was developing a longing for a connection to the outdoors.”
So when the opportunity arose to volunteer at one of London’s educational farms, Coral joined the team.
“I have always been a vegan, passionate about sustainable food systems, so I quickly gravitated towards the growing team, where I discovered a deep sense of belonging with like-minded individuals who shared a desire to create a food system that nourishes both people and the planet.”
ABOVE: Left – polycropping at Earth Stewards; right – Coral Ramiro Photos: Sarah Smuts-Kennedy
Challenges: catalysts for change
But despite her growing passion, she faced challenges breaking into the sector due to a lack of experience. This was a catalyst for Coral and her partner embarking on their big OE (overseas experience), first going to Australia before ultimately landing in New Zealand.
“I completed my Permaculture Design Certificate (PDC) at Whanganui Eco School before I was lucky to secure my first role in the sector at Earth Stewards in 2019, just as the farm was getting off the ground,” says Coral.
During Covid-19 Earth Stewards lost its manager and Coral was encouraged to step up and take the reins. It was a daunting task, but luckily six months later, she was invited to take the Earthworkers Hort 101 course, which proved to be a pivotal moment in her career.
Earthworkers course: valuable learning
“The course really opened doors for me,” says Coral. “It helped me become an informed decision-maker. I need to understand something before I can truly embrace it. The course gave me the base knowledge of why we do what we do, especially when it comes to growing regeneratively and organically. I came away with answers that gave me clarity and confidence in my role as a market garden manager.”
One of the key takeaways for Coral was understanding the science behind regenerative practices, particularly the relationship between soil microbiology, chemistry, minerals, and nutrients.
“It was overwhelming at first. I had a headache for days trying to absorb all the new information, but by the end of the course, I really understood how everything fits together.”
As a creative person, Coral also loved how polycropping allowed her to apply her design skills to farming.
“I get a lot of joy from the colour patterns that appear across the beds over the growing season. We got really excited at Earth Stewards as a team about planning our polycrops, and it gave us a simple way to contribute and learn together.”
“I need to understand the why behind what we do—why we grow in ways to protect the soil and the whole ecosystem” – Coral Ramiro
Supportive network of growers
In addition to the valuable knowledge gained, the Earthworkers course provided her with the opportunity to connect with other like-minded growers.
“Through the course, I met Jenny Lux of Lux Organics and Brit from Tomtit Farms, and we’ve formed a lasting, supportive connection. Our farms collaborate by sharing produce, seedlings, and knowledge, and we’ve visited each other’s farms, like Jenny’s in Rotorua. It’s been a reminder that we’re not alone. Being part of a network of like-minded growers makes all the difference, especially in a field where the challenges can feel isolating.”
Coral has found the Earthworkers support network to be crucial for her and the Earth Stewards team, especially when it comes to managing pest and disease pressures.
“Having access to the post-course WhatsApp group has been vital. It’s reassuring to see other growers experiencing the same challenges—it makes you feel better about the difficulties you’re facing.”
ABOVE LEFT: Earthworkers participants at Highwic House, left to right: Coral Ramiro, Richard Conyngham, Jenny Lux, Pippa Hayes and Kaitlyn Lamb ABOVE RIGHT: Coral, standing in the centre, and Brit Stembridge at the front, with other Earthworker participants at Highwic House, learning ‘flipping beds’ with no-till systems. Photos: Sarah Smuts-Kennedy
Stepping up to share knowledge and innovation
“Brit and I are excited to host the 2025 Earthworkers Hort 101 course at Earth Stewards and Tomtit Farms. The Earthworkers course was a game-changer for us, and being able to see these practices in action at the FTLOB (For the Love of Bees) model farm OMG in Auckland really made it feel real and achievable. Now, as we step into hosting the course on our own farms, we hope to inspire local growers in Waikato to embrace biology-first regenerative growing systems.”
Coral’s enthusiasm for soil science as a result of the Earthworkers course led her to undertake more study with Dr Elaine Ingham via the Soil Food Web. Participants in the next Earthworkers course in March 2025 will be able to see some of the research project she did.
Earth Stewards is certified organic with OrganicFarmNZ. It has come a long way since its early days, and Coral and the team will share some of the farm’s innovations with course participants in March.
Enhancing soils with compost and cover crops
“One of the things we’re really proud of is our ability to grow all the inputs we need to produce high-quality compost. We’re now self-sufficient in compost production, which we use for our seed-raising mix. Knowing that we control the quality of our seedlings has made a huge difference.”
“We’ve also had our first successful season managing our cover crops, allowing us to have in-situ mulch on most of our beds. This has drastically improved our moisture management and weed control, while also providing nutrition to the plants as they grow.” “This season while we were planting out our seedlings we experienced the soil being bouncy underfoot for the first time, and found preparing for planting carrots much easier. Over time we are seeing a change in the physical conditions of the farm as a result of the practices we are using.”
ABOVE: Abundant growth in the Earth Stewards greenhouse. Photos: Sarah Smuts-Kennedy
Finding the best sales model
At Earth Stewards they have also made real progress with their sales system, which they discovered is just as important as the growing.
“We started out doing farmers’ markets and had just started implementing the CSA (community supported agriculture) model as Covid started,” Coral recalls. “In a few weeks we went from doing a few CSA boxes to over 100, which put us under untenable pressure. It took us a while to find the right balance, and model, for selling our produce, but now we have a thriving shop on site which is open one day a week with talk of opening another day.”
“On sunny days there is a queue to buy produce which comes from a few local growers we are collaborating with. This gives us a very practical way to contribute to local growers who are also needing to sell their produce.”
The importance of a sense of community in organic regenerative farming is huge. Farming can be isolating, especially when you’re committed to healing the ecosystem the community gets even smaller. But for Coral and others the Earthworkers network has helped them feel supported and connected to others who are facing similar challenges.
“Together, we’re learning, growing, and turning our farms into models of biology-first regenerative practice.”
Earthworkers Hort 101
24–28 March 2025, Hamilton
Hosted by:
Coral Ramiro and team at Earth Stewards
Brit and James Stembridge of Tomtit Farm
Chris McIntosh at Ethos Café’s new start-up farm
These three farms will showcase regenerative farming practices in action. Participants in the course will learn from these growers who have experience of managing farms and offer models of what’s possible using biology-first regenerative methods.
ABOVE: Earthworkers lead agronomist Daniel Schuurman showing soil samples to Earthworkers participants at OMG in central Auckland. Photo: Kate Micaela
Earthworkers alumni – continuing the journey
Since it was launched in 2020 the five-day Earthworkers Hort 101 course has encouraged nearly 200 alumni to turn food production into an ecosystem restoration tool. Continuing this support via post-course mentoring they have established a network of optimistic like-minded growers who help each other in the day-to-day stresses and joys of learning how to work alongside nature to feed their local communities.
As a result, Earthworkers lead agronomist Daniel Schuurman and Earthworkers co-founder Sarah Smuts-Kennedy are developing the Earthworkers Educational Pathway to include opportunities for those wanting to take their learning to the next stage.
In 2024 For the Love of Bees (FTLOB) ran the Communities of Regenerative Learning (CORL) programme) in Tāmaki Makaurau, supporting six urban growing projects engaging alumni to step into mentoring roles. In 2025 this is being rebranded as the Earthworkers Alumni Research Group and will support a small group of alumni who want to deepen their knowledge using their own projects to do this.
Sarah Smuts-Kennedy is the founder of For the Love of Bees and OMG (Organic Market Garden in central Auckland), and co-founder of the Earthworkers programme.
https://organicnz.org.nz/wp-content/uploads/sites/2/2024/12/Earthstewards-Coral-Ramiro-cropped-scaled.jpg17822560Staff Writerhttps://organicnz.org.nz/wp-content/uploads/sites/2/2024/09/OrganicNZ-2024-Masthead.pngStaff Writer2024-12-18 11:19:302025-04-03 16:33:10Working with the earth
Paige Murray explores how we can work with weeds as organic gardeners and growers.
Growing organically, as you well know, is not without its challenges: weeds in abundance, certain insects wreaking havoc out in the fields, not to mention the constant soil remediation and conditioning.
While these obstacles may be at times overwhelming, there are ways to manage them – and let’s be brutally honest here: if you’re taking the leap and growing without synthetic chemicals, it’s unlikely you’ll achieve completely weed- and pest-free crops.
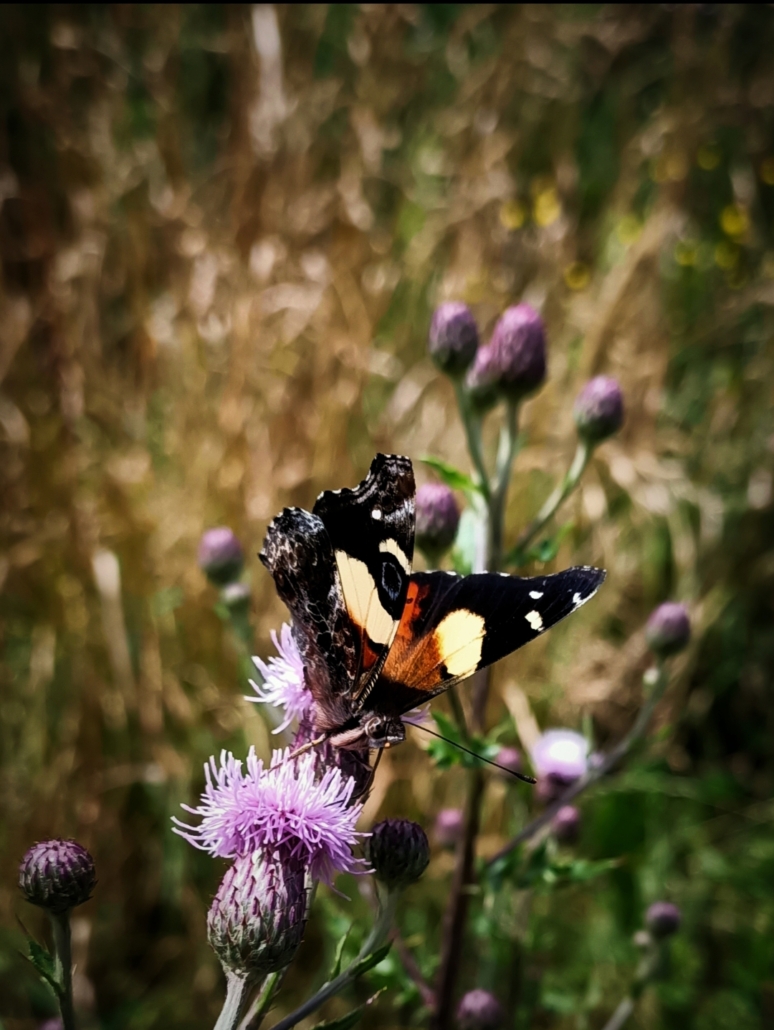
Yellow Admiral butterfly on Scotch thistle
The following content is only available to logged-in members. Join us to gain access to a wide range of content.
Paige Murray lives near Christchurch and loves any excuse to get outdoors. Passionate about organic and regenerative agriculture, she works for Quorum Sense and Streamside Organics, and spends most of her free time gardening, making cheese and preserves, or climbing up rocks.
https://organicnz.org.nz/wp-content/uploads/sites/2/2024/11/IMG_20241120_080942.jpg14261080Staff Writerhttps://organicnz.org.nz/wp-content/uploads/sites/2/2024/09/OrganicNZ-2024-Masthead.pngStaff Writer2024-11-25 11:56:302025-07-04 16:45:41Stop, look and listen to the weeds
Chaos Springs at Waihi run regular workshops about soil health, composting, and creating on-farm fertility. Jenny Lux reports on a recent workshop.
We hope you enjoy this free article from OrganicNZ. Joinus to access more, exclusive member-only content
Chaos Springs workshops
I have been an avid follower of Chaos Springs since I first went there in 2014 on a field trip as a student doing an evening class in Level 3 organic primary production. Recently I did a cheeky entry into one of their competitions for a free place in a workshop and I won!
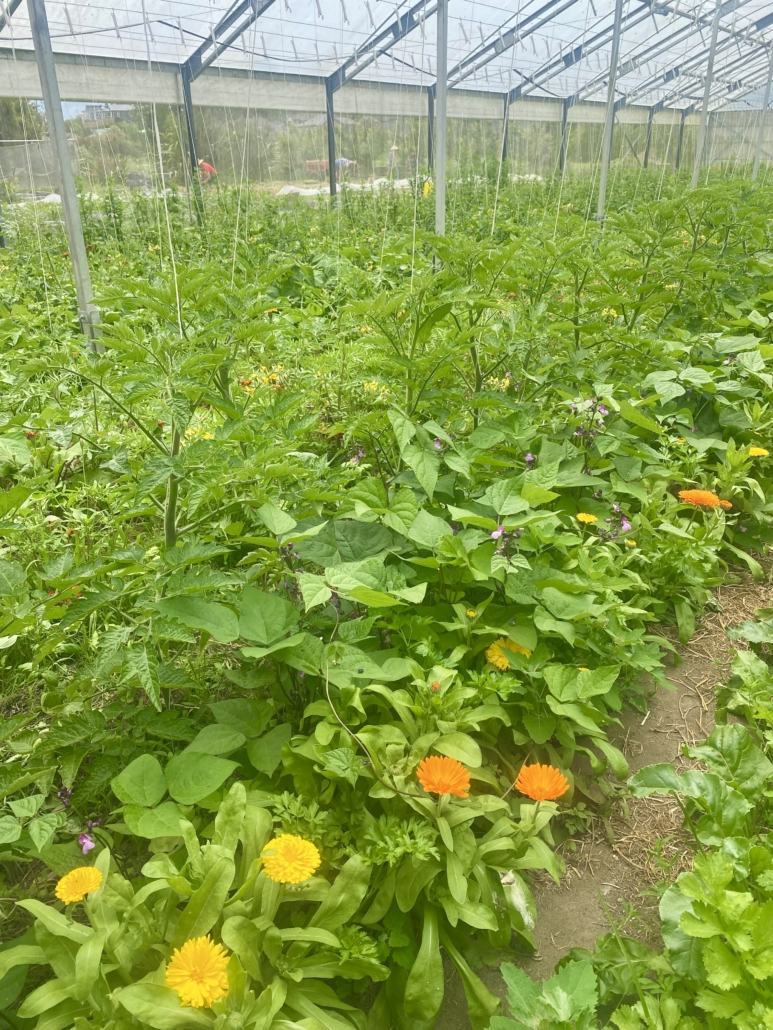
So on a sunny spring Friday in October I attended the Creating On-Farm Fertility workshop taught by Steve and Jenny Erickson. This proved to be equally useful and stimulating to me, a market gardener, as it was to the many pastoral farmers, orchardists and general public attending, who all had a common interest in living off the land in some way.
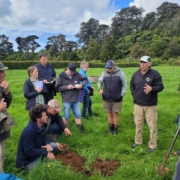
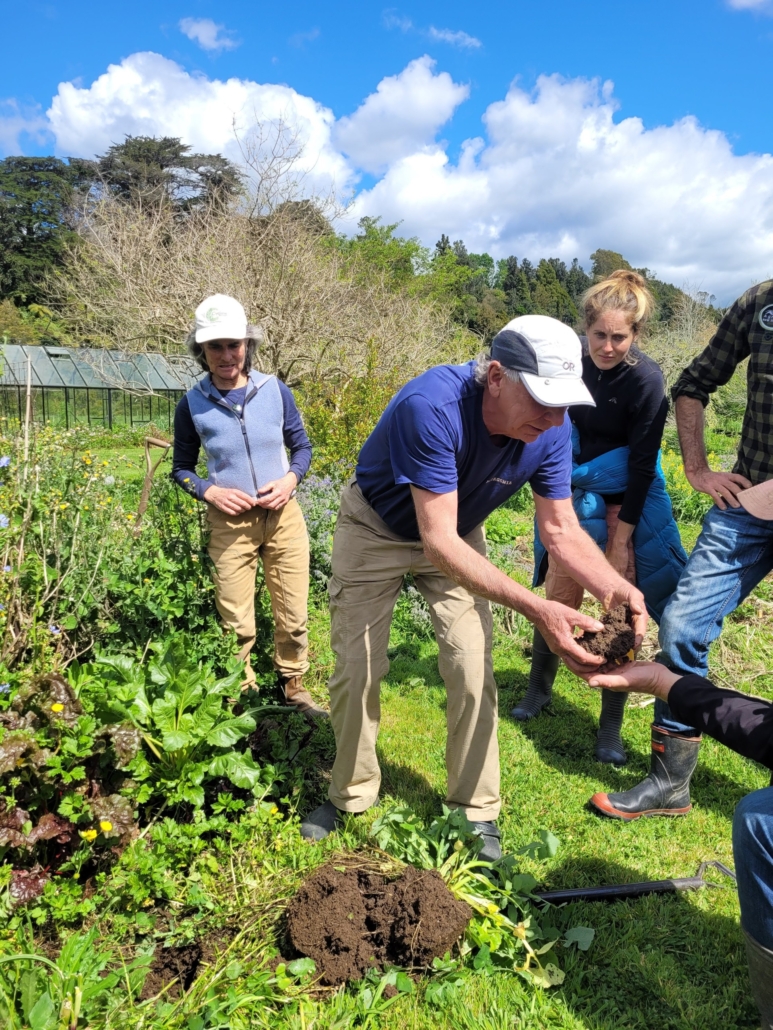
ABOVE: Jenny Erickson (left) and Steve Erickson by the vege garden, looking at the health and quality of the soil. Behind Jenny is a huge lemon verbena.
The biological engine
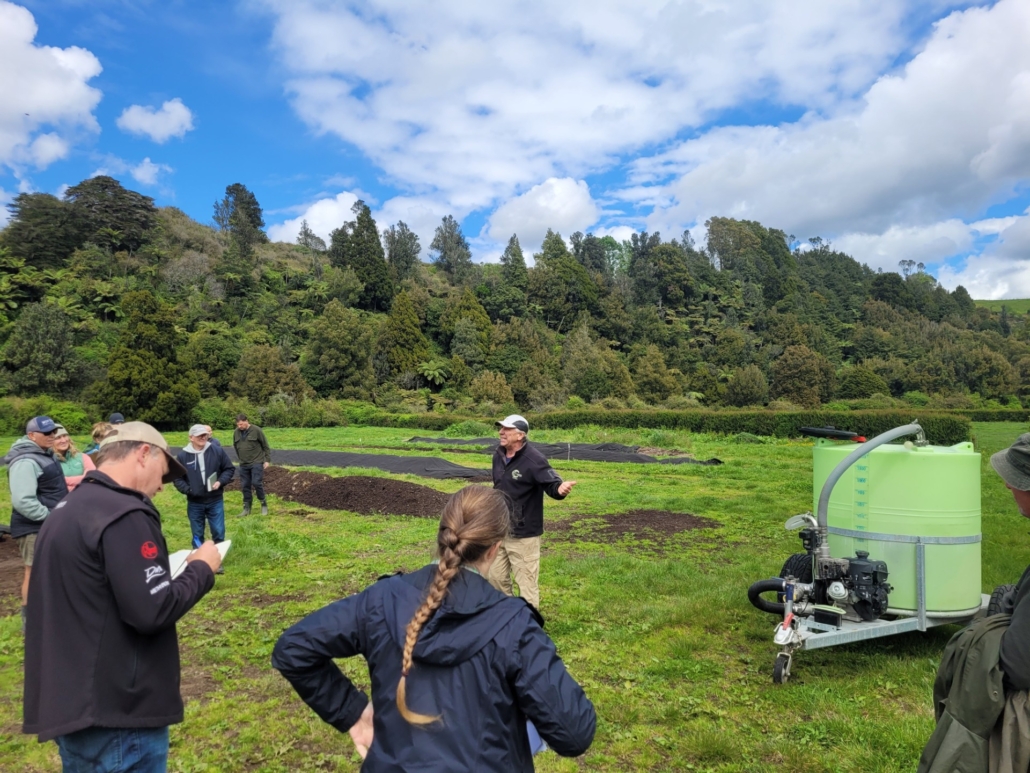
It all comes back to what Steve calls the ‘biological engine’ and getting that really humming. It’s an analogy that suits a mechanic like Steve, who is the man behind the innovative Cyclone multi-task sprayer. This machine allows you to combine compost, minerals and fertilisers in a liquid format for a single application onto land, and can handle particles up to 15mm – an amazing tool!
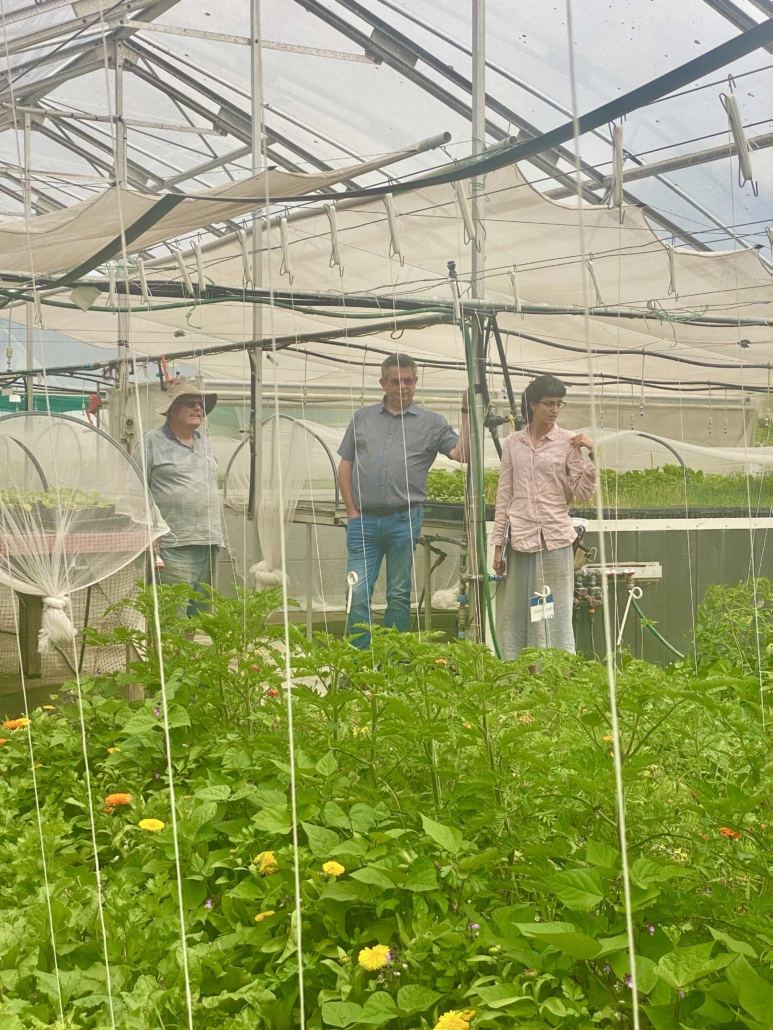
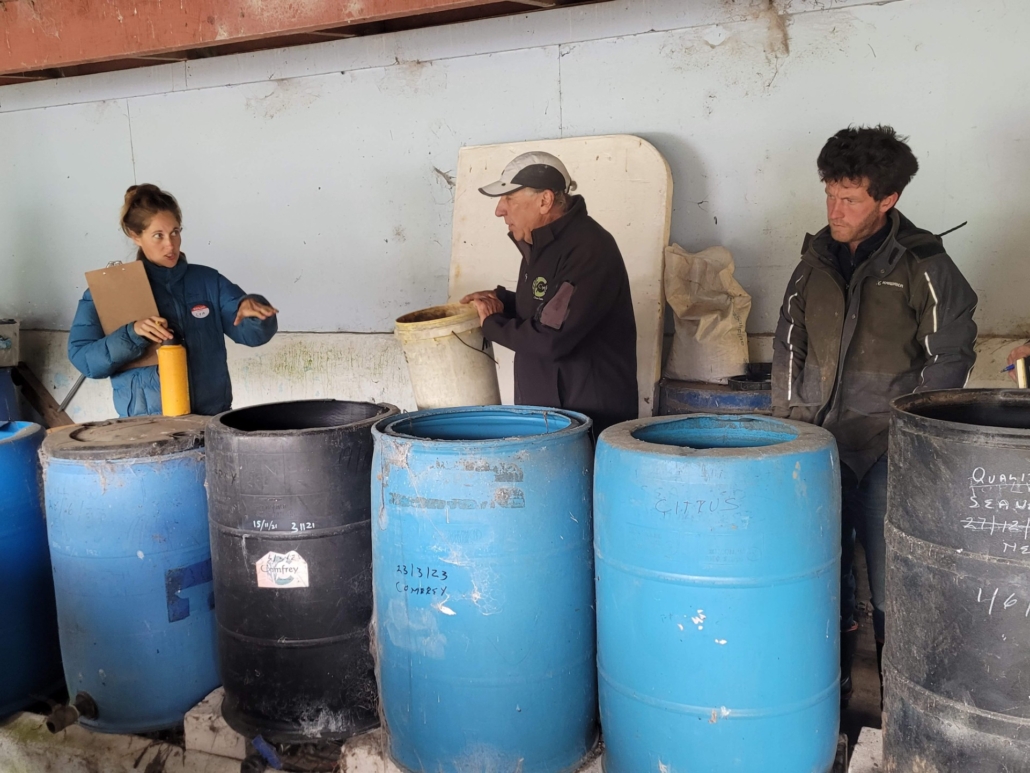
Steve (centre) with workshop group and the Cyclone at rightSteve Erickson (centre) with barrels of comfrey extract
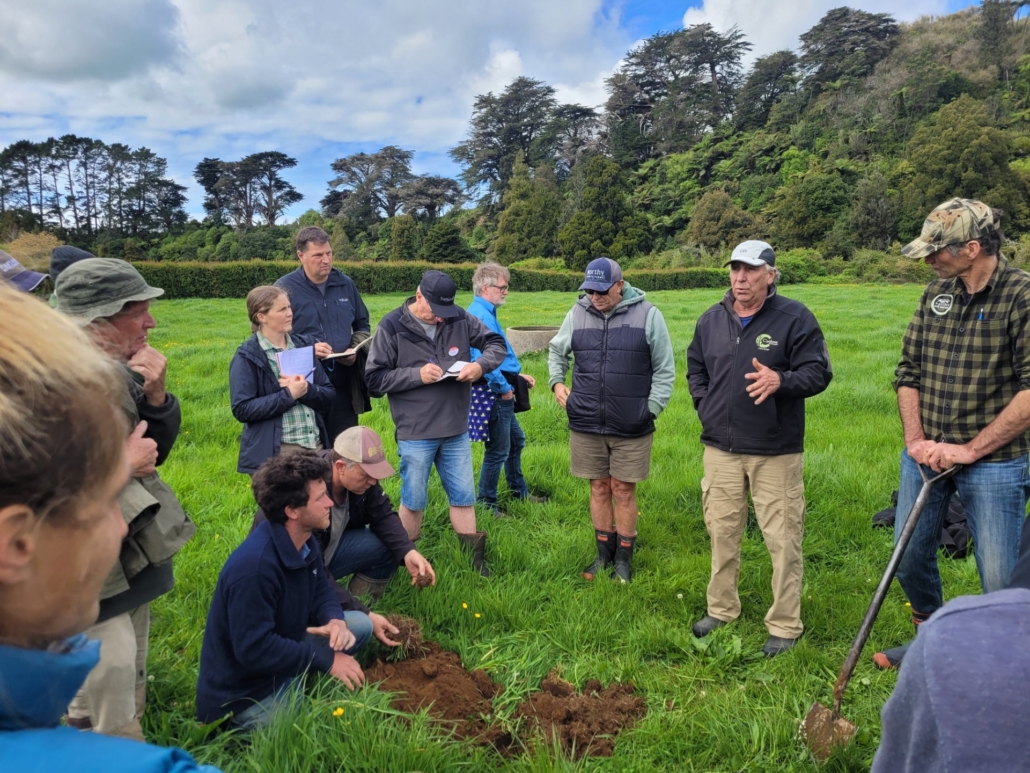
The day began with a couple hours of lectures, and a sumptuous morning tea, followed by a BYO packed lunch and a farm tour. We started looking at the plant extract facility, then onto the commercial composting area (with a demo of the Cyclone), and a walk through some paddocks to dig holes and observe soil structure and visible biological activity. We finished at Jenny’s biodynamic home garden, where you could see and also feel the energy of plants growing in balance.
This Chaos Springs workshop attracted a lot of practitioners with many years of knowledge, so there was a really rich exchange of ideas and advice. My only criticism was that it didn’t really seem long enough!
If you are managing any piece of land, I would highly recommend attending one of the Chaos Springs workshops. There is an on-farm composting workshop coming up on 29 November.
Jenny Lux, immediate past co-chair of Soil & Health, is an organic market gardener at Rotorua.
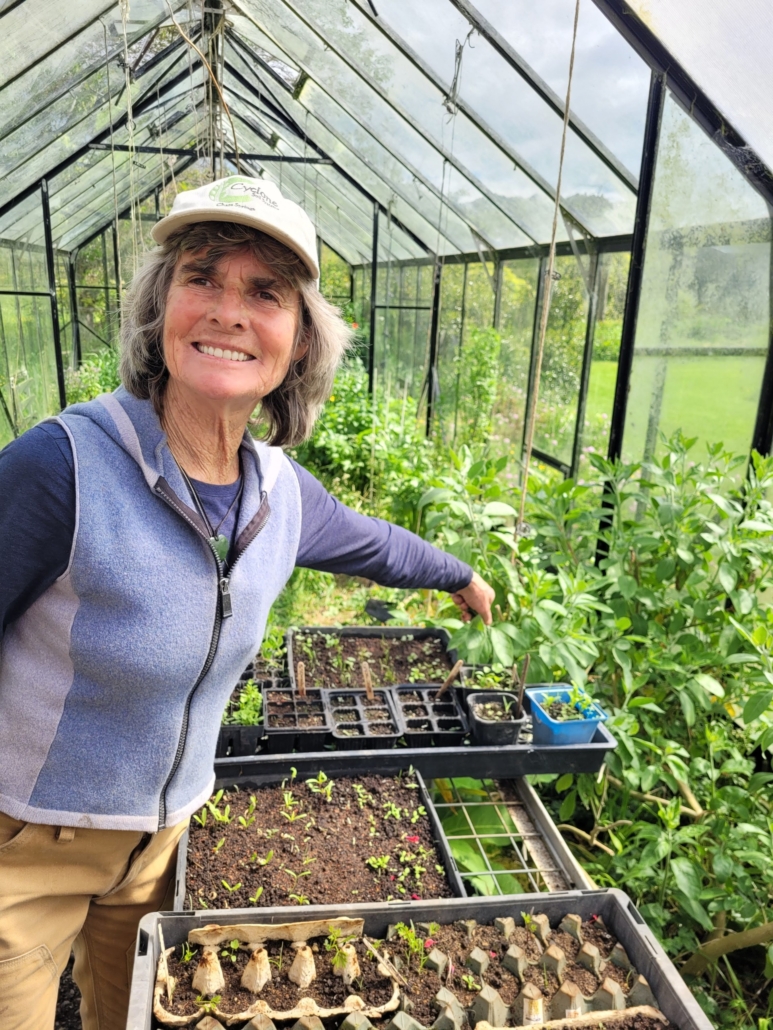
ABOVE: Jenny Erickson with her ashwagandha plant inside her glasshouse.ABOVE: Steve Erickson of Chaos Springs (second from right) speaks of his journey in pasture management over the last 22 years, from a fairly degraded base of ragwort-infested conventional dairy pasture on clay, to a currently thriving mixed sward on a darker clay-loam that provides optimal nutrition for his animals and is maintained only twice a year with a biological liquid spray, all made on farm.